background image

58

3. CARING FOR YOUR MACHINE /

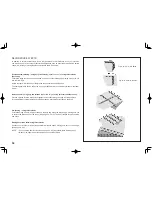
REPLACING MOVING CUTTER

Replace a moving cutter if it becomes blunt as follows.

NOTE: You should not need to replace fixed cutter, which 

is made of a special hard alloy material.

FIRST REMOVE  THE POWER PLUG FROM THE SUPPLY 
SOCKET-OUTLET.

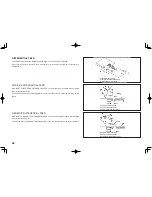
1. Loosen screw and take out moving cutter.

2. Close the working table. Lower cutter driving arm to its 

lowest position by turning the hand wheel towards you 
by   hand.   In   this   position,   set   replacement   cutter   in 
position and secure it with screw, ENSURING THAT THE 
EDGE OF THE MOVING CUTTER IS APPROXIMATELY 
0.5 MM BELOW THE SURFACE OF THE FIXED CUTTER.


DISENGAGING MOVING CUTTER

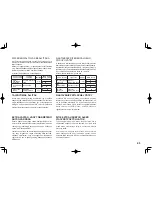
If you want to sew without cutting, open the working table 
and   disengage   the  moving   cutter   by   pushing   the   cutter 
release   knob   to   the   left   and   turning   it   towards   you   as 
illustrated.

Ensure that fabric edge is not wider than overedge width 
selected or upper looper and needle can be damaged.

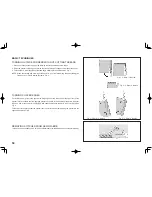
REMOVING FACE COVER

Disconnect from power supply before removing face cover. 

Remove the screw and take off the face cover.

REMPLACEMENT DU COUTEAU 

MOBILE

Si le tranchant du couteau mobile est émoussé, il  faut le 
changer aussitôt avec un neuf.

NOTE : Il est généralement inutile de remplaçer le couteau 

fixe   qui   est   fabriqué   avec   une   matière 
particulièrement résistante (widia).

TOUJOURS DEBRANCHER LA MACHINE DE LA PRISE DE 
COURANT EXTERIEURE.

1. Ouvrir la table de travail, desserrer  l'écrou et retirer  le 

couteau.

2. Refermer   la   table   de   travail.   Descendre   la   bielle   de 

commande   du   couteau   en   position   la   plus   basse   en 
tournant le volant à la main vers soi. Dans cette position, 
plaçer le nouveau couteau et le resserrer avec l'écrou, 
EN VERIFIANT QUE LE BORD DU COUTEAU MOBILE 
SOIT APPROXIMATIVEMENT A 0,5 mm EN DESSOUS 
DU COUTEAU FIXE. 
(Voir Fig.3).

DEBRAYER LE COUTEAU MOBILE

Si vous voulez coudre sans couper, ouvrir la table de travail 
et débrayer le couteau mobile en poussant et tournant vers 
soi la vis d'engagement du couteau.selon le schéma.

S'assurer que le bord du tissu n'est pas plus grand que la 
largeur de coupe sélectionnée, ou le boucleur supérieur et 
l'aiguille peuvent être endommagés.

RETIRER LE CAPOT FRONTAL.

Pour changer l'ampoule, dévisser la vis qui tient le capot et 
le retirer.

Toujours débrancher la machine de la prise extérieure de 
courant avant de retirer le capot,

29

Screw

Moving cutter

0.5 mm

Cutter release knob

Screw

Face cover

REPLACING MOVING CUTTER

Replace a moving cutter if it becomes blunt as follows.

NOTE: You should not need to replace fixed cutter, which is made of a special hard alloy material.
FIRST REMOVE THE POWER PLUG FROM THE SUPPLY SOCKET-OUTLET.
1.  Loosen screw and take out moving cutter.
2.  Close  the  working  table.  Lower  cutter  driving  arm  to  its  lowest  position  by  turning  the  hand 

wheel towards you by hand. In this position, set replacement cutter in position and secure it with 

screw, ENSURING THAT THE EDGE OF THE MOVING CUTTER IS APPROXIMATELY 0.5 MM 
BELOW THE SURFACE OF THE FIXED CUTTER.

DISENGAGING MOVING CUTTER

If  you  want  to  sew  without  cutting,  open  the  working  table  and  disengage  the  moving  cutter  by 
pushing the cutter release knob to the left and turning it towards you as illustrated.
Ensure that fabric edge is not wider than overedge width selected or upper looper and needle can 
be damaged.

REMOVING FACE COVER

Disconnect from power supply before removing face cover.
Remove the screw and take off the face cover.

3. CARING FOR YOUR MACHINE

Moving cutter

Mozgó kés
Pohýbajúci sa nôž

Screw

Csavar
Šrób

Face cover

Homloklap

Stehová doska

Screw

Csavar

Šrób

Cutter release knob

Késkikapcsoló gomb

Gombík vypnutia pohýbajúceho sa noža

Summary of Contents for jaguar epochlock 055

Page 1: ...roducts are being used or where oxygen is being administered 8 To disconnect turn switch to the off 0 position then remove plug from outlet 9 Do not unplug by pulling on cord To unplug grasp the plug not the cord 10 Keep fingers away from all moving parts Special care is required around the sewing machine needle 11 Never sew with a damaged needle plate as this can cause needle to break 12 Do not u...

Page 2: ... a gépet a szabadban 7 Ne használjuk a varrógépet ott ahol aeroszol vagy spray terméket használnak 8 Mielőtt kihúzná a konnektorból a villásdugót győződjön meg róla hogy a kapcsoló a 0 pozícióban áll 9 Ne egy kézzel a zsinórnál fogva húzza ki a dugót a konnektorból Kihúzáshoz a dugót fogja meg ne a zsinórt 10 Ne nyúljon a mozgó alkatrészekhez főleg ne a varrógép tűjéhez 11 Soha ne varrjon sérült t...

Page 3: ...ekvapkajte nič do vetracích otvorov 6 Nikdy nepoužívajte stroj vo voľnej prírode 7 Nepoužívajte šijací stroj tam kde sa používajú aerosoly a spray 8 Predtým žeby ste vytiahli zástrčku zo zásuvky zistite že prepínač stojí v pozícii 0 9 Nevytiahnite jednou rukou zástrčku zo zásuvky chytením šnúry K vytiahnutiu chyťte zástrčku a nie šnúru 10 Nedotýkajte sa pohybujúceho sa stroja najmä k ihle šijacieh...

Page 4: ...speed Up to 1300 stitches per minute Dimensions 320 mm W 280 mm D 280 mm H Weight 8 Kgs 17 6 Ibs A GÉP FŐ MŰSZAKI ADATAI MODELL 056 055 Szálak száma 2 3 vagy 4 3 vagy 4 Szegélyező öltés szélesség 6 mm bal tű és 3 8 mm jobb tű Tű HA1 SP HA 1 130 705 H Öltéshossz 1 5 mm Öltéssebesség Max 1300 öltés perc Méretek 320 mm szélesség x 280mm hosszúság x 280mm Tömeg 8 kg 1 KNOWING YOUR MACHINE Identificati...

Page 5: ...vení 32 35 Steh overlock s tromi nitkami s jednou ihlou 36 37 Používanie s dvomi nitkami 36 37 Úzky a točený lem lemová slučka 38 39 Nastavenie sponovačov nití 40 43 Nastavenie dĺžky stehov nastavenie rezania okraja Reťazový jazyk 44 45 Diferenciálny posuv látky 46 49 Nastavenie prítlaku pätky 48 49 Šitie extra hrubej alebo viacvrstvovej látky 48 49 Základné techniky Šitie vonkajšieho rohu bez rez...

Page 6: ...ft needle thread tension control 12 Right needle thread tension control 13 Upper looper thread tension control 14 Lower looper thread tension control 15 Needle thread guides Model 056 only 16 Thread cutter lever 17 Two thread convertor instruction Model 056 only 18 Threading chart 19 Lint tray 20 Foot control 21 Release lever 22 Foot release lever 23 Spool disc 24 Differential feed control dial 25...

Page 7: ...lladékterelő ajtó 30 Mozgó kés 31 Felső hurokfogó 32 Alsó hurokfogó 1 PREDSTAVENIE STROJA PREDSTAVUJÚCI NÁKRES 1 Vodítko nitky 2 Regulátor prítlačnej pätky 3 Osvetlenie 4 Zdvíhač prítlačnej pätky 5 Nôž na niť 6 Stehová doska 7 Prítlačná pätka 8 Regulátor stríhača lemu šírky 9 Pracovný stôl 10 Rameno vodítka nitky 11 Regulátor tesnosti nitky ľavej ihly 12 Regulátor tesnosti nitky pravej ihly 13 Reg...

Page 8: ...ealer 1 Two thread convertor Model 056 only 2 Stitch finger B 3 Needle set 4 Brush 5 Screw driver small 6 Tape measure option 7 Machine cover 8 Oiler 9 Tweezer 10 Thread net 11 Extension plate 12 Spool holder 13 Accessory bag 3 4 5 6 7 8 9 10 11 12 13 2 1 dealer 7 Machine cover 8 Oiler 9 Tweezer 0 Thread net 1 Extension plate 2 Spool holder 3 Accessory bag 4 5 6 7 8 9 10 11 12 13 ealer Machine cov...

Page 9: ...bővítő tányér 12 Kúpos spulnírögzítő betét 13 Táska a tartozékok részére PRÍSLUŠENSTVÁ Zoznam celého príslušenstva je dosiahnuteľný v obchodoch značky 1 Konvertor s dvomi nitkami len pri modelu 056 2 Reťazový jazyk 3 Čistiaca kefka 4 Zdvíhač prítlačnej pätky 5 Skrutkovač a držiak malý 6 Merací pás opcionálny 7 Vrchnák stroja 8 Štipec 9 Sieť nitky 10 Rozširujúci tanier nite 11 Kúželovitá vložka pri...

Page 10: ...socket and connect the power line plug into power supply outlet 3 POWER LIGHT SWITCH Your machine will not operate unless the power light switch is turned on This same switch controls both machine power and sewing light When leaving the machine unattended or servicing the machine remove the power line plug from supply outlet 4 OPENING FRONT COVER To open front cover pull it to the right and down t...

Page 11: ...itásához jobb kézzel húzza magafelé a rögzítőkart majd bal kézzel emelje fel a nyomótalp karját UVÁDZANIE STROJA DO PREVÁDZKY 1 Zotrite nadbytočný olej zo stehovej dosky a z pohybujúcich sa súčiastok 2 Pedál riadený nohami Zastrčte zásuvku pedálu do zásuvky stroja potom do konektora steny 3 Hlavný vypínač vypínač osvetlenia Váš stroj dovtedy nefunguje kým nezapnite hlavný vypínač vypínač osvetleni...

Page 12: ...read guide PREPARATION FOR THREADING THREAD GUIDE POLE Pull up thread guide pole to the highest point until you hear it click Place thread spools on pins and draw thread through thread guides on the pole from rear to front Thread guide of pole can hold thread spools on the spool stand by pulling down the pole as illustrated Thread guide Cérnatartó Držiak nite Thread guide pole Cérnatartó rúd Tyč d...

Page 13: ...álható szemeken A cérnatartó rudazatot az ábrán látható módon a cérnákkal együtt lenyomva tárolhatja PRÍPRAVA NAVLIEKANIA NITE TYČ DRŽIAKU NITE Ťahajte hore tyč držiaku nite dovtedy kým dáva klapnúci hlas Položte nite na kolíky potom pretiahnite nitky cez otvory nachádzajúce sa na hornej časti držiaku nite Tyč držiaku nite môžete uskladňovať stlačene spolu s niťmi spôsobom viditeľným na obrázku ...

Page 14: ...ing of such threads utilize spool net sleeving over the spool Net Cérnaháló Sieť nite Net Cérnaháló Sieť nite Spool Spulni Valec nite Spool Spulni Valec nite Extension plate Bővítő tányér Rozširujúci tanier Spool holder Spulnitartó Držiak valca nite Cone type thread Kúpos cérnaspulni Kúželový valec nite Spool cap Cérnarörzítő kúp Kúžel ustaľujúci niť Domestic cotton reel Háztartási cérnaspulni Dom...

Page 15: ...kében hogy a szál egyenletesen maradjon a spulnin húzza a spulnihállót a cérnaspulnira POUŽITIE ČIAPKY VALCA NITE V PRÍPADE VALCOV NITÍ DOMÁCEHO CHARAKTERU POUŽITIE ROZŠIRUJÚCEHO TANIERA A DRŽIAKU VALCA NITE V PRÍPADE KÚŽELOVÝCH VALCOV NITÍ V prípade väčších kúželových valcov nití používajte gumový držiak valca nite s hrubšou stranou smerom hore k menším valcom nití používajte ten istý držiak ale ...

Page 16: ...release lever Nyomótalp kioldókar Páčka na výmenu pätky LINT TRAY With the lint tray located in waste material After completion of work direction shown finger R hand pin will slide into low THREAD CUTTER Thread cutter is built in easily trimmed near end o as illustrated CHANGING PRESS Be sure needle is in the lever 1 Push foot release lever 2 Place the desired fo needle holes 3 Lower the presser f...

Page 17: ...ripojte čapík nachádzajúci sa na ľavej strane do diery B potom časť C priložte do medzery D CÉRNAVÁGÓ KÉS csak a 056 modell A cérnavágó kés a tűlemezbe van beépítve A cérnát a megmunkált anyag mellet az ábrán látható kis gomb lefelé nyomásával elvághatja HULLADÉK TÁLCA Ha a hulladék tálcát felteszi akkor ezzel összegyűjti a huladék anyagot A munka befejezése után a tálcát az ábrán látható módon fo...

Page 18: ...CHANGING NEEDLE Raise needle bar to its highest point by turning hand wheel towards you but leave presser foot down Loosen needle clamp screw to remove the needle and place new needle with Flat Side Away From You into the needle bar as far as it will go and tighten screw Flat side away from you Lapos fele legyen hátrafelé Nech je dozadu plochá časť Needle clamp screw Tűrögzítő csavar šrób držiaku ...

Page 19: ... hogy a lapos fele legyen hátrafelé a cérnatartók irányába ahogy a tűrúdba behelyezhető és szorítsa meg VÝMENA IHLY Zdvihnite ihlu do najvyššej pozície otočením ručného kola smerom k sebe ale pätku nechajte dole Uvoľnite šrób skrutkovačom a umiestnite nové ihly tak aby ich plochá strana sa dostala dozadu smerom k držiakom nití ako sa dá položiť do tyča ihly a stisnite ich ...

Page 20: ...jú Könnyű gyapjú Polyészter 80 Pamut 60 Flanell Polyészter 80 60 Pamut 60 Vastag velúr Polyészter 60 50 Pamut 60 Műszál Szatén Polyészter 100 80 Pamut 120 80 Farmer Polyészter 60 Pamut 60 Kötött Trikó Polyészter 80 60 Pamut 80 60 Jersey Polyészter 60 50 Pamut 60 Pamut Polyészter 60 50 NEEDLE THREAD AND FABRIC CHART Use HA 1SP HA 1 130 705H Needles TŰ CÉRNA ÉS ANYAG TÁBLÁZAT Használjon HAx1SP HAx1 ...

Page 21: ...st Vlna 100 90 Pre všeobec né ciele 75 Ľahkým látkam Hrubý džíns Polyester 60 50 Bavlna 60 Vlna Ľahká vlna Polyester 80 Bavlna 60 Flanel Polyester 80 60 Bavlna 60 Hrubý velúr Polyester 60 50 Bavlna 60 Umelá hmota Satén Polyester 100 80 Bavlna 120 80 Džíns Polyester 60 Bavlna 60 Pletená Tričko Polyester 80 60 Bavlna 80 60 Jersey Polyester 60 50 Bavlna 60 Bavlna Polyester 60 50 TABUĽKA IHIEL NITIEK ...

Page 22: ... Wrong threading may cause skipped stitches breaking threads or other problems Try to master the correct threading before moving on to test sewing Threading must be carried out in the sequence of Lower Looper Upper Looper Needle Open the front cover and the working table Raise needle to its highest point by turning hand wheel towards you Before re threading lower looper remove thread from needle e...

Page 23: ...okfogó lyukába és akassza be az ábrán jelzett szálvezetőbe Hagyjon szabadon kb 10 cm hosszúságú szálat 2 A VARRÁS MEGKEZDÉSE 2 ZAČIATOK ŠITIA NAVLIEKANIE NITE DO STROJA Zle navlieknutá niť môže zapríčiniť vynechanie stehu trhanie nite alebo iný problém Osvojte si navlikanie nite pred začaním šitia Poradie navliekanie je dolný chapač horný chapač ihla Otvorte dvere pre odpady potom pracovný stolík ...

Page 24: ...e používania hrubej nite When using normal or thin thread Normál vagy vékony cérna használata esetén V prípade používania normálnej alebo tenkej nite THREADING UPPER LOOPER 1 Feed the thread through the thread guide as illustrated 2 Pull the upper thread through the tension control 3 Draw the thread through the thread guide as illustrated 4 Pass the thread through wire thread guide and looper eye ...

Page 25: ...o chapača a zaveste ju na vodítko nite ktoré je uvedené na nákrese Nechajte voľne približne 10 cm dlhú časť nitky CÉRNA BEFŰZÉSE A FELSŐ HUROKFOGÓBA 1 Fűzze át a szálat az ábrán látható szálvezetőn 2 A felső hurokfogó szálát fűzze át a szálfeszítőn 3 Az ábrán látható módon fűzze be a szálat a szálvezetőkbe 4 Fűzze be a cérnát a felsőhurokfogó lyukába és akassza be az ábrán jelzett szálvezetőn Hagy...

Page 26: ...nkej nite When using thick thread Vastag cérna használata esetén V prípade používania hrubej nite THREADING NEEDLES 1 Feed the thread through the thread guide as illustrated 2 Draw the needle threads through left hand tension 3 Draw the thread through the thread guide as illustrated 4 Thread the needles from front to back through needle eye and pull the threads towards the back passing along the r...

Page 27: ... A tűbefűző segítségével könnyen be tudjuk fűzni a cérnát a tűbe lásd 72 73 oldal NAVLIEKANIE IHLY 1 Navlieknite nite na vodítko nite ako vidíte na nákrese 2 Pretiahnite nitky ktoré chcete navíjať do ihly cez navíjače nití nachádzajúcich sa na ľavej strane 3 Pretiahnite nitky ako vidíte na nákrese 4 Nite navlieknite cez diery z predu dozadu a pretiahnite nite nechajúc voľno približne 10 cm dlhú ča...

Page 28: ...ot and 3 Lower needle bar to wheel away from you one by one until th needle eye and loope 4 Reset the tension con CUTTING NEEDLE Frayed thread may make Draw the thread near the and push the thread cut the thread passing unde wheel towards you to obt HELPFUL HINTS REPLACING THREAD SPOOLS When replacing thread spools the following steps may be helpful for quick changeover 1 Cut off existing threads ...

Page 29: ... húzza a szálat a mozgókés alá és a kézikereket maga felé elfordítva az ábrán látható módon vágja el a szálat UŽITOČNÉ RADY VÝMENA VALCOV NITÍ Ak je potrebná výmena valcov nití nasledujéce kroky uľahčujú ich rýchlu výmenu 1 Navliekanú nitku strihnite ako vidíte na nákrese a hotovte jednu slučku s novou a starou nitkou rybársky uzol 2 Zdvihnite prítlačnú pätku a nastavte všetky navíjače nití na hod...

Page 30: ...c end carry on ru gently pulling the fabric to to 6 cm of extra lock stitche Cut thread by pushing thr 056 only or with scissors 14 Fig 1 1 Ábra 1 Nákres Fig 2 2 Ábra 2 Nákres Fig 3 3 Ábra 3 Nákres TESTING STITCH OVERLOCK STITCHES After threading is completed use a scrap of fabric that you plan to sew and test to sew in the following order 1 Gently pulling all the threads to the left lower the pre...

Page 31: ...átra egészen addig amíg az anyagon túlfutva kb 5 6 cm hurkot képez a gép Vágja el a szálat a szálvágó kar lenyomásával vagy ollóval VYSKÚŠANIE STEHOV OVERLOCK Po navlieknutí nite urobte skúšobné šitie na malom kúsku látky v nasledujúcom poradí 1 Opatrne ťahajte všetky nitky pod prítlačnou pätkou do ľava Otočte ručné kolo niekoľkokrát smerom k sebe aby bolo viditeľné či sú slučkové stehy vhodného t...

Page 32: ...ing with a piece of fabric you are going to use and find the best settings Model 056 only Number of threads 4 3 3 2 Overedge cutting width dial 6 6 4 5 4 4 6 6 6 4 6 Needle to use Left and Right Left Right Left Right Right Left and Right Left Right Stitch finger Two thread convertor Tension control Left needle thread 4 4 0 4 0 4 Right needle thread 4 4 0 4 4 4 4 5 Upper looper thread 4 4 4 4 4 4 6...

Page 33: ...jai lehetnek ha a tűbeállítás nem megfelelő Próbáljon egy darab használni kívánt anyagon próbavarratot Csak 056 modell Szálak száma 4 3 3 2 Vágásszélesség a tárcsán 6 6 4 5 4 4 6 6 6 4 6 Használt tű Bal jobb Bal Jobb Bal Jobb Jobb Bal jobb Bal Jobb Láncnyelv Két szálas átalakító Szálfeszesség állító Bal tűszál 4 4 0 4 0 4 Jobb tűszál 4 4 0 4 4 4 4 5 Felső hurok kfogó 4 4 4 4 4 4 6 4 Alsó hurok fog...

Page 34: ...roblémy ak nastavenie ihly nie je vhodné LEN PRI MODELI 056 Počet nitiek 4 3 3 2 Šírka strihu na kotúči 6 6 4 5 4 4 6 6 6 4 6 Používaná ihla Ľavápravá ľavá pravá ľavá pravá pravá Ľavápravá ľavá pravá Reťazový jazyk Zmena na stav s dvomi nitkami Nastavenie tesnosti nitky Ľavá nitka ihly 4 4 0 4 0 4 Pravá nitka ihly 4 4 0 4 4 4 4 5 Horný chapač 4 4 4 4 4 4 6 4 Dolný chapač 4 4 4 7 7 0 7 7 0 4 0 1 Na...

Page 35: ...35 ...

Page 36: ...onvert to two thread use first open the front cover and working table and raise needle to its highest point by turning hand wheel towards you Pull out the convertor as shown in Fig 1 Attach the two thread convertor onto the upper looper as shown in Fig 2 Fig 3 Remove the right needle and use the left needle Please keep the unused needle on the needle pad When not using convertor insert it deep and...

Page 37: ...i tűt a tűpárnába az ábrán látható módon Ha nem használja az átalakítót süllyesztve tartsa az ábrán látható módon OVERLOCK S TROMI NITKAMI A S JEDNOU IHLOU Navliekaním iba ľavej ihly môžeme hotoviť 6 mm široký steh navliekaním iba pravej ihly stroj hotoví 3 8 mm široký steh Ihlu ktorú nepoužívate položte do ihelnice ako vidíte na nákrese PREMENA NA DVOJNITKOVÝ PREVÁDZKOVÝ STAV len pri modelu 056 V...

Page 38: ...ture of these hems they are unsuitable for use on hard or heavy materials 1 Raise the presser foot 2 Open the front cover and working table 3 Remove the stitch finger from the needle plate by screw driver and keep it in the front cover as illustrated 4 Set the machine according to page 16 NOTE 1 Please use following recommended thread for making ideal seams 2 After finishing re set the stitch fing...

Page 39: ...átkach Lemovací steh sa používa vtedy keď šijeme jemné látky ako napríklad šatka Z toho teda vidíme charakter týchto lemov tieto sa nepoužívajú pri tvrdých hrubých látkach 1 Zdvihnite prítlačnú pätku 2 Otvorte dvere pre odpady a pracovný stôl 3 Pomocou skrutkovača odstráňte reťazový jazyk zo stehovej dosky a 4 položte ho pod prvé dvere ako je viditeľné aj na obrázku 5 Nastavte stroj podľa toho čo ...

Page 40: ...ooper thread tension and or decrease upper looper tension Left needle thread loose and visible on under side of fabric Increase left needle thread tension and or decrease either or both looper threads Right needle thread loose and visible on under side of fabric Increase right needle thread tension Increase tension Decrease tension Under side Top side Fig 1 Under side Top side Fig 2 Under side Top...

Page 41: ...ínoldalára Növelje az alsó hurokszál és vagy csökkentse a felső hurokszál feszességét Bal tűszál kihagy és látható az anyag hátoldalán Növelje a tűszál és vagy c s ö k k e n t s e a z e g y i k vagy mindkét hurokszál feszességét Jobb tűszál kihagy és látható az anyag hátoldalán Növelje a tűszál feszességét Növeli a szálfeszességet Csökkenti a szálfeszességet Hátoldal A textil szín oldala 1 Ábra Há...

Page 42: ...ebo znížite tesnosť nitky horného chapača Vynechanie ľavej ihlovej nitky a je viditeľné na zadnej strane látky Zväčšite tesnosť ihlovej nitky a alebo znížite tesnosť nitky jedného alebo obidvoch chapačov Vynechanie pravej ihlovej nitky a je viditeľné na zadnej strane látky Zväčšite tesnosť ihlovej nitky Zväčší tesnosť nitky Zníži tesnosť nitky Zadná strana Líčna strana textílie Líčna strana textíl...

Page 43: ...43 ...

Page 44: ...threads righ cutting width a case chang to get neat st Stitch length dial Overedge cutting width dial Fig 1 1 Ábra 1 Nákres Fig 3 3 Ábra 3 Nákres Fig 2 2 Ábra 2 Nákres Fig 4 4 Ábra 4 Nákres ADJUSTING STITCH LENGTH Turn the stitch length dial until the required length is reguired The higher the number the longer the stitch This dial can adjust the stitch length from 1 to 5 mm ADJUSTING OVEREDGE CUT...

Page 45: ...tárcsa 4 5 állásban van 3 ábra Ebben az esetben cserélje ki az A láncnyelvet a B jelűre a szép varratkép elérése érdekében 4 ábra ASTAVENIE DĹŽKY STEHU Otočte kotúč dĺžky stehu kým dosiahnete žiadanú dĺžku Čísla na kotúči označujú dlhší steh S týmto kotúčom môžeme nastaviť dĺžku stehu medzi 1 5 mm NASTAVENIE ŠÍRKY STRIHU Šírku strihu môžeme nastaviť na hodnotu medzi 4 7 mm pomocou kotúča nastaveni...

Page 46: ... has the effect of stretching material under the presser foot to offset the puckering on the fabric DIFFERENTIAL FEE The differential feed has tw front A and one rear B Each feed dog has an ind enables the feeding of mate POSITIVE DIFFEREN WHEN SET FOR POSITIVE feed dog A makes a long B This has the effect of ac presser foot to offset the wa NEGATIVE DIFFEREN WHEN SET FOR NEGATIVE feed dog A makes...

Page 47: ...debb úton mozgatja előre az anyagot mint a hátsó B Így a nyomótalp alatt megnyújtva az anyagot ellensúlyozhatjuk az anyag ráncolódását DIFERENCIÁLNY POSUV LÁTKY Diferenciálny posuv látky funguje s dvomi visiacimi podávačmi A prvý B druhý Obidva podávače hýba nezávislá mechanika pohybujú látku napred v rozlišnej miere POZITÍVNY DIFERENCIÁLNY POSUV Ak použijete pozitívny diferenciálny posuv predný p...

Page 48: ...ABRIC A wide range of fabric can be overlocked on this machine but it is recommended to tighten screw as illustrated when sewing with extra heavyweight fabrics or mulitiple layers of fabric Open working table for adjustment Loosen the screw when sewing with light to normal weight fabric or turning overedge cutting width dial or otherwise fabric may not be well cut The machine is set for normal wei...

Page 49: ...ering Positive differential feed 1 2 No differential feed Neutral feed 1 Pucker free seams Negative differential feed 0 7 1 NASTAVENIE DIFERENCÁLNEHO POSUVU LÁTKY K nastaveniu diferencálneho posuvu látky otáčajme kotúč diferencálneho posuvu látky do smerov dole uvedenej tabuľky Nastavenie môžeme uskutočniť medzi 0 7 negatívny vplyv 2 pozitívny vplyv Tieto nastavenia dávajú posuv najväčšej miery K ...

Page 50: ...t the fabric along the new stitching line for about 3 cm before turning the fabric Fig 2 TURNING CURVED EDGES For inside curves guide fabric gently with trimming line of the fabric under the right front of the presser foot or a little to the left applying pressure at point A in the direction of the arrow with your left hand and at the same time applying a little opposite pressure at point B with y...

Page 51: ...LTÁVOLÍTÁSA A VARRT ANYAGBÓL A már megvarrt anyagból az öltés eltávolításához csípjük el a tűszála ka t és húzzuk meg a hurokszála ka t ZÁKLADNÉ TECHNIKY ŠITIE VONKAJŠÍCH ROHOV BEZ ODREZANIA NITE 1 Ak ste na kraji látky zastavte šitie tak aby ihla zostala nad látkou 2 Zdvihnite prítlačnú pätku a jemne tiahnite švík 3 Otočte látku pusťte prítlačnú pätku a pokračujte v šití v novom smere 1 nákres PO...

Page 52: ...presser foot which has been designed to feed your cord or yarn to the left of the safety stitch or to the right Follow instructions as follows 1 Place a filler cord such as a crochet cotton gimp wool knitting yarn or shirring elastic at the rear of the machine spool pin Pass the cord through the cord guides 1 and 2 and then through the left needle thread guide 3 See Fig 1 2 Insert the cord through...

Page 53: ...ľným na 38 39 strane Používa sa to napríklad pri lemovaní sukien ZSINÓROZOTT OVERLOCK A zsinórozott overlock varrást a vállak megerősítésénél az ujjak vagy oldalak varrásánál hasnáljuk ahol kötött anyagot toldunk vagy összeállítunk Díszes jellegénél fogva színes kontraszt hatást érhet el a ruha összeállításánál Az Ön gépe olyan talppal van ellátva amelyet úgy terveztünk hogy akár a bal akár a jobb...

Page 54: ...the lower looper Butted seams using only two threads Model 056 only or using three threads flat seam Place two pieces of fabric wrong sides together and overlock along the edge Unfold and press By using different colored fabrics and thread a pleasing patchwork effect can be achieved Pin tucking using three threads Fold fabric along a line to be pin tucked and overlock sew along the folded edge mak...

Page 55: ... ld 64 65 o könnyebben elkészítheti az öltést Vastag cérna használata esetén csökkentse az első hurokfogó szál feszességét DEKORAČNÉ EFEKTY Okrem napísaných v návode použitia stroj môžete používať na mnohé dekoračné efekty ako napríklad dekoračné švíky tupé švíky alebo šitie pozdĺžnych ozdobných stužiek Pozri nižšie Horný ozdobný steh používaním len dvoch nitiek len v prípade stroja 056 alebo s tr...

Page 56: ...ferential feed makes gathering easier on lightweight fabric Use it on waistlines sleeve heads sleeve bottoms and ruffles etc Set the differential feed control dial between 1 5 and 2 to obtain the best gathering effect for your use IMPORTANT The exact adjustment depends on the thickness and elasticity of fabric Even the stitch length can influence the setting The longer the stitches the more the fa...

Page 57: ...šie nastavenie DIFFERENCIÁL TOLÁS ALKALMAZÁSOK Kérjük figyelmesen tanulmányozza át a 46 49 oldalakat Differenciál tolást a gyűrődés és hullásmosodás csökkentésére fejlesztették ki Nagyon hatékonyan használhatjuk ráncolásokhoz is 1 Gyűrődés Szőtt vagy könnyű anyagok hajlamosak a gyűrődésre Gyűrődés mentes varrat elérése érdekében állítsa a differenciáltolás szabályzó tárcsát 1 nél alacsonyabb érték...

Page 58: ...lowest position by turnin by hand In this positi position and secure it wit EDGE OF THE MOVING 0 5 MM BELOW THE SUR DISENGAGING MOV If you want to sew without and disengage the moving release knob to the left a illustrated Ensure that fabric edge is selected or upper looper and REMOVING FACE C Disconnect from power supp Remove the screw and take Screw Moving cutter 0 5 mm Cutter release knob Screw...

Page 59: ...OLÍTÁSA Mielőtt a homlokfedelet eltávolítaná húzza ki a hálózati csatlakozót a konnektorból Csavarja ki a csavart és vegye le a homlokfedelet 3 ENTRETIEN DE LA MACHINE ODSTRÁNENIE POHÝBAJÚCEHO SA NOŽA Odstráňte pohýbajúci sa nôž ak sa stane neostrým Zásobný nôž nájdete v príslušenstve POZNÁMKA Stojací nôž netreba vymeniť lebo je zhotovený zo špeciálne tvrdej látky PREDOVŠETKÝM VYTIAHNITE SIEŤOVÚ Z...

Page 60: ...HINE FROM POWER SUPPLY BY REMOVING PLUG FROM SOCKET OUTLET 1 Open the front cover and working table Using the brush provided remove dust and lint that have accumulated 2 Apply a few drops of oil to the points indicated by arrows ALWAYS USE A GOOD QUALITY SEWING MACHINE OIL Brushing Ecsetelés Čistenie štetcom Oil Olaj Olej ...

Page 61: ...na body označené šípkami VŽDY POUŽÍVAJTE OLEJ ŠIJACÉHO STROJA DOBREJ KVALITY TISZTÍTÁS ÉS OLAJOZÁS A gép egyenletes működésének megőrzése érdekében tartsa azt tisztán és minden alkalommal olajozza meg M I N D E N E K E L Ő T T H Ú Z Z A K I A H Á L Ó Z AT I CSATLAKOZÓT A KONNEKTORBÓL 1 Nyissa ki a homlokfedelet és a munkaasztalkát Ecset segítségével távolítsa el a port és a felgyülemlett hulladéko...

Page 62: ...pool properly Fully extend Guide Pole PROBLÉMA PROBLÉMA OKA HIBAJAVÍTÁS Szabálytalan varrat Nem megfelelő szálfeszesség tűméret cérna Húzza az anyagot a gép Laza a talpnyomás Állítsa be a szálfeszességet Használjon az anyagnak és a cérnénak megfelelő tűt Fűzze be újra a cérnát a gépbe Ne húzza az anyagot igazítsa gyengéden Állítsa be a talpnyomást Tű eltörött A gép húzza az anyagot Nem megfelelő a...

Page 63: ...neho posuvu je nevhodné Nastavte tesnosť nitky Vymeňte si ihlu znovu Nastavte diferenciálny posuv menej ako 1 Vlnitosť látky Nastavenie diferenciálneho posuvu je nevhodné Nastavte diferenciálny posuv na hodnotu 1 alebo na viac ako 1 pri pletených látkach Vynechanie stehu Nevhodné navliekanie nitky Nevhodná veľkosť ihly Opotrebovaná alebo krivá ihla Nastavenie ihly je nevhodné Navlieknite nitku y z...

Page 64: ...as follows 1 Turn up the hem to the re the hem back against the creating a soft fold on th see Fig 1 2 Place fabric under the pres up Feed the folded edge of the foot and lower the p or several stitches on a sp and adjust the guide so th fold Adjust the guide by m top of the foot see Fig 2 3 When correctly set sew th be cut away by the mach completion open out an should be almost invisible see Fig...

Page 65: ...gig fogja vágni ld 2 ábra Készre varrás után nyissa szét és simítsa le a varrást Tehát az öltéseknek az anyag színén alig láthatóknak kell lenniük 5 OPCIONÁLNE PRÍSLUŠENSTVÁ SKRYTÁ LEMOVACIA PÄTKA Skrytá lemovacia pätka je zvlášť prístupné príslušenstvo ktorú sa dá dostať v dvoch rozmeroch 0 5 k jemným a stredným látkam 1 0 k stredným a hrubým látkam Používajte vhodnú pätku Dĺžku stehu nastavte na...

Page 66: ...ed a Tighter tension of the fabric after it is sewn b Weaker tension of th fabric Tension control of roller Tension control of roller Görgőfeszesség állító csavar Šrób pre nastavenie napínania valčeka ELASTICATOR An elastic foot is available as an optional extra This foot will guide your elastic and at the same time apply pressure to the elastic with our specially designed tension controlled rolle...

Page 67: ...dményt elérje a a görgő feszítőjének szorításával a varrás után az anyag rugalmasabb lesz b a görgő feszítőjének lazításával az anyag kevésbé lesz rugalmas VŠITIE GUMY Pätka na všitie gumy je zvlášť zaobstarateľné príslušenstvo Táto pätka pomôže všitie gumy a v jednom čase robí nátlak na gumu so špeciálne navrhnutým napínacím valčekom pomáhajúc Vám upravenie pružnosti 1 Vymeňte si všeobecnú pätku ...

Page 68: ...Pin or baste and stitch the seam Braid or ribbon may also be used either flat or folded braid can be used in straight seams Use for decorating edges of collars cuffs pockets etc PIPING FOOT Prepare a piece of read tape Place folded piping be extending beyond seam l and stitch the seam Braid or ribbon may also can be used in straight sea Use for decorating edges 34 ...

Page 69: ...lapos vagy visszahajtott fonatot is alkalmazhat Díszítő szegélyt alkalmazhat gallérok mandzsetták zsebek díszítésére is ŠNÚROVACIA PÄTKA Pripravme kúsok šnúrovacej lemovacej pásky Umiestnime lemovaciu pásku medzi kraje švíku v jednej priamke s vyčnievajúcou časťou látky Pripnite alebo stehujte to potom urobte švík Môžete použiť aj šnúru aj stužku a ešte aj plochú alebo hnutú šnúru zhotovenú rovným...

Page 70: ... and lower layers 6 Serge Use both hands to guide fabric one on the under layer of fabric Keep in mind that the lower piece of fabric will move faster as it is gathering than the top piece GATHERING SHIR 1 Tension settings for ga Left needle 4 Right needle 4 Upper looper 4 Lower looper 4 2 Replace regular presse 3 Clip both fabric layers and 1 1 2 4 cm down Lift front of presser foo 4 Place fabric...

Page 71: ...az anyagot egyikkel az anyag alatt Tartsa szem előtt hogy az alsó anyag gyorsabban mozog mind a felső ráncolt RIASIACA LEMOVACIA PÄTKA 1 Nastaveneie tesnosti nitky k vrašteniu Ľavá ihla 4 Diferenciálny posuv 2 0 Pravá ihla 4 Dĺžka stehu 4 Horný chapač 4 Dolný chapač 4 2 Vymeňte si pätku na riasiacu pätku 3 Porežte obidve látky vo vzdialenosti 1 5 cm od kraja látky 4 cm dlho Zdvihnite začiatok pätk...

Page 72: ...he thread leaving about 4 10 cm clear 2 Lower the presser foot Set the needle threader ensuring the hooking fork enters into the needle hole 3 Hold the thread with the needle threader with your hand 4 Guide the thread into hooking fork and pull the thread with your another hand 5 Move the needle threader backwards slightly Then release the hand which is pulling the thread 6 Take the needle threade...

Page 73: ... ho s rukou s ktorou ste ho ťahali 6 Umiestnite navliekač ihly na ustaľovač ihly 7 Ťahajte nitku k sebe TŰBEFŰZŐ 1 Fűzze át a cérnát a tűbefűzőn amint azt az ábra mutatja Emelje fel a talpat Emelje fel a tűkart a legfelső helyzetébe és húzza át a szálat kb 10 cm t hagyva szabadon 2 Engedje le a talpat Állítsa be a tűbefűzőt úgy hogy biztosítva legyen a hurok villájának a tűlyukba lépése 3 A tűbefű...

Page 74: ...English Magyar Slovenčina Part No 82170 12 07 ...

Page 75: ...056 055 INSTRUCTION MANUAL HASZNÁLATI ÚTMUTATÓ NÁVOD POUŽÍVANIA INSTRUCTION MANUAL MODEL 056 055 ...

Reviews: