


Service Instructions
Page 89
Service Manual Deli Multisserie form 9123560 rev. 09/2017
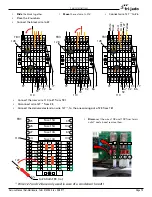
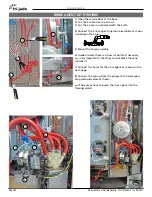
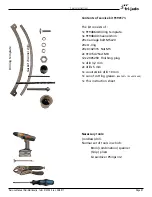
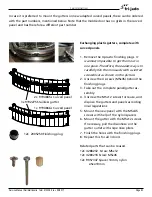
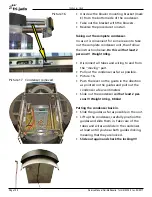
Step by step description of bottom channel repair:
1. Remove the curved panel with the drip tray.
2. Remove the doorgasket at the bottom side. Remove
the gasket completely when it is worn out.
3. Attach 2 carriage bolts with an M8 nut and an M5 nut
to the template. The M8 nut is used as spacer.
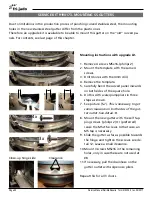
4. Mount the assembly on the bottom plate.
5. Make sure that the outline of the template falls within
the outline of the bottom plate.
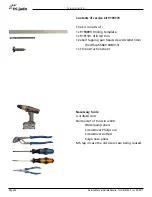
6. Drill 4 holes with the short 3,2 mm drill. Drill through
the first plate only. Use the cutting grease to cool the
drill!
7. Remove the template.
8. Drill all holes up with the 5 mm drill and now through
the second plate too. Try to drill as straight (90°) as
possible with 500 rpm maximum! Use cutting grease!
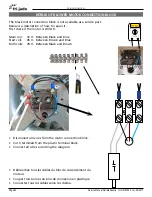
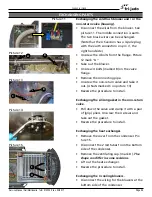
9. Countersink the holes till an outside diameter of 9 mm
minimum and maximum 9,2 mm (45/128”-23/64”). See
picture on previous page.
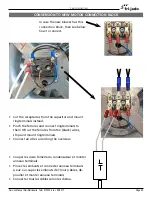
10. Place an o-ring under each bolt head.
11. Place the bolts in the holes and position the square
under the bolt head, parallel to the spacer plate.
12. Place an M5 nut and washer and hold the bolt against
rotating with (grip) pliers.
13. Tighten the nut ±6Nm (4,5 Lbf.ft) with an 8mm
wrench. Too tight will result in deformation of the
bottom plate!!
14. The square under the bolt head will be pulled through
the countersunk hole.
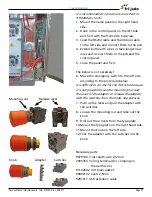
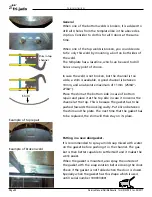
15. Put in the gasket. See description below.
16. Put back the curved panel with the drip tray.
Note that the repair of the top rabbet is the same as the
bottom rabbet. In this case the curved panel at the top
has to be removed, the door gasket at the top too and so
on.
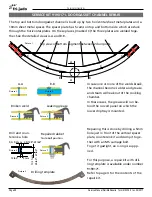
A1
A2
A3
A4
A5
A9
A10
A11
A12
A13
A14
A6
A8
!
max 500rpm


