111
Model D2424LV Reference Manual (Changing the Initial Settings <SETUP mode>)
Flashing
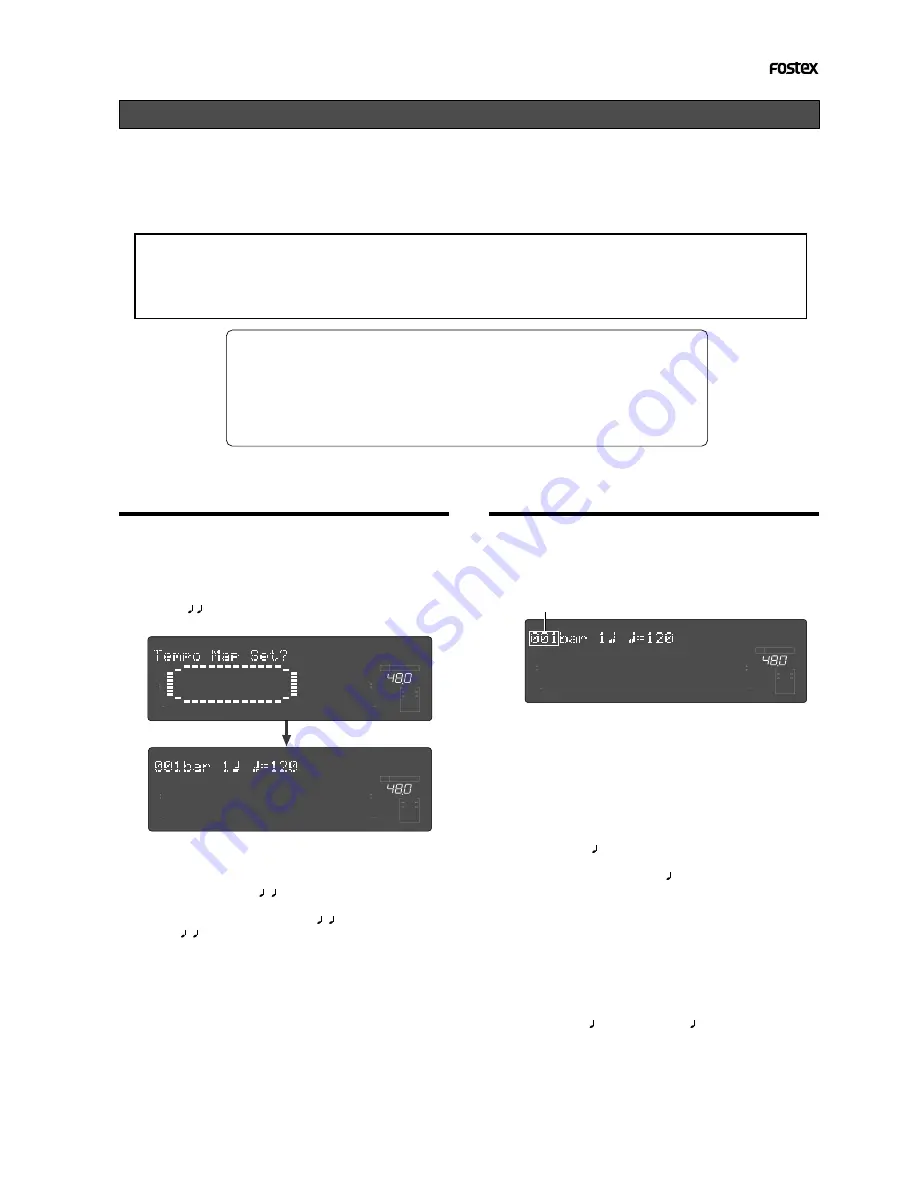
Setting a tempo (“Tempo Map Set ?” menu)
The “
Setting a tempo
” menu enables you to specify a tempo at a given point in a song that already has a time
signature setting. For example, you can specify a tempo of 150 to the third beat of the 12th measure.
Time signature and tempo settings make a Tempo Map, which is used by the recorder to manage the song
using the BAR/BEAT/CLK Time Base, and enable the Metronome function. Tempo settings as well as time
signature settings are required when you wish to output MIDI clock and Song Position Pointer to an external
sequencer.
<Note>
The tempo set figure setup here is an approximate figure and not 100% accurate. Therefore, although the tempo
map be matched to a personal computer, they will gradually drift apart. In order to prevent this drift, the
personal computer side can be set to either MIDI Clock Sync or, the MIDI sync output signal temporarily set to
“MIDI Clock,” the figure reset to the accurate tempo and then return again to MTC sync.
• Initial setting:
bar 001, beat 1: 120 (001 bar 1 beat 120 tempo)
• Setting range of measures:
Determined by the time signature setting.
• Setting range of beats:
Determined by the time signature setting.
• Setting range of tempo:
30-250/quarter note, — (delete)
• Max. setting points:
64 points
* You can set the tempo for each Program individually.
* The settings can be saved and loaded as part of song data.
* The settings are maintained after you turn off the power to the recorder.
Checking the stored tempo setting
1.Select a Program to check the tempo setting for.
Press the [
SETUP
] key, use the
Jog
dial to select the
“
Tempo Map Set ?
” menu, then press the [
EXECUTE/YES
]
key. Indication on the display changes as shown below,
and the current tempo appears. The initial setting is
“
001 bar 1 =120
”. This means that a tempo for the
first beat of the first measure is set to 120.
2. Rotate the Jog dial clockwise.
You can view the current tempo values in sequence.
Tempo value “
- - - bar - = - - -
” means that no tempo
values are specified after the current setting.
With the initial setting, “
001bar 1 =120
” is followed by
“
- - - bar - = - - -
”.
Storing a tempo value
3.Press the [EXECUTE/YES] key.
The indication changes to “
001
(measure)” of “
001bar
”
flashes. (See the figure below.)
This means that you can enter a value now.
4.Turn the Shuttle dial to move the flashing cursor
to the desired edit location, and use the Jog dial
to enter the bar/beat/tempo information to be
stored.
The bar and beat settings for the time signatures
determine the setting range of bar and beat settings for
the tempo. You can specify a tempo between 30 and
250 per quarter note.
The indication “
= - - -
” means “no tempo,” which is used
to delete a tempo setting.
When you turn the
Jog
dial, “
= - - -
” appears for the bars
and beats for which no tempo has been set.
∞
42
OL
0
30
24
18
12
9
6
3
kHz
24
FS
BIT
SETUP
24
∞
42
OL
0
30
24
18
12
9
6
3
23
22
21
20
19
18
17
16
15
14
13
12
11
10
9
8
7
6
5
4
3
2
1
CLOCK
INT
∞
42
OL
0
30
24
18
12
9
6
3
kHz
24
FS
BIT
SETUP
24
∞
42
OL
0
30
24
18
12
9
6
3
23
22
21
20
19
18
17
16
15
14
13
12
11
10
9
8
7
6
5
4
3
2
1
CLOCK
INT
∞
42
OL
0
30
24
18
12
9
6
3
kHz
24
FS
BIT
SETUP
24
∞
42
OL
0
30
24
18
12
9
6
3
23
22
21
20
19
18
17
16
15
14
13
12
11
10
9
8
7
6
5
4
3
2
1
CLOCK
INT
5.Press the [EXECUTE/YES] key.
The display shows the stored bar/beat/tempo, then
returns to the Tempo Edit indication (as shown in step
4).
6.Repeat steps 3-5 to store necessary tempo data.
For example, if you specify tempo values in the song
with “
001bar 4/4
” and “
005bar 3/4
” settings, the Tempo
Map includes the settings shown in the table below.


