427-0064-00-12 Version 100
August 2017
14
2
Basic Operation and Configuration
2.2
Set IP Address using the FLIR Discovery Network Assistant (DNA)
The FB-Series O camera is shipped with a static IP address of 192.168.0.250. Assuming the existing
network uses IP addresses that are unique and different than the default address, configuring the
camera for IP communications generally involves the following steps:
Step 1
Connect the Ethernet port of the camera to the existing IP camera network.
Step 2
Connect a PC or laptop to the same network.
Step 3
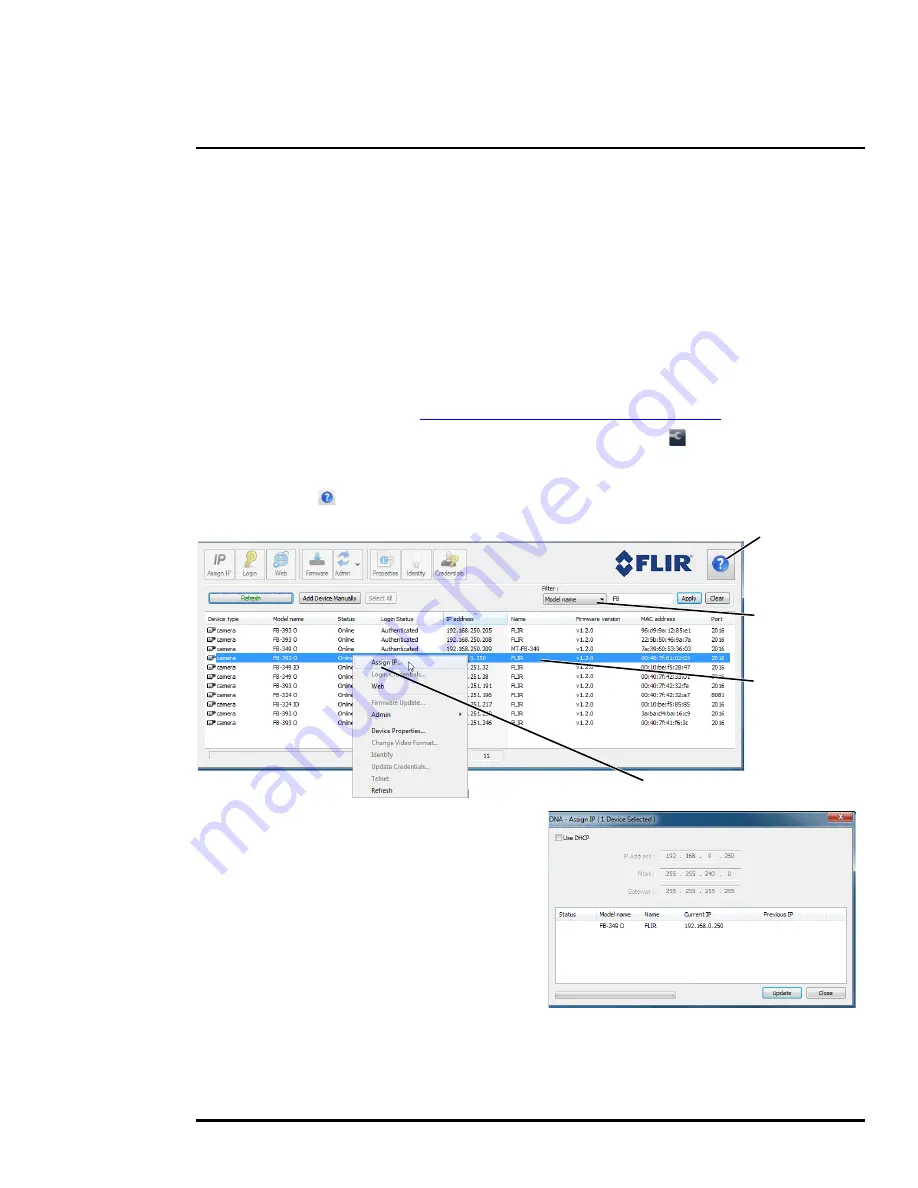
From the PC connected to the camera network, use the DNA utility to discover and display
the camera’s current IP address.
a Download the DNA utility (2.1.3.15 or later) from the
FLIR Firmware & Software
Downloads
page at:
http://www.flir.com/security/display/?id=73533
.
b Unzip the utility, then double-click to run the executable file (
DNA.exe
). All the units on
the VLAN are discovered.
c For additional instructions on using DNA, refer to the DNA User’s Manual available in the
Help ( ) link while the software is running.
Step 4
Right-click on the camera, select
Assign
IP
to change the IP address from the
default (
192.168.0.250)
to a another static
IP or select DHCP if a DHCP server is
used on the network.
Step 5
Double-click the camera in DNA’s
Discovery List
to open the camera’s
web server
Login
page in Internet
Explorer or point your web browser to the
camera’s IP address.
Step 6
Enter the default user name (
admin
) and password (
admin
) to open the
Live Video
page.
Refer to
Live Video Page, pg. 16
.
Online manual
Select a filter
Select Assign IP
Right-click


