38
MCI MODE
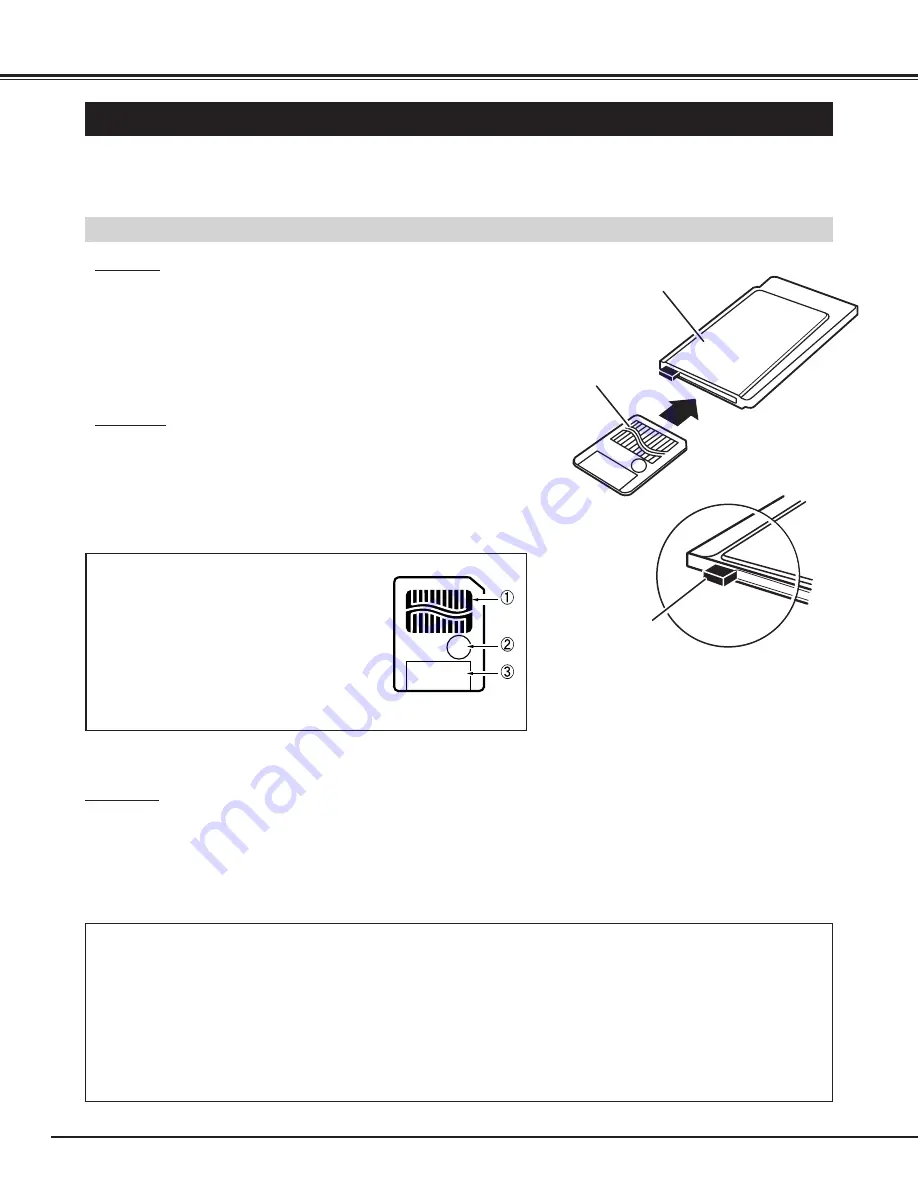
SMARTMEDIA AND PC CARD ADAPTER
SmartMedia and PC Card Adapter are provided with this LCD projector. SmartMedia can be used as a PC card
conforming to the PC Card Standard-ATA by combining with PC Card Adapter.
Install / Remove the SmartMedia
INSTALL
Insert SmartMedia fully into PC Card Adapter. Make sure EJECT
button pops out.
NOTE
●
The front side of SmartMedia has Contact Area on its surface.
The front side of PC Card Adapter has Eject button on the left
side of the slot.
●
Do not insert SmartMedia in the reverse. The card and the
data can be damaged.
REMOVE
To remove SmartMedia, fully press in the EJECT button.
The card pops out, then take out the card.
NOTE
●
Do not pull SmartMedia by force. It may damage SmartMedia
or PC Card Adapter.
PC Card Adapter
(supplied)
SmartMedia
(supplied)
EJECT button
①
Contact Area
Data is written in Contact Area. Never
scratch or stain this area.
➁
Write Protect Area
Affix Write Protect Sticker onto Write
Protect Area to prevent from accidental
erasure.
➂
Index Area
Affix Index Label onto Index Area.
CAUTION
Write Protect Sticker is not available for PC. When PC attempts to read the data from SmartMedia with Write
Protect Sticker, it provides the error messages or the control of PC becomes insecure because of the property of
the interface. When the error messages are displayed, press any key to return to the normal display. It is recom-
mended, however, SmartMedia should be used on PC without Write Protect Sticker.
IMPORTANT NOTE
THE DATA STORED ON THE MEMORY CARD (SMARTMEDIA OR PC CARD) MAY BE DAMAGED OR
LOST BECAUSE OF THE DAMAGE OF THE MEMORY CARD OR THE ACCIDENTAL ERASURE. IT IS
RECOMMENDED THAT ANY IMPORTANT DATA SHOULD BE COPIED ONTO SEPARATE MEDIA,
SUCH AS A FLOPPY DISK, A HARD DISK, OR A MO DISK. WE SHALL NOT BE LIABLE FOR ANY DAM-
AGE OR LOSS OF PROFITS ARISING FROM THE LOSS OF DATA BECAUSE OF THE ACCIDENTAL
OPERATION AND THE DAMAGE OF A MEMORY CARD OR APPLIANCES. REFER TO OWNER’S MAN-
UAL OF MEDIA CARD IMAGER FOR OPERATING THE SOFTWARE.
Summary of Contents for PLC-XU10N
Page 1: ...Owner s Manual PLC XU10N Multimedia Projector MODEL...
Page 6: ...6 PREPARATION NAME OF EACH PART OF THE PROJECTOR...
Page 19: ......
Page 21: ......
Page 41: ......


