background image

122

CONNECT NA

V+

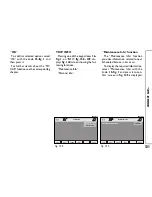
“Personal info” function

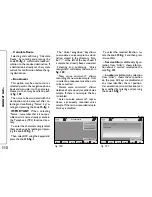
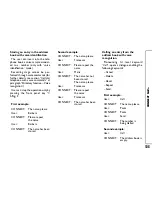
“Personal info” function opens a 10-

element directory 

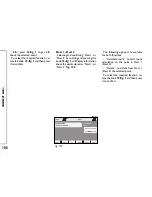
fig. 146

where it is

possible  to  store  events  to  be  re-
membered on a specified date and/or
car mileage.

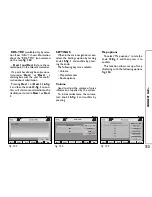
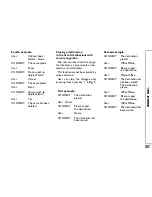
As soon as this event (date and/or

car mileage) is reached, CONNECT
Nav+ display shows a reminder box
with event mnemonic string entered
at setting (see paragraph dealing with
“Add” function) 

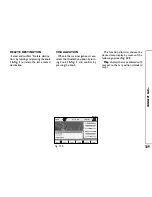
fig. 147

; “ESC” 

14-

fig.  1

clears  off  the  string  till  next

CONNECT Nav+ switch on.

To delete the message definitively

press the knob 

15-fig. 1

. “Personal in-

fo” function shows also the following
icon keys:

“Select”;

“Add”.

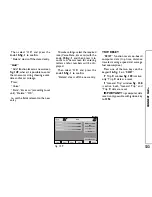
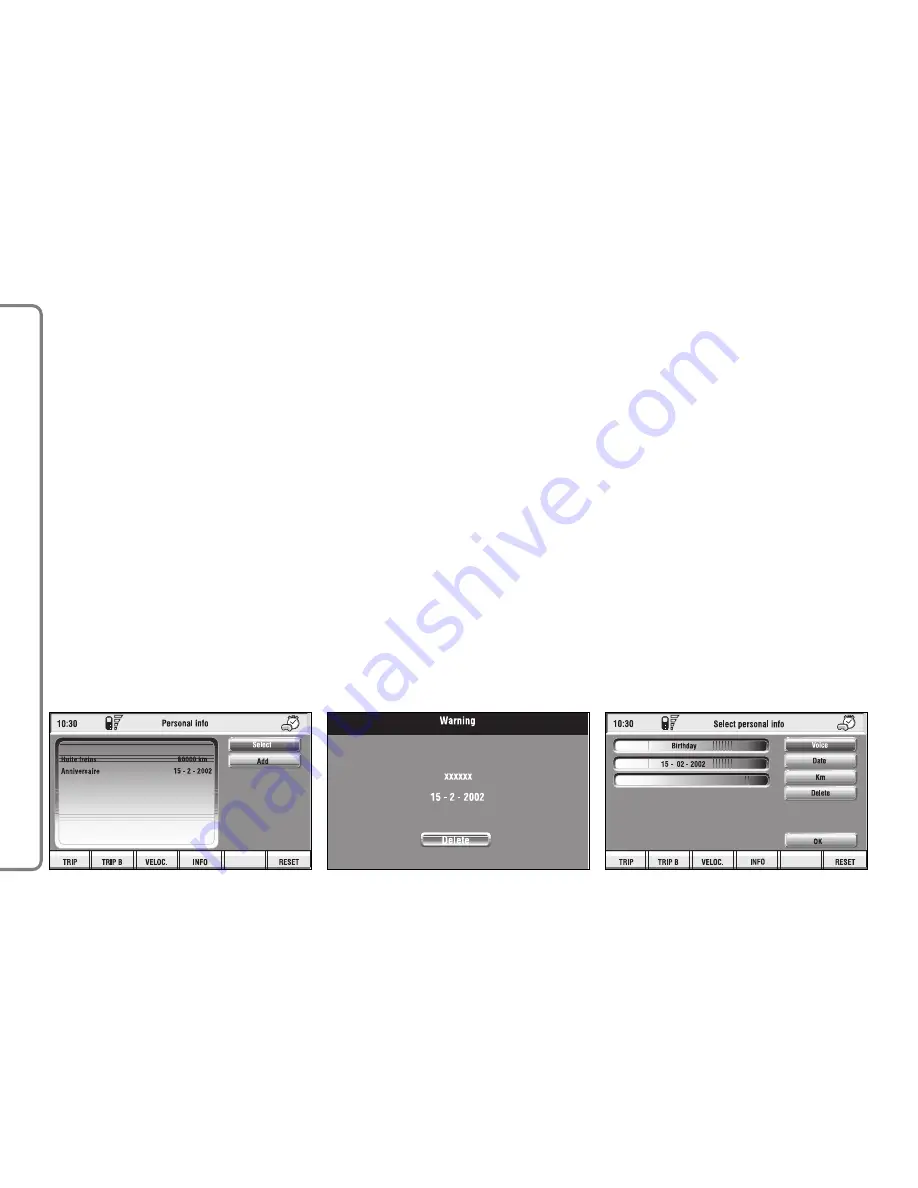
“Select”

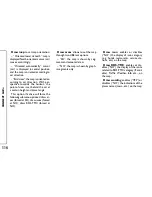
“Select” function enables to select a

list entry and to display detailed info in
a new window 

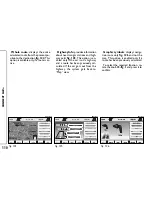
fig. 148

.

Press:

“Voice”,  “Date”,  “km  or  mi”  (ac-

cording to set unit), “Delete”, “OK”
to change selected entry settings.

To make the change, select the re-

quired icon (Voice, Date, km or mi)
with the knob 

15-fig. 1

and then press

it to confirm. A new screen for en-
tering or changing letters and/or num-
bers will be displayed.

fig. 146

F0Q3097g

fig. 147

F0Q3098g

fig. 148

F0Q3099g

Summary of Contents for Connect Nav+

Page 1: ......

Page 2: ...ickly locate the controls which facilitates the use of them To increase safety against theft the set is fitted with a protection system that allows the use of it only on the car on which it was fitted originally The pages that follow contain the instructions for use which we advise you to read carefully and always keep within reach e g in the glove compartment So enjoy your reading and have a good...

Page 3: ......

Page 4: ... MODE 37 Shuffle function 38 Scan function 39 Compression function 39 CD setup function 39 Audio setup function 42 CD CHANGER MODE 42 Shuffle function 44 Prog function 45 Scan function 45 Compression function 45 CDC setup function 45 Audio setup function 47 MP3 MODE 47 Main screen options and functions 49 Audio setup function 50 Direct selection function 50 Define Playlist function 50 Playlist fun...

Page 5: ... Estimated Time of Arrival 117 Distance to destination 117 Speed limit 117 Km miles to empty 117 Instant consumption 118 Trip time 118 Distance traveled 118 Average speed 118 Average consumption 118 Trip speed 118 Trip MY CAR 119 Trip info 121 Trip reset 123 VOICE RECOGNITION 124 GENERAL INFORMATION 124 VOICE COMMANDS 125 Keywords 125 Examples voice commands 132 INFORMATION AND ASSISTANCE SERVICES...

Page 6: ...are must however be taken to ensure the complete efficiency of the CONNECT Nav the monitor is sensitive to scratch ing liquid detergents and UV rays liquids that penetrate inside may damage the device irreparably Clean the front panel and display on ly using a soft dry antistatic cloth Cleaning and polishing products may damage the surface A A A AD D D DV V V VI I I IC C C CE E E E C C C CO O O ON...

Page 7: ...n the sound system remember that the presence of dirt or marks on Compact Discs may cause skipping when playing and poor sound quality The same hap pens if Compact Discs are bent by ac cident IMPORTANT Never use 8 cm au dio or MP3 CDs even with the spe cial adapter since this format damages the system To obtain optimum playing condi tions we give the following advice Only use Audio Compact Discs w...

Page 8: ...sc from its container press on the centre and raise the disc holding carefully from the edges Always hold a Compact Disc by the edge Never touch the surface To remove fingerprints and dust use a soft cloth starting from the centre of the Compact Disc towards the cir cumference Proper way to hold the compact disc Removing the disc New discs may be rough around the edges When using these discs the p...

Page 9: ... Should copy pro tected CDs be used then few sec onds may be required before the sys tem starts to play them Moreover due to the proliferation of always new and different protection methods it is not guaranteed that the CD player can play whatever protected disc Copy protection is often indicated on the CD cover in small letters or hard to read characters Usually it is indicat ed by writings like ...

Page 10: ...em main ly consists of the following a keypad consisting of 28 push but tons and 2 knobs controls on steering wheel 8 push buttons 1 encoder electronics boxed in a properly housing located inside the dashboard The interface is the multifunction in formation display for all the integrat ed components Multifunction information display The system uses a graphic 6 5 16 9 LCD 256 colour TFT display wit...

Page 11: ...rs identifying each key as shown in the figure are used in the manual to describe the relevant functions You are therefore recommended to keep this figure within reach when learning how to use the different functions of the Connect Nav system fig 1 F0Q0754m ...

Page 12: ...he incoming call Stop current conversation Radio mode activation of the scan function with frequency lower than the initial one Station scanning will stop to the first audible station CD mode select previous track MP3 mode skip to previous 10 tracks or previous folder Short push function less than 1 second Voice Recognition function on off Audio source selection FM1 2 3 FMAST LW MW AMAST CD CDC Fo...

Page 13: ... Slot for SIM CARD SOS mode on assistance services and functions Infomobility bCONNECT mode on This button lets the user get out from a selection list or jump from a submenu to an upper menu Knob for selecting the required function press the knob to confirm selection Prolonged pressure of the key more than 2 seconds Radio mode activation of the scan function with frequency higher than the initial ...

Page 14: ...nt buttons the function of all these buttons will be the same Knob for adjusting the volume level and for turning the system on off by pressing it Navigator mode on Telephone mode on Audio mode on Main mode on Prolonged pressure of the key more than 2 seconds RPT function for navigation information on off Telephone on off MUTE function for audio sources on off Dark Mode the display will be fully b...

Page 15: ... FM1 2 3 AST MW LW AMAST CD CDC Increase or decrease listening volume Activate or interrupt voice recognition option The SCAN keys are used in Radio mode to search for the next or previous available radio station in CD MP3 CDC mode skip to previous or next track Send phone call Redial last number called and send call if key pressed within 5 seconds Accept incoming phone call Long push function mor...

Page 16: ...ed keeping full control of the car in the case of doubt in the use of the functions it is necessary to stop be fore performing the various opera tions use of the cell phone is prohibited near explosive substances The navigation system allows you to reach your destination indicating each route change stored on the navigation CD ROM In fact in calculating the route the system takes into account of a...

Page 17: ...tem If you leave the suggested route the naviga tion system will calculate a new one and suggest it to you The navigation system helps the driver while dri ving by suggesting vocally and graphically the best route to be fol lowed to reach the preset destina tion The suggestions given by the navigation system do not exempt the driver from full responsibility due to driving behaviour and com pliance...

Page 18: ...witch on the TRIP and MY CAR functional modules can be accessed with a few restrictions These limita tions are normal when switching the system on manually by button 17 fig 1 since with engine off key at OFF the car data transmission de vices are not operating Turning the ignition key to ON will make all system functions active See TRIP computer and SETUP sections SYSTEM POWER OFF The CONNECT Nav ...

Page 19: ...is delayed and will take place after 20 minutes if the sys tem has a destination set or a phone call is in progress Deactivation independent of ignition key Key independ auto off With this mode active the radio nav igation system can be switched off by pressing button 1 fig 1 or automati cally after 20 minutes MAIN MODE Activate MAIN by pressing the MAIN key 21 fig 1 located on the front panel Thi...

Page 20: ...ey 16 fig 1 next to the symbol is pressed screen brightness may be switched between day and night set tings For other display setting options re fer to the VIDEO paragraph in the MY CAR chapter PROTECTION AGAINST THEFT Power on authentication procedure CONNECT Nav is protected against theft and unauthorised instal lation by means of an authentication procedure This kind of verification involves Bo...

Page 21: ...hone PIN entry request Only the code entry numeric keys key 17 fig 1 and a few audio control keys will be active After the code is entered a second panel notices the user that the authen tication procedure is in progress fig 6 In case the correct code is provided the system is fully enabled On the con trary if a wrong code is entered screen is cleared and previous box is shown again with the follo...

Page 22: ...audio system of the CONNECT Nav it is possible to control RDS radio with FM AM reception Compact Disc player CD Changer if installed equalizer MP3 player SCREEN OPTIONS AND FUNCTIONS Pressing repeatedly the SRC key 2 fig 1 the available audio sources are displayed cyclically Radio FM1 FM2 FM3 FMAST LW MW AMAST CD if the CD is inserted CD Changer if installed The audio source is automatically chang...

Page 23: ...here are 6 available memories for each band RADIO MODE Choosing the radio source will dis play the following functions fig 8 Frequency Autostore active only on the FMAST and AMAST bands Preset scan Band scan Loc DX Radio setup Audio setup The radio is always set to receive sta tions in the RDS Radio Data System mode The main screen is as follows fig 8 the top section on the left of the screen desc...

Page 24: ...en band Proceed as follows select the frequency band FM1 FM2 FM3 MW LW pressing the SRC key repeatedly 2 fig 1 press key 5 fig 1 or 6 fig 1 to start the search for tuning the next or previous station that can be received If the TA function is on traffic in formation the tuner only seeks sta tions that broadcast traffic bulletins If the PTY function is on the tuner only seeks stations with the sele...

Page 25: ...he traffic information function is on but you are tuned to a station that does not broadcast traffic infor mation TA and TP not shown on the dis play you are tuned to a station that does not broadcast traffic information and the traffic information function is off With the TA function on it is possi ble 1 to receive traffic information al so if the CD CDC MP3 player is working 2 to receive traffic...

Page 26: ...ic information though not listening to the radio turn on the TA function so that the display shows the abbreviation TA tune to a station enabled to broad cast traffic information so that TP is shown on the display This way if that station broadcasts traffic information this will be heard at a minimum predefined volume A telephone call has higher priority than traffic message IMPORTANT In certain c...

Page 27: ... icon key and then press it To turn this function off press again knob 15 fig 1 AF SEEKING ALTERNATIVE FREQUENCIES Within the RDS system the radio can work in two different modes AF ON alternative frequency search on AF OFF alternative frequency search off When the signal of the RDS station tuned weakens the following two cas es may occur With AF ON the RDS system ac tivates automatic tuning of th...

Page 28: ...t during Au tostore is as follows pressing one of the preset keys from 1 to 6 the automatic storage process is interrupted and the station stored with that key is tuned changing the audio source Radio CD CD Changer during the auto matic storage process the Autostore function is interrupted Autostore FUNCTION AUTOMATIC STATION STORAGE After selecting the AMAST or FMAST band to turn on the Auto stor...

Page 29: ...be interrupted by press ing knob 15 fig 1 again by taking care to be positioned onto the Preset Scan graphic key or by selecting a station previously memorized Preset Scan FUNCTION The Preset scan function activates stored station scanning in the chosen frequency band Each stored station will be played for about 10 seconds To turn on the Preset scan func tion select the Preset scan icon with the k...

Page 30: ... pass from Mono to Stereo or vice versa select Mono Stereo by turning the knob 15 fig 1 and press it to confirm This function is only available on FM band When stereo reception is on the dis play shows STEREO when it is off the display shows MONO When the signal of the station tuned is weak to improve the sound quality it is advisable to switch to MONO Radio setup FUNCTION To turn on the Radio Set...

Page 31: ...TY programmes turn the knob 15 fig 1 To choose a type of programme press the knob af ter choosing the type IMPORTANT The PTY function can only be turned on in the FM band The list of PTY programmes is the following NONE NEWS AFFAIRS INFO SPORT EDUCATION DRAMA CULTURE SCIENCE VARIED POP ROCK EASY LIGHT CLASSIC OTHER WEATHER FINANCE CHILDREN SOCIAL RELIGION PHONE IN TRAVEL LEISURE JAZZ COUNTRY NATIO...

Page 32: ...r the corresponding icon Regional function This function enables or disables a RDS regional service To turn the Regional function on off select the Regional function by turning the knob 15 fig 1 and then press it to confirm This function is on ly available on FM band The display shows DISABLED or ENABLED OK Choosing and confirming OK with the knob 15 fig 1 goes back to the previous screen storing ...

Page 33: ...s back to the previous screen resuming the settings stored previously AUDIO SETUP FUNCTION AUDIO ADJUSTMENTS The audio parameters described in this paragraph can be activated and ad justed with all the audio sources Ra dio CD CD Changer Select the Audio setup function from the main menu of one of the au dio sources by turning and pressing the knob 15 fig 1 In this way access to first level menu is...

Page 34: ... 1 turn the knob 15 fig 1 right to in crease the treble tones or left to re duce them At the end press the knob 15 fig 1 to confirm setting and con tinue with the other parameter set tings Balance Fader function sound distribution The Balance Fader function shows a schematic representation of the po sition of the speakers in the car left right and front rear Sound dis tribution is represented by a...

Page 35: ...ess to confirm The function status on or off is shown on the display by wording YES or NO select the Balance function by turning the knob 15 fig 1 and press it to confirm turn the knob 15 fig 1 to change the sound distribution in the passen ger compartment between the right and left speakers cursor moving along the horizontal axis then press the knob 15 fig 1 to confirm In the same way choose and ...

Page 36: ... cannot be set To activate the chosen setting pro ceed as follows choose and confirm the Equaliz er function by turning and pressing the knob 15 fig 1 turn the knob 15 fig 1 again to se lect the setting chosen then press it to confirm The equalizer setting active is shown on the display Changing the treble and bass settings will cause the equalizer to be switched off the window with the preset equ...

Page 37: ...by turning and pressing the knob 15 fig 1 to enter and store the settings Auto Vol Cont function volume changing with speed With the Auto Vol Cont function it is possible to automatically adjust the radio volume level to the speed of the car increasing it as the speed increas es to maintain the correct ratio with the noise level in the passenger com partment The adjustment levels available are OFF...

Page 38: ... activates CD Changer RPT enables the Repeat function Repeat one repeat one track Repeat all repeat all tracks No Repeat off repeat function off TA traffic information on off The main screen shows also the fol lowing information fig 14 audio source CD CD name only if the CD when in serted has been named TA wording if the TA function traffic announcement is enabled number of the track being played ...

Page 39: ... II 9 fig 1 To eject the CD from the slot 7 fig 1 press key 8 fig 1 Shuffle FUNCTION RANDOM PLAYING To turn the Shuffle function on off select it by turning the knob 15 fig 1 and then press it to confirm When the Shuffle function is on the display shows SHUFFLE and symbol is shown near the corresponding icon With this function on the CD tracks are played in random se quence To turn off this functi...

Page 40: ...in to turn the function off Compression FUNCTION This function activates dynamic sound compression when playing a CD in the car To turn this function on off select the Compression icon with the knob 15 fig 1 and press it When the Compression function is on symbol is shown near the corresponding icon CD setup FUNCTION Select the CD setup icon with the knob 15 fig 1 and press it to access the CD set...

Page 41: ...nding to the first track of the CD you want to listen to then press it 15 fig 1 to confirm Proceed in the same way to programme the sequence of the other tracks Press ESC 14 fig 1 to quit To store the chosen sequence select OK with the knob 15 fig 1 and then press it Delete Delete icon enables to clear off the last stored track This key is disabled if the sequence is empty To turn the function on ...

Page 42: ... used to name the CD inserted Proceed as follows select the first letter rotating the knob 15 fig 1 and press it to confirm proceed in the same way for the other letters until completing the name select and press OK to confirm the CD name After confirming the CD name the previous screen is shown automati cally The CD name is automatically asso ciated to CD track number and total time duration CD P...

Page 43: ...int out the problem The user shall have to delete some previously stored CD names AUDIO SETUP FUNCTION AUDIO ADJUSTMENTS To access the audio setup menu while listening to a CD select the Au dio setup icon with the knob 15 fig 1 and press it to confirm For the description of the different functions available in the menu see the corresponding paragraph of the RA DIO MODE chapter CD CHANGER MODE if i...

Page 44: ...t function off The main screen shows also the fol lowing information fig 22 number of the track being played CD name only if the CD when in serted has been named TA wording if the TA Traff Ann function traffic announcement is en abled number of the track being played current status of CDC source play pause stop CD time information the numbers of the next 9 tracks that will be played and symbol if ...

Page 45: ... the CD player press continuously button II 9 fig 1 press it briefly to resume playing ex actly from the point where it was in terrupted After CD stop or CD pause if the CD played by the CD Changer has been removed also temporary playing will restart from first track of default CD After CD stop or CD pause no CD will start playing and the string NO CD will be displayed if all the CDs have been rem...

Page 46: ...urned on off selecting the relevant icon key with the knob 15 fig 1 and pressing it When this function is on all the CD tracks are played for about 10 seconds in the actual sequence on the CD To turn the function off select the Scan icon key and press the knob 15 fig 1 again Compression FUNCTION This function activates dynamic sound compression when playing a CD in the car To turn this function on...

Page 47: ...ete Delete icon enables to clear off the last stored track This key is disabled if the sequence is empty To turn the function on select Delete icon rotating the knob 15 fig 1 and then press it Delete all Delete all icon enables to delete the entire track list stored This key is disabled if the sequence is empty To turn the function on select Delete all icon rotating the knob 15 fig 1 and then pres...

Page 48: ...nob 15 fig 1 and press it to confirm For the description of the different functions available in the menu see the corresponding paragraph of the RA DIO MODE chapter MP3 MODE CONNECT Nav can recognize the type of Compact Disc inserted Dur ing the reading procedure to recog nize the disk the display shows Read ing CD If the inserted CD is a MP3 one a specific control is activated IMPORTANT Never use...

Page 49: ...pres ence of a stored playlist coupled with the CD If one of the 10 known CDs is de tected playing starts automatically ac cording to the preset sequence If no playlist coupled to the inserted MP3 CD is found then playing starts from the first file on the CD If recorded MP3 CD was not sam pled at right frequency playback is im mediately stopped and the display shows the following message The curre...

Page 50: ...s audio source change through the following loop LW MW AMAST MW CD activates CD CDC activates CD Changer RPT enables the Repeat function Repeat one repeat one track Repeat all repeat all tracks Repeat off re peat function off TA traffic information on off The main screen shows also the fol lowing information audio source MP3 name of the file or piece of music if any author SHUFFLE REPEAT according...

Page 51: ... allow the tracks choice addition or cancellation It is possible to add a single track or an en tire folder This function is described in detail in a specific paragraph below Define playlist icon key is disabled when a MP3 CD is playing you must stop CD playing to enable it Playlist FUNCTION The Playlist function enables or dis ables playback of user s previously programmed track list To turn this...

Page 52: ... able disable To turn the function off select the Scan icon and press the knob 15 fig 1 again Shuffle FUNCTION RANDOM PLAYING To turn the Shuffle function on off turn the knob 15 fig 1 and press it af ter selecting the function When the Shuffle function is on the display shows SHUFFLE With this function on the MP3 CD tracks or the playlist are played in ran dom sequence depending on Playlist enabl...

Page 53: ...ylist under Play and Pause conditions fig 28 and 30 stop the MP3 CD Stop to enable these two functions fig 31 When playing MP3 CD buttons 5 fig 1 and 6 fig 1 on the left of the CONNECT Nav key pad perform the following functions with short push skips to previ ous next track in playlist with long push skips 10 tracks back forward in playlist 6 Direct Selection Define Playlist Playlist Compression S...

Page 54: ...ent track number fig 28 current status of MP3 CD source play fig 28 pause fig 30 stop fig 31 CD time information list of available tracks TA SHUFFLE REPEAT accord ing to the active function Icon keys on the right of the screen are all enabled excluding Define playlist and Playlist under Play and Pause conditions fig 28 and 30 stop the MP3 CD Stop fig 31 to enable these two functions When playing M...

Page 55: ...fig 32 Add Info Start of list End of list View Playlist OK The left side of the screen displays folder organized MP3 CD structure Max 10 rows with all the folders and file names are displayed To scroll names press the multifunction key 16 fig 1 symbols and at the bot tom of the screen The top of the screen shows the number of selected tracks in playlist 100 max At the bottom of the screen are show...

Page 56: ...ax the display will show the fol lowing message Playlist is complete Eliminate at least one track in order to enter the current track fig 34 To store settings select OK with the knob 15 fig 1 and press the knob 15 fig 1 Pressing ESC 14 fig 1 takes back to MP3 mode main screen loosing set modifications During Define playlist operations buttons 5 6 and 9 fig 1 are disabled Changing mode without aban...

Page 57: ...displaying the file name the author and the title of the song This function reminds the user the contents of a file To turn the Info function on select the corresponding icon by rotating the knob 15 fig 1 and press it to confirm Start of list function Start of list function goes to first folder of MP3 CD To turn the Start of list function on select the corresponding icon by rotating the knob 15 fi...

Page 58: ... press it to confirm The screen displays the following functions Delete Delete all Info Start of list End of list Def Playlist define playlist OK On the left side of the screen the playlist files are displayed max 10 rows are displayed To scroll file names press the multifunction key 16 fig 1 symbols and at the bot tom of the screen The top of the screen shows the num ber of stored tracks in playl...

Page 59: ...letes the cur rent selected track from the playlist To select the track to delete use keys and on keypad 16 fig 1 Delete all function Selecting the Delete all icon with the knob 15 fig 1 and pressing it to confirm deletes the entire playlist MP3 main screen is displayed and Playlist icon is disabled since there is no playlist available Info function Info function displays a screen showing the sele...

Page 60: ... 1 and press it to confirm Def playlist function Selecting Def playlist function with the knob 15 fig 1 and pressing EN TER to confirm 15 fig 1 recalls au tomatically the Define playlist screen For the description of the dif ferent functions available in this screen see previous specifications in the cor responding paragraph OK icon key To save modifications set in View playlist select OK with the...

Page 61: ...without entering PIN code reading the telephone numbers stored on the SIM card entering a new telephone number on the SIM card deleting a telephone number from the SIM card information on SIM card conditions correct or wrong insertion access to the list of the last 10 numbers dialled to facilitate frequent calls access to the list of the last 10 calls received SMS function Short Message Ser vice t...

Page 62: ...e telephone mode main screen fig 39 that pro vides the following information Time GSM field strength If telephone mode is switched off the display shows TEL OFF GSM signal strength is shown even if no SIM card is inserted Active GSM provider If a SIM card is inserted and validated by PIN and no provider is available the display will show FIND An envelope shaped symbol to in dicate unread SMS messa...

Page 63: ...n ß3 fig 1 the display will show for few seconds the last dialled number press again button ß 3 fig 1 to start the phone call When call is in progress the display shows the status as in fig 40 Current telephone status call in progress Conversation time of the active call Remaining credit if provided for by the telephone company Called or incoming telephone num ber if available by the provider Dire...

Page 64: ...g 1 and remove the SIM slot put the SIM cards into the special recess by following the shaping of the seat with the golden part facing up wards Correct card insertion is confirmed by the prompt to type the card PIN code fig 41 if enabled To remove the SIM card slightly press into its housing and then release it it will come out a little so that you can extract it IMPORTANT Removing the SIM card wi...

Page 65: ...IM card is in serted into the SIM reader and the sys tem is already on and PIN lock is en abled on that SIM card To enter the PIN code between 4 and 8 digits use the multifunction but tons 16 fig 1 at the bottom of the dis play and confirm by pressing knob 15 fig 1 Entered digits are shown by as terisks on the display fig 41 If a PIN code digit needs to be cor rected press ESC 14 fig 1 to delete i...

Page 66: ...e pre vious mode and the display shows the relevant status To refuse the call proceed as fol lows long push on button ß 3 fig 1 di alog box disappears and ring stops In this case the screen will remain the one shown before the incoming call IMPORTANT Dialog box disap pears and ring stops also if the line is unwillingly lost OUTGOING CALLS To start a call proceed as follows enter the telephone mode...

Page 67: ...aragraph the user can dial service numbers e g xxxxx ac cording to ETSI Standard GSM 02 30 Frequent Numbers FUNCTION Frequent numbers function enables to create and have quick access to a list with the 9 most frequently dialled phone numbers Choose a user whose number is identified as a frequent number by turning knob 15 fig 1 to the Frequent Number option on the phone main menu and confirm by pre...

Page 68: ...nfirmation box with YES NO fig 46 will come up rotate the knob 15 fig 1 and se lect YES all the numbers below the deleted one are moved up by one po sition automatically IMPORTANT Delete shall be used specially when the Frequent numbers list is full 9 numbers stored and you want to enter a new number New entry function New entry icon key is used to copy an entry from the directory To copy an entry...

Page 69: ... 15 fig 1 then press it to store the new position Delete all option The Delete all option deletes the full list of Frequent numbers Phonebook FUNCTION Phonebook function makes access to an electronic directory of person al phone numbers and names select Phonebook by rotating and pressing the knob 15 fig 1 the screen shown is that in fig 49 with the following available icon keys Di al Add Hear voic...

Page 70: ...racters After selecting List by rotating and pressing the knob 15 fig 1 the keypad disappears and an en try of the list can be selected fig 51 a scrolling lift key appears on the left when the list is shown and the items cannot be displayed together the lift indicates the focus position in the dis played position after selecting the required entry press button ß 3 fig 1 to start the call A B C D E...

Page 71: ...nob 15 fig 1 it is possible to change the name the phone number and the relevant voice sample Location cannot be changed fig 53 Delete clears off a directory entry rotate the knob 15 fig 1 to select Delete a confirmation box with YES NO fig 54 will come up select YES by rotating the knob 15 fig 1 press the knob to confirm during deleting operation the display shows Please wait then goes back to ma...

Page 72: ...play will show the message Name already found in the SIM card then it will copy the entry by putting the latter into the SIM card To copy an entry from the SIM card to the phonebook select by turning knob 15 fig 1 the Save into phonebook graphic key then confirm by pressing the same the system will carry out a check to verify whether an entry with the same name exists in the diary if it does the d...

Page 73: ...ters one by one through the knob 15 fig 1 and pressing it to con firm proceed in this way until com pleting the entry rotate the knob 15 fig 1 select OK and then press the knob to con firm the display returns to screen in fig 56 Number allows insertion of new phone number proceed as follows rotate the knob 15 fig 1 select Number and then press the knob to confirm the display shows the keypad and t...

Page 74: ... number location To enter this mode proceed as fol lows rotate the knob 15 fig 1 select Voice recognizer and then press the knob to confirm the display shows the condition in fig 58 and the following icon keys New voice command Delete voice command Listen to voice command OK Voice phonebook fig 58 F0Q3057g New voice command activates recording of a new voice sample pro ceed as follows rotate the k...

Page 75: ... and then press the knob to confirm the system will reproduce the selected voice sample IMPORTANT This icon key is ac tive only if the concerned entry in the directory is associated to a voice sam ple as described previously OK confirm changes and stores them in the directory IMPORTANT If the user after end ing these operations doesn t select OK and confirm by pressing the knob 15 fig 1 new settin...

Page 76: ...key allows reading and sending short messages maximum length is 160 characters by GSM phone Read and sent messages are stored into two separate boxes which how ever share a common memory sec tion so the sum of sent and read stored messages must not exceed the maximum number of allowed SMSs it depends on the SIM card Telephone module stops input of new messages when the buffer is full and the Enter...

Page 77: ...ser selects a message of type î or í from the above list screen displayed is that shown in fig 61 Selecting Delete by rotating and pressing the knob 15 fig 1 activates selected message deletion A confir mation dialog with YES and NO is shown for user confirmation select ing and confirming YES starts mes sage deletion from SIM card When selecting Send by rotating the knob 15 fig 1 and then pressing...

Page 78: ...en the message is deleted from the SIM card Selecting Call by rotating and pressing the knob 15 fig 1 starts a call to the sender of the message the display shows Call in progress Selecting Answer by rotating and pressing the knob 15 fig 1 lets the user reply to the received message with a new SMS the display shows fig 62 screen Press ESC 14 fig 1 to quit and go back to fig 60 screen Text Telephon...

Page 79: ...racters Telephone number icon key en ables by means of multifunction keys 16 fig 1 associated to icon keys 0 9 and to compose the phone num ber to which the message must be sent Phonebook icon key lets the user choose a number from the di rectory instead of direct number di alling see paragraph Phonebook for further details Store icon key enabled if mes sage text is present stores the mes sage for...

Page 80: ...b Incoming Calls function Incoming Calls option pops up the list of the last 10 calls received The list shows the name if stored in the di rectory and the phone number rele vant to the most recently received calls fig 67 The list is managed and updated by the system automatically To call directly one of the entries in the list proceed as follows select an entry in the list by rotat ing the knob 15...

Page 81: ...lecting the required entry pressing the knob 15 fig 1 opens a window with detailed information re garding selected name and number fig 70 Icon keys Call and Store are available on the display select Call by rotating and press ing the knob 15 fig 1 system starts the call to the displayed number select Store by rotating and pressing the knob 15 fig 1 the sys tem stores the current name in the di rec...

Page 82: ...start of recording A maximum of 1 minute of user s voice sampling is available and can be split in several recording sessions A further push of ô key 1 fig 1 stops sampling Next sampling will be queued after the previous one After 1 minute recording operation is stopped and the display shows the screen in fig 72 the function will be disabled Push on Voice memo key in main telephone screen displays...

Page 83: ... Card title in the centre of the up per bar Main window on the left including card text links and possible selections and or input areas Left vertical scroll bar showing if required which portion of the card is displayed Card list icon displays the title or the ID number of all the cards in cluded in the loaded deck This icon is greyed when the displayed deck is de clared as No bookmark able Updat...

Page 84: ...1 to confirm the relevant screen will be displayed Press ESC 14 fig 1 and confirm to quit the WAP mode the display will return to the main telephone screen TEL Go low bar icon key This graphic key fig 74 75 which is selected by pressing the corre sponding key 16 fig 1 below the writing makes it possible to get con nected to the specified Web address if allowed for by the provider Proceed as follow...

Page 85: ... each stored address fig 77 proceed as fol lows rotate the knob 15 fig 1 to se lect Name fig 77 and type in the re quired name using the keypad WAP Options icon key This key fig 74 75 selected and con firmed by rotating and pressing the knob 15 fig 1 allows to set up the following WAP options address of Home setup site Site directory Settings Home set up This key fig 78 selected and con firmed by ...

Page 86: ...sociated name if stored Select the required item by turning and pressing the knob 15 fig 1 the display will show detailed info on the selected address and the following icon keys Change and Delete fig 81 Change this key fig 81 selected and confirmed by rotating and press ing the knob 15 fig 1 allows to change site address and or name in this case the display shows the keypad and the editing box fo...

Page 87: ...nfirm the display shows the keypad and the editing box for typing the re quired address select Name fig 82 by turning the knob 15 fig 1 and then press it to confirm the display shows the keypad and the editing box for typing the re quired name select OK by turning the knob 15 fig 1 and press it to confirm the entered data the WAP address will be stored in the WAP site directory 86 CONNECT NAV Site...

Page 88: ... icon Any of these keys activates the key pad to be used for entering the re quired data Settings FUNCTION Selecting Settings by turning and pressing the knob 15 fig 1 the dis play will show fig 84 screen and the following icon keys Ringer volume sets the volume level of the telephone ringer Redial in case of busy line redials automatically the called number for a preset number of times Call forwa...

Page 89: ...rent setting of Enable PIN re quest is NO the display shows PIN NOT REQUESTED if current setting of Enable PIN re quest is YES and the current set ting of Recall last PIN is YES the display shows Recall PIN Request PIN if current setting of Enable PIN re quest is YES and the current set ting of Recall last PIN is NO the display shows PIN request Information shows information re lated to the GSM mo...

Page 90: ...graphic key will be OFF Manual fig 88 operator is chosen manually In this case Operator icon key is enabled If chosen operator is no longer able to provide an adequate GSM field telephone functions will not be available Preferential operator is chosen manually In this case Operator icon key is enabled and if chosen operator is no longer able to provide an ade quate GSM field the system automat ica...

Page 91: ...Please retype new PIN is displayed In this case restart the entire procedure This key is active only if the PIN re quest is enabled Enable PIN request This key enables disables PIN check on inserted SIM card To change this setting the system requires the new PIN code This setting is saved in SIM card memory Recall last PIN This key stores the first PIN entered sending it automatically to the SIM c...

Page 92: ... Information icon key Information shows information re lated to the GSM service provider fig 92 Press ESC to quit the Informa tion screen 14 fig 1 91 CONNECT NAV fig 92 F0Q3087g ...

Page 93: ...ally the optimum routing to reach the preset destina tion The navigation system suggestions do not exempt the driver from full re sponsibility due to his her driving be haviour and to compliance with road and other traffic regulations The re sponsibility for road safety always and in any case lies with the car driver IMPORTANT NOTES GPS reception is difficult under trees among tall buildings in mu...

Page 94: ...t selection of the navigating function show the in structions for using the system The text will be as follows The FIAT navigation system guides you in traffic and helps you reach your destination Comply with all local traf fic regulations which take precedence over the manoeuvres indicated by the navigation system Full responsibility for operating the vehicle and observ ing all traffic regulation...

Page 95: ... main page of the navigating function The downward graphic symbol rep resents next manoeuvre turn left right straight on U turn while the up ward graphic symbol represents the next one The number displayed un der the graphic symbol indicates the car distance from the manoeuvre point VOICE INSTRUCTIONS The voice instructions provided by the system guide you to your destina tion and suggest all mano...

Page 96: ...in fig 95 If the user selects and confirms YES the system will store the navi gation data required to reach the set destination this operation requires a few seconds and the display will prompt the message to wait fig 96 After loading the CD ROM is eject ed and the system restarts its naviga tion function with the maximum scale of 2 km therefore it may be possi ble that not all of the route is vis...

Page 97: ...destination When the navigation system is no longer able to continue destination guidance or the car is now out of the loaded map section the system prompts for inserting the navigation CD ROM fig 97 If the user does not insert the CD ROM the system re turns to the status shown in fig 94 IMPORTANT The driver is always responsible for compliance with the enforced traffic regulations any indication ...

Page 98: ...5 fig 1 and pressing it to confirm The display will then show the new distance and the time necessary to reach the destination fig 101 Selecting and confirming YES or NO by turning and pressing the knob 15 fig 1 the user can accept or reject the new route If there is no alternative route then the display shows No alternative route fig 102 MAP activates the map mode The display shows map route if p...

Page 99: ...s the symbols indicating one way streets 98 CONNECT NAV If the Bird View function is active the scale concept is no longer valid since in this case it is considered the dis tance between the car and the dis played horizon see paragraph Map Options The car horizon distance can have the following values 3km 6km and 15 km fig 105 Visualisation allows map visualisa tion to be changed between the fol l...

Page 100: ...hrough an address Points of interest to select a point of interest by the relevant sub menu Last destinations to select a point from the list of previous destinations Bookmarks to select a point from the navigator directory RDS TMC to select a point from the RDS TMC generated list of events Dest 1 to select as destination to delete or to display the point stored as Home 1 Dest 2 to select as desti...

Page 101: ...cters select them on the keypad by rotating the knob 15 fig 1 then press it to confirm If the combination of two characters alphabetical letter symbol is pos sible the two characters are auto matically unified into their corre sponding single character for exam ple if the user selects E and then the two characters are replaced with Ë Blank and _ are word sepa rator characters After selecting the p...

Page 102: ...ring the place name and the first street name Select Intersection by rotating the knob 15 fig 1 and press it to confirm To input the 2nd street name char acters select them on the keypad by rotating the knob 15 fig 1 and then press it to confirm Afterselectingthe 2nd street pressthe knob 15 fig 1 Calculate route This option will activate route calcu lation to the required destination If a destinat...

Page 103: ...f there is no sample this key is disabled Listen to voice command repro duces a previously recorded voice sample If there is no recorded sam ple this key is disabled To select the required function ro tate the knob 15 fig 1 and press it to confirm Dest 1 and Dest 2 store the se lected point in the relevant memories If a point has already been previous ly stored as Dest 1 or Dest 2 a warning box as...

Page 104: ...ad By selecting the Service list graph ic key the display will show the list of the available services in connection with the specified class and will also indicate the name of the service the distance as the crow flies and an icon with the direction fig 111 The list can be run through by turning knob 15 fig 1 the choice can be confirmed by pressing the knob After selecting a point of interest the...

Page 105: ...es fig 113 After selecting the required service associated information and location may be obtained using Info and Map Select OK by rotating and pressing the knob 15 fig 1 to confirm selection Name Service selection by Name is used to select a known service as the des tination by entering Category Place name and Service name fig 114 After confirming the selected service associated information and ...

Page 106: ... a point from those stored in the direc tory fig 115 If the list contains more than 9 destinations the display will show the screen in fig 116 Select ing List the keypad disappears and the required destination can be se lected directly The available options are the follow ing Calculate route allows the use of the point as already described fig 117 Change modifies the Name associ ated to the point ...

Page 107: ...19 Near car Near address RDS TMC icon allows the user to select a geographical point to get re lated RDS TMC information RDS TMC events are pictured through dedicated icons on the map A TMC event cannot be used to identify a des tination IMPORTANT TMC information can be displayed provided that the fol lowing two conditions take place 1 the active radio station provides such service 2 the same stat...

Page 108: ...elect the required function ro tate the knob 15 fig 1 and then press it to confirm Near address Near address enables to get infor mation on events near a specific ad dress The following functions are available fig 121 Category specifies the event cat egory Traffic Weather Info All Place name Street Street num ber inputs resort address List of events opens the event list and choose the event of int...

Page 109: ...he required function ro tate the knob 15 fig 1 and then press it to confirm Info press 16 fig 1 to get info about the selected event To select the required function ro tate the knob 15 fig 1 and then press it to confirm Dest 1 Dest 2 Selecting and confirming Dest 1 or Dest 2 by rotating and pressing the knob 15 fig 1 will display information about the points stored as Dest 1 or Dest 2 fig 122 fig ...

Page 110: ...d destination VISUALIZATION When in the main navigation screen select the Visualisation option by turn ing knob 15 fig 1 and confirm by pressing the knob This function allows to choose the desired map display by means of the following options fig 123 Map displays the map centered with respect to the car position standard map fig 123 F0Q3162g ...

Page 111: ...g 125 This option is en abled only if the car is on a highway and a route has been previously cal culated If the car gets out from the highway the system gets back to Map view Graphic symbols displays naviga tion icons only fig 126 and not the map This option is enabled only if a route has been previously calculated To select the required function ro tate the knob 15 fig 1 and press it to confirm ...

Page 112: ...been ac tuated with the meaning below There are three available icon keys R E press the corresponding multi function key 16 fig 1 a rotation of the knob 15 fig 1 will move the cross cur sor horizontally Q Z press the corresponding multi function key 16 fig 1 a rotation of the knob 15 fig 1 will move the cross cur sor vertically Zoom pressing one of the corre sponding two multifunction keys 16 fig ...

Page 113: ... can be entered after se lecting and confirming Name by ro tating and pressing the knob 15 fig 1 IMPORTANT When selecting Name remember that it is not pos sible to add a name already present in the Telephone TEL function direc tory To enter the characters simply select them one by one by rotating and press ing the knob 15 fig 1 Then select OK using the keypad and press the knob 15 fig 1 The Voice ...

Page 114: ...on screen select the Settings option by turning knob 15 fig 1 and confirm by press ing the knob The following keys are available Volume Map preferences Route options Volume Used to adjust the volume of voice information supplied by the system To increase decrease the volume turn knob 15 fig 1 and confirm by pressing Map options To select Map options rotate the knob 15 fig 1 and then press it to co...

Page 115: ... active will force the following submenu options ddraw ar eas forced at 2D draw icons forced at NO draw RDS TMC forced at NO Draw areas allows to set the map through two different options 2D the map is shown by seg ments and coloured areas NO the map is shown by graph ic segments only Draw icon enables or disables NO the display of icon category e g hotels restaurants service sta tions etc on the ...

Page 116: ...g and confirming Route type by rotating and pressing the knob 15 fig 1 makes it possible to set the route calculation criteria ac cording to two different modes Shortest time or Shortest dis tance Ferries Select the Ferries key by turning knob 15 fig 1 and confirm by press ing the knob to determine whether or not the route may or may not include ferry crossings Highway Select and confirm Highway b...

Page 117: ... to input a number of events e g Tyre replace ment Birthday that can be trig gered both on set date or mileage To display on board computer screen press TRIP key 4 fig 1 To perform new settings or to have information about TRIP settings press keypad 16 fig 1 buttons TRIP TRIP B SPEED INFO or RE SET GENERAL TRIP and TRIP B FUNCTION Press TRIP key 4 fig 1 on CON NECT Nav front panel to open the Gene...

Page 118: ... Arrival This information is present only when the navigation function is on and indicates the expected time of arrival to destination Time is expressed in hh mm hours and minutes Distance to destination This information is present only when the navigation function is on and indicates the distance between current position and the destination set Dis tance value is expressed in km kilo metres unles...

Page 119: ...ter TRIP RE SET function The value is expressed in km kilometres unless otherwise set by the user see paragraph TRIP MY CAR Average speed This shows the average speed of the car calculated from the last manual re set of the on board computer TRIP RESET function The value is ex pressed in km h kilometres per hour unless otherwise set by the user see paragraph TRIP MY CAR Average fuel consum This sh...

Page 120: ...ording to set unit Press the knob 15 fig 1 to confirm Alarm The Alarm function enables dis ables warning indication when set speed limit is exceeded To enable disable this function select and confirm Alarm by rotating and pressing the knob 15 fig 1 The dis play will show ENABLED or DIS ABLED OK To confirm selected options select OK with the knob 15 fig 1 and then press it TRIP UNITS OF MEASURE The...

Page 121: ...ts consumption units shall be ex pressed in l 100 km or km l If the Distance units set is ex pressed in mi miles Consum units shall be compulsorily expressed in mpg miles per gallon Distance units Select Distance units icon with the knob 15 fig 1 Press the knob 15 fig 1 to change unit between km kilometres and mi miles Consum units Select Consum units icon with the knob 15 fig 1 and press it to co...

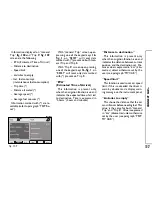
Page 122: ...44 screen showing the fol lowing functions Maintenance Info Personal info Maintenance Info function The Maintenance Info function provides information related to next Scheduled Service in km or mi To display the required information select Maintenance Info with the knob 15 fig 1 and press it to con firm screen in fig 145 is displayed Vehicle info SPEED Maintenance info Personal info fig 144 F0Q316...

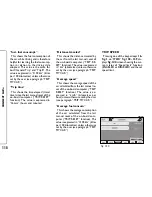
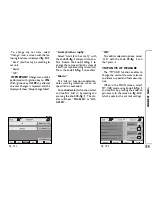
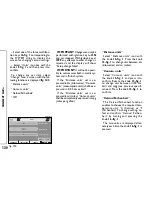
Page 123: ...tring till next CONNECT Nav switch on To delete the message definitively press the knob 15 fig 1 Personal in fo function shows also the following icon keys Select Add Select Select function enables to select a list entry and to display detailed info in a new window fig 148 Press Voice Date km or mi ac cording to set unit Delete OK to change selected entry settings To make the change select the re ...

Page 124: ...and then press it to confirm A new screen for entering letters and or numbers will be dis played Then select OK and press the knob 15 fig 1 to confirm Delete clears off the new entry TRIP RESET RESET function resets on board computer data trip time distance traveled average speed and average fuel consumption Press one of the two keys on the keypad 16 fig 1 on RESET If Trip B window fig 139 is acti...

Page 125: ...ames in the phone directory and or navigation addresses In the first case voice recognition without voice identification the sys tem is able to receive the voice com mands regardless of the user s sex and voice tone and inflexion No preliminary training phase is re quired just follow the instructions giv en by the system each time In the second case voice recognition with voice identification the ...

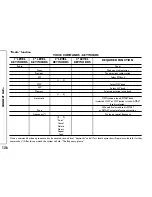
Page 126: ...vant to that command will remain active until another 1st level keyword is giv en the same rule applies for the oth er lower levels 2 3 and 4 If too much time passes between a command and another of lower level the system will invite the user to con tinue by voice message Can I help you 1st level keywords are the following Memo Radio CD player CD changer Navigator Call Dial Redial PIN code Address...

Page 127: ...MAST or AMAST autostore function activation Tuning on special frequency Radio function VOICE COMMANDS KEYWORDS 1st LEVEL KEYWORDS Radio Once a command has been pronounced and executed second level keywords and all first level keywords will remain available for further commands After this command the system will ask The frequency please 2nd LEVEL KEYWORDS Next Previous FM MW LW Memory Autostore Tun...

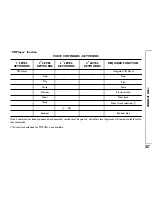
Page 128: ...VOICE COMMANDS KEYWORDS 1st LEVEL KEYWORDS CD player Once a command has been pronounced and executed second level keywords and all first level keywords will remain available for fur ther commands Direct track selection for MP3 CDs is not available 2nd LEVEL KEYWORDS Stop Play Pause Previous Next Track Random 3rd LEVEL KEYWORDS 1 20 4th LEVEL KEYWORDS ...

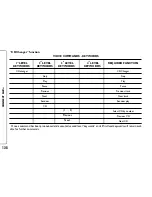
Page 129: ...t CD CD Changer function VOICE COMMANDS KEYWORDS 1st LEVEL KEYWORDS CD changer Once a command has been pronounced and executed second level keywords and all first level keywords will remain avail able for further commands 2nd LEVEL KEYWORDS Stop Play Pause Previous Next Random CD 3rd LEVEL KEYWORDS 1 5 Previous Next 4th LEVEL KEYWORDS ...

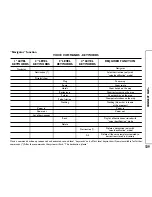
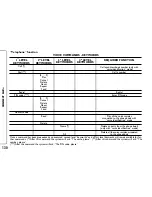
Page 130: ...VEL KEYWORDS Map Route Hotels Restaurants Parking Petrol station Nothing Read Delete 4th LEVEL KEYWORDS Destination All REQUIRED FUNCTION Navigator Select destination only with voice identification mode Show map Show route Show hotels on the map Show restaurants on the map Show parking on the map Show petrol stations on the map Nothing hide what is shown at the moment Zoom in Zoom out Play list of...

Page 131: ...umber please After this command the system will ask The PIN code please 2nd LEVEL KEYWORDS 0 9 Plus Cancel Delete Abort Repeat Send 0 9 Cancel Delete Abort Repeat Send Read Delete 3rd LEVEL KEYWORDS Name All 4th LEVEL KEYWORDS REQUIRED FUNCTION Call an address book number only with voice identification mode Call a number Redial Enter PIN code Play all the voice samples associated to the phone book...

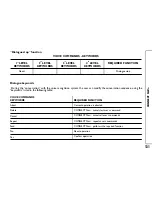
Page 132: ... COMMANDS KEYWORDS Abort Delete Cancel Repeat Send No Yes REQUIRED FUNCTION Current operation is aborted CONNECT Nav cancels last user s command CONNECT Nav cancels all user s commands CONNECT Nav repeats user s commands CONNECT Nav performs the required function Abort operation Confirm operation Dialogue stop function VOICE COMMANDS KEYWORDS 1st LEVEL KEYWORDS Abort 2nd LEVEL KEYWORDS 3rd LEVEL K...

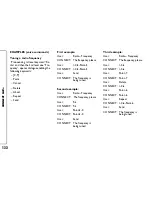
Page 133: ...1 0 5 Point 5 CONNECT 1 0 5 Point 5 User Send CONNECT The frequency is being tuned Second example User Radio Frequency CONNECT The frequency please User 9 6 CONNECT 9 6 User Point 5 0 CONNECT Point 5 0 User Send CONNECT The frequency is being tuned Third example User Radio Frequency CONNECT The frequency please User 1 0 6 CONNECT 1 0 6 User Point 7 CONNECT Point 7 User Delete CONNECT 1 0 6 User Po...

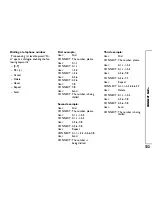
Page 134: ... Send CONNECT The number is being dialled Second example User Dial CONNECT The number please User 0 1 1 1 2 3 CONNECT 0 1 1 1 2 3 User 4 5 6 7 8 CONNECT 4 5 6 7 8 User Repeat CONNECT 0 1 1 1 2 3 4 5 6 7 8 User Send CONNECT The number is being dialled Third example User Dial CONNECT The number please User 0 1 1 1 2 3 CONNECT 0 1 1 1 2 3 User 4 5 6 7 8 CONNECT 4 5 6 7 7 User Repeat CONNECT 0 1 1 1 2...

Page 135: ...NNECT 1 2 3 4 User Send CONNECT The PIN code is being dialled Second example User PIN code CONNECT The PIN code please User 1 2 CONNECT 1 2 User 3 4 CONNECT 3 4 User Send CONNECT The PIN code is being dialled Third example User PIN code CONNECT The PIN code please User 1 2 CONNECT 1 2 User 3 4 CONNECT 3 8 User Delete CONNECT 1 2 User 3 4 CONNECT 3 4 User Repeat CONNECT 1 2 3 4 User Send CONNECT Th...

Page 136: ...se User Barbara CONNECT Please repeat the name User Barbara CONNECT The name has been stored Second example CONNECT The name please User Francesca CONNECT Please repeat the name User Maria CONNECT The name has not been stored The name please User Francesca CONNECT Please repeat the name User Francesca CONNECT The name has been stored Calling an entry from the address book with voice recognition Pr...

Page 137: ... the address book Pronouncing 1st level keyword Address book and then Delete and Name will open a dialogue enabling the following keywords Yes No Cancel Delete Abort Repeat First example User Address book Delete Name CONNECT The name please User Barbara CONNECT Do you wish to delete Barbara User Yes CONNECT The name has been deleted Second example User Address book Delete Name CONNECT The name ple...

Page 138: ...associ ated to a stored address This function cannot be activated by voice command User can stop the dialogue only pressing front panel key ô 1 fig 1 First example CONNECT The destination please User Home CONNECT Please repeat the destination User Home CONNECT The destination has been stored Second example CONNECT The destination please User Office Milano CONNECT Please repeat the destination User...

Page 139: ...is being entered Second example User Navigator Destination CONNECT The list of destinations is emp ty Third example User Navigator Destination CONNECT The destination please User Office Milano CONNECT Please repeat User Milano Office CONNECT Milano Office User Send CONNECT The destination is being entered Fourth example User Navigator Destination CONNECT The destination please User Anna s house CO...

Page 140: ...tinations Delete Destination CONNECT The destination please User Home CONNECT Do you wish to delete Home User Yes CONNECT The destination has been deleted Second example User Navigator List of destinations Delete Destination CONNECT The destination please User Torino CONNECT Do you wish to delete Toirano User Repeat CONNECT Do you wish to delete Toirano User No CONNECT Abort Third example User Nav...

Page 141: ...ice Milano CONNECT Do you wish to delete Office Mi lano User Cancel CONNECT The destination please User Paola s house CONNECT Do you wish to delete Paola s house User Yes CONNECT The destination has been deleted Stopping the dialogue To stop a dialogue pronounce Abort keyword Keywords entered before pronouncing Abort are deleted Abort is recognized by the system only in voice recognition without v...

Page 142: ...es will be provided on payment If the user has not yet subscribed to them the as sociated menu functions are inactive and the dis play shows Subscribed services not enabled fig 151 During subscription you will be given the activation and deactivation procedures of the Telematic Services offered by bCONNECT MEDICAL ADVICE FUNCTION Selecting this function with the knob 15 fig 1 and pressing it to co...

Page 143: ...e assis tance centre number cannot be set by the user For both Roadside Assistance and Medical Advice calls if trans mission of the telematic call is not successful automatic dialling of the tollfree number concern ing the service required is envis aged to inform in any case of the need for assistance this call will be successful only if the area in which the car is has GSM cover age PERSONAL NUMB...

Page 144: ...er the number to be called when the Personal number function is activated on the screen that appears after pressing the SOS key 12 fig 1 for the emergency call To enter the telephone number use the keypad keys 16 fig 1 normally disabled set on the lower screen bar fig 152 Medical advice function The Medical advice function allows to activate or deactivate automatic sending of the medical call Auto...

Page 145: ...g as the call for assistance is active with the corresponding screen on the display If a phone call is received while for warding a request for assistance the corresponding alert will not be shown on the display but the ringer will ring If the user decides to accept the call and briefly presses the ß 3 fig 1 key the assistance call screen goes off the display IMPORTANT The call for assis tance is ...

Page 146: ...t to confirm the on board device will send info request to the bCONNECT Operational Centre via a pre configured SMS When receiving the request bCON NECT will call the user on the car freehand set When this phone con nection is active the user can request info to the operator If the telematic connection cannot be activated the display will show the relevant warning message Some information will be ...

Page 147: ... display in the screen with Infomobility function fig 156 A maximum of ten messages can be stored further arrivals overwrite the oldest one Every message is identified by an icon recalling the message type and an envelope recalling the message status read or not sealed envelope unread message open envelope read message To access single messages of the list which may contain information on the traf...

Page 148: ...with generic informa tion When the message is shown on the display the options Delete Map and Call are made available fig 158 Selecting and confirming Delete with the knob 15 fig 1 eliminates de finitively the message from the list while with Map the map is displayed if the message contains a geographic poin showing the point of interest that can also be used as destination or entered in the syste...

Page 149: ...the ignition key is at OFF certain MY CAR informa tion operations will only be accessible for reference Any new setting on the CONNECT Nav will be operative only after check performed by car check com ponents otherwise the warning mes sage Setup change failed will be dis played IMPORTANT To be sure that any new setting is positively received by car check components it is strictly necessary that ig...

Page 150: ...be sure that the provided Setup CD is avail able and ready to be used Selecting icon LANGUAGE by turning the knob 15 fig 1 and press ing it to confirm the user can set the required language available languages are Italian English French German Spanish and Portuguese Selected language will be valid for both the written text Text Lan guage and voice recognition VR language and for any voice instruc ...

Page 151: ...will be displayed Language change failed Please re peat procedure This message asks the user to repeat the above procedure Whenever the system is switched on turning the ignition key to ON the language module is checked and if the system finds a fault the following mes sage is displayed Voice commands and messages not available Please change the language This message asks the user to repeat langua...

Page 152: ...AAA select year rotating the knob 15 fig 1 and press it to con firm Setting HH select hour rotating the knob 15 fig 1 and press it to confirm Setting MM select minutes rotating the knob 15 fig 1 and press it to con firm Setting MODO 12h 24h select 12h or 24h mode rotating the knob 15 fig 1 and press it to confirm To activate the required settings se lect and confirm OK by turning and pressing the ...

Page 153: ...g 1 to select and confirm Instrument pan el buzzer volume The display shows the screen in fig 164 To adjust volume select Change rotating the knob 15 fig 1 and then press it to confirm Rotate the knob 15 fig 1 clockwise to increase volume and anticlockwise to reduce it An indication cursor and a numeric window will help you in setting Press the knob 15 fig 1 twice to confirm and go back to first m...

Page 154: ... a numeric window will help you in setting Press the knob 15 fig 1 twice to confirm and go back to first menu Whenever set value exceeds 0 sym bol is displayed in the first menu next to the corresponding item The 0 level excludes the buzzer of the instrument panel keys MODE Ô Õ Auto door lock To set automatic door lock accord ing to car speed When this function is active doors are locked automatic...

Page 155: ...Inde pendent trunk lid opening and then press the knob to confirm When is displayed the function is active OK To activate and to store settings se lect OK by rotating and pressing the knob 15 fig 1 SECOND MENU To open the second menu from the screen shown in fig 162 select and confirm Next menu by rotating and pressing the knob 15 fig 1 The display shows the screen in fig 166 To go back to the fir...

Page 156: ... is equipped with daylight sensor To adjust daylight sensor sensitivity select and confirm Daylight sensor sensitivity by turning and pressing the knob 15 fig 1 The display shows the screen in fig 167 Then select Change by rotating the knob 15 fig 1 and press it to confirm Turn the knob 15 fig 1 clockwise to increase the sensitivity level and anti clockwise to reduce it Setting is aided by a curso...

Page 157: ...con Instrument panel by turning an pressing knob 15 fig 1 to confirm to set repetition of radio and or phone info on the instrument panel display fig 169 To turn this function on off rotate and press the knob 15 fig 1 When is displayed the function is active To activate and to store settings se lect and confirm OK by rotating and pressing the knob 15 fig 1 TRIP B info duplication on instrument pan...

Page 158: ...lock wise to decrease it Color selecting and confirming it by rotating and pressing the knob 15 fig 1 the following settings are pos sible Automatic enables to adjust au tomatically the colour palette day night depending on car lights switching on off With car headlights on and color set to Automatic in MAIN mode press knob 15 fig 1 to alternate daytime brightness and nighttime brightness settings...

Page 159: ...es To change setting select and confirm Distance units by turning and press ing the knob 15 fig 1 The two units are displayed alter nately each time the knob 15 fig 1 is pressed Consumption units To choose the required consump tion unit l 100Km or km l To change setting select and confirm Consum units by turning and press ing the knob 15 fig 1 The two units are displayed alter nately each time the...

Page 160: ...r action e g resetting involved module hardware Should the system be not operating reset it manually by pressing the knob17 fig 1 for over 7 seconds OVERTEMPERATURE FAULTS If the temperature of a CONNECT Nav hardware module audio tele phone CD player etc exceeds the max limit the module will detect overtemperature and the display will show a dedicated warning message The involved module will autom...

Page 161: ...ox the involved module will feature limited functions as described in the fol lowing table Application Audio Radio CD CDC Telephone voice Navigator voice Voice recognition voice Audio CD only Navigation Cell phone SOS All Displayed message Limited audio volume CD player OFF Telephone OFF TEL OFF Whole system OFF ...

Page 162: ...ctions will not be guaranteed unless navigation without CD has been previously activated The display will show a proper warn ing message Telephone module overheating In case of Telephone module over heating the module is deactivated TEL OFF thus inhibiting information and assistance functions SOS The display will show a proper warn ing message CONNECT Nav auto off In case of excessive overtempera ...

Page 163: ...NOTES ...

Page 164: ......

Page 165: ...Fiat Auto S p A After Sales Assistenza Tecnica Ingegneria Assistenziale Largo Senatore G Agnelli 5 10040 Volvera Torino Italia Print no 603 46 855 X 2006 1st edition ...

Page 166: ......

Reviews: