3-25
1
2
3
Basic Usage
Setting the Threshold (Teach Function)
3
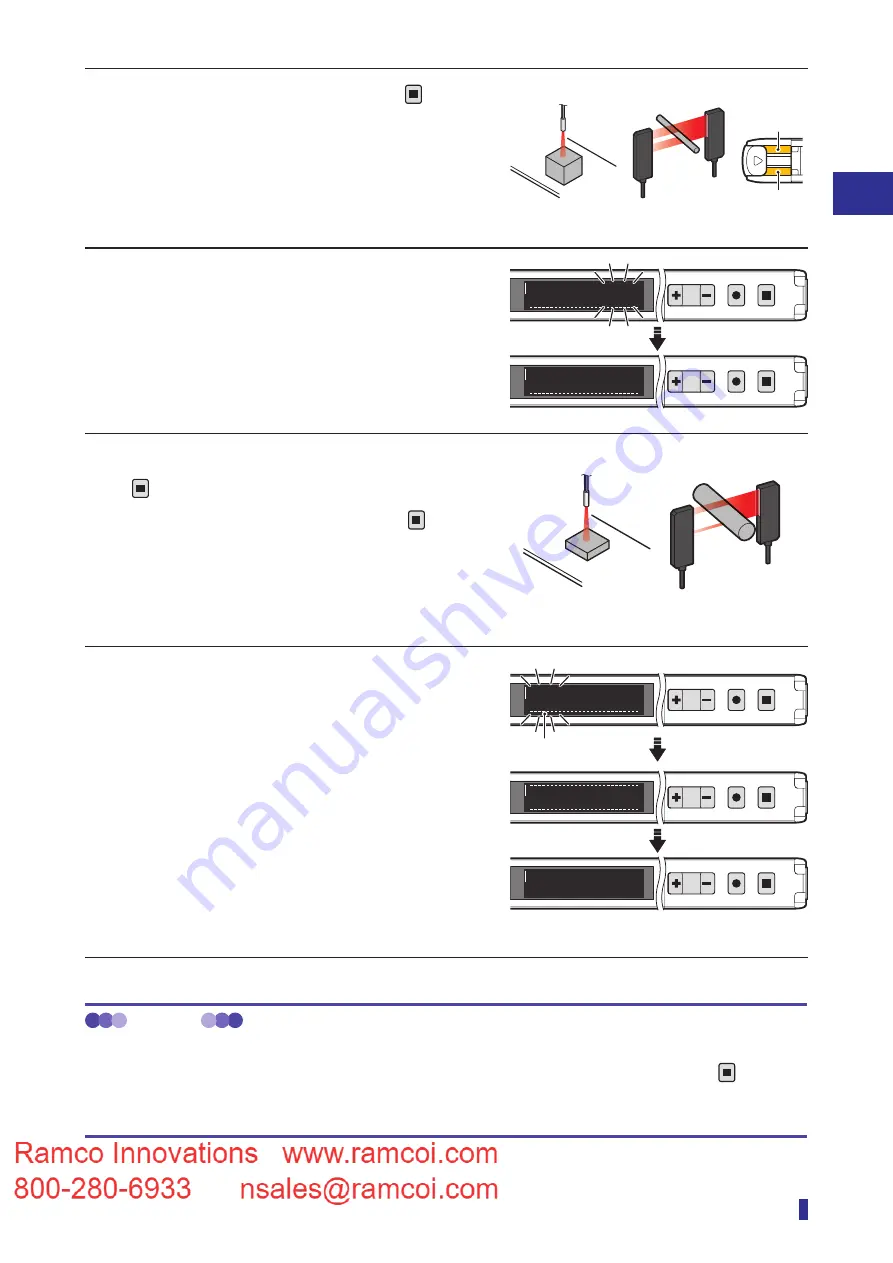
With an object present, hold down
TEACH
ESC
for 1
second or more.
The output indicator of the channel (output 1 or
output 2) for which the teach function is being
executed blinks once in orange.
* Steps 3 and 5 can be performed in any order.
4
When the product is taught the received
light amount of the first point, the numeric
value blinks, then the product is set for the
execution of the teach function at the
second point.
5
Place the other object, and then hold down
TEACH
ESC
for 1 second or more.
* If approximately 30 seconds elapse with
TEACH
ESC
not
being held down, the teach function will be
canceled, and the threshold will not be set.
6
The product is taught the received light
amount of the second point, and the
threshold blinks.
This completes the execution of the teach function.
The OLED display automatically returns to the
RUN screen.
* If the received light amount does not meet the
conditions required for the teach function, “Teach
error” will be displayed. If this error is displayed,
refer to
“5-1 Error Displays” (page 5-2) for
troubleshooting.
MEMO
Operations when executing the teach function again
After executing the teach function, to reset the teaching with the same mode again, simply hold down the
TEACH
ESC
key for
1 second or more. (The operations in steps 1 and 2 of the operation procedure are not necessary.)
In this situation, the teach function is executed with the previously set mode.
Thin object
Examples)
Tall object
[Through-beam]
[Diffuse reflective]
S
R
Output 1
indicator
Output 2
indicator
1
2
MENU
OK
TEACH
ESC
1ptok
1
2
MENU
OK
TEACH
ESC
1000
200
2pt
Examples)
Short object
[Through-beam]
[Diffuse reflective]
Thick object
RUN screen
1
2
MENU
OK
TEACH
ESC
Refresh
1
2
MENU
OK
TEACH
ESC
1
2
MENU
OK
TEACH
ESC
To run mode
2000
1000
2000
1000
2000
Upper and lower
thresholds
Summary of Contents for D4RF Series
Page 2: ......
Page 12: ......
Page 13: ...1 Read This First This section explains the accessories and the names of this product s parts...
Page 16: ...1 4 Part Names...
Page 17: ...2 Installation and Connection This section explains how to install and wire this product...
Page 25: ...3 Basic Usage This section explains the types of display screens and transitions...
Page 82: ...3 58...
Page 83: ...4 Settings Menu This section explains how to set the parameters of this product...
Page 122: ...5 8 Errors and Countermeasures...
Page 137: ......


