


Network Camera
7
Factory Reset
This will only be used on the rare occasions that you want to return all the settings to the original
factory settings.
CAUTION: When performing a Factory Reset, you will lose any settings you have
saved.
Cut off the power from the camera.
→
Poke a straightened paperclip into the factory reset switch
hole.
→
Turn on the power while holding the reset switch
→
Release the switch in about 5 seconds
after the Power LED blinks.
→
The camera resets to factory defaults and restarts after completing
the factory reset.
You can perform a factory reset while the camera is turned on by pressing the factory reset switch
and releasing the reset switch. A factory reset also can be performed remotely by running the INIT
program. The camera restarts after completing the factory reset. Refer to the INIT User’s Manual
for details on remote factory resetting.
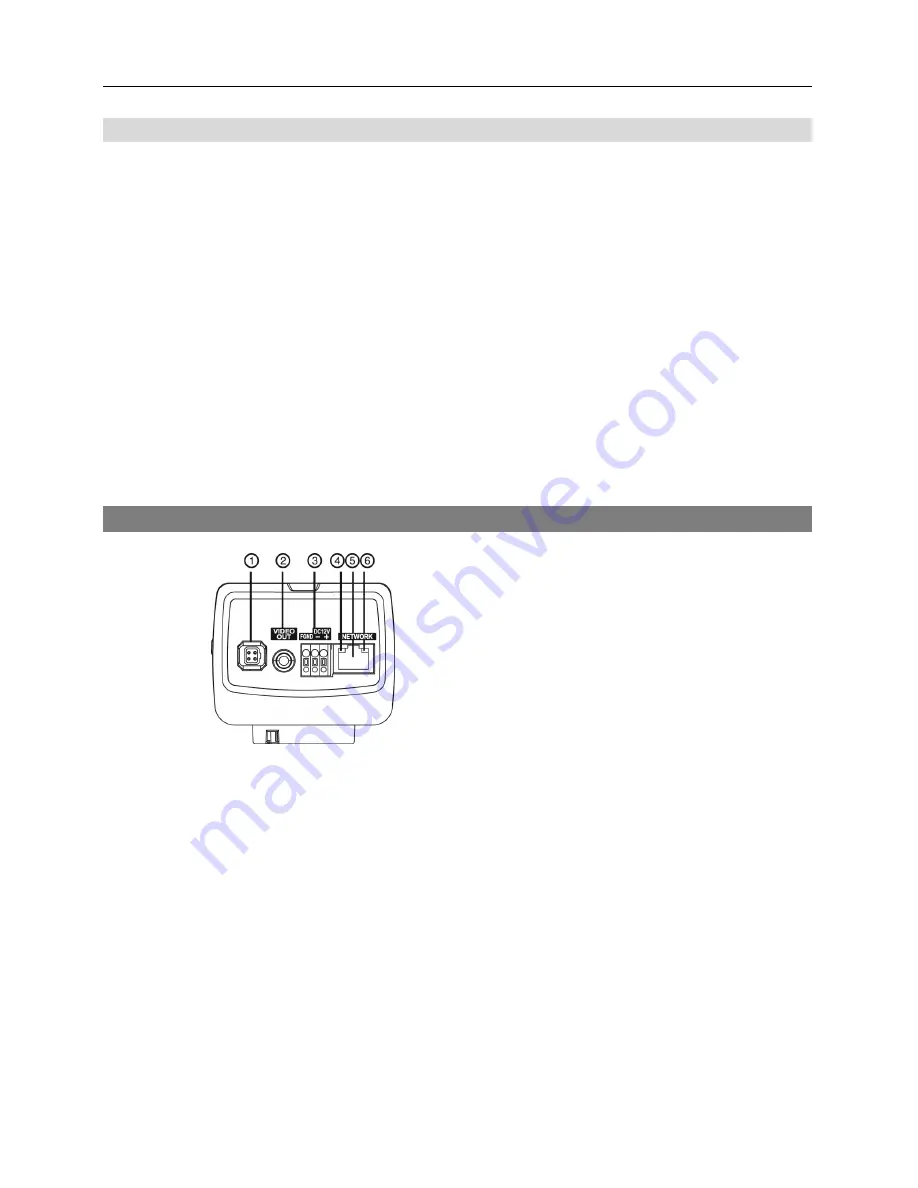
Rear View
①
Auto Iris Lens Connector
②
Video Out
③
Power
④
Power LED
⑤
Network Port
⑥
Network LED
Auto Iris Lens Connector:
Connect the auto iris jack if the lens is a DC-type auto iris lens. Use
the lens of which the auto iris jack is long.
Video Out:
Connect to a monitor. This is intended for video preview while adjusting the camera.
Power
−
DC12V +/–
: Connect two wires from the power adapter. You must distinguish power polarity
when connecting the wires. The camera starts booting as soon as power is applied.
−
FGND
(Frame GND)
:
Ground the camera by using the grounding cable and screw.
Power LED:
Indicates system operation status. See
Appendix – LED Indicators
for details.
The LED will not light regardless of the status if the Status LED is disabled when configuring
the
System – General
setup.
Network Port:
Connect a Cat5 cable with an RJ-45 connector. You can change the settings,
manage the camera, upgrade the software or monitor video remotely via the network connection.
Refer to the INIT User’s Manual for details about network connection setup. When using a PoE
switch, the camera can be supplied with power over Ethernet cable (supported for not every model)
(Refer to the PoE switch manufacturer’s manual for details).
Summary of Contents for C-FB310DN
Page 1: ......
Page 2: ......
Page 8: ...User s Manual 2 Typical Applications Remote Monitoring Remote Recording...
Page 9: ...Network Camera 3 Webcasting...
Page 10: ...User s Manual 4...
Page 44: ...User s Manual 38...
Page 48: ...User s Manual 42...
Page 54: ...User s Manual 48...
Page 58: ......


