


83
IP Address -
For each application, enter the IP Address of the PC running the specific application.
Enable -
Click the
Enable
checkbox to enable port forwarding for the relevant application.
When finished making changes, click the
Save Settings
button to apply your changes or
Cancel Changes
to cancel
them.
Here is an example for how the port information might look:
HTTP
80 to 80
Both
192.168.1.50
Enable
Where 192.168.1.50 is the IP address of the PARAGON264x1 on the LAN, and the default port 80 is in use.
Note:
If you changed port 80 in the DVR’s Network Menu, open that port instead of 80.
9.2
TYPICAL D-LINK PORT FORWARDING
This section will cover a few simple configurations for the D-Link router. This chapter is only to offer some help to the
installer and end user. Please understand we
DO NOT
support this product and will not give tech support on it. If you need
additional technical support on this router you must call D-Link.
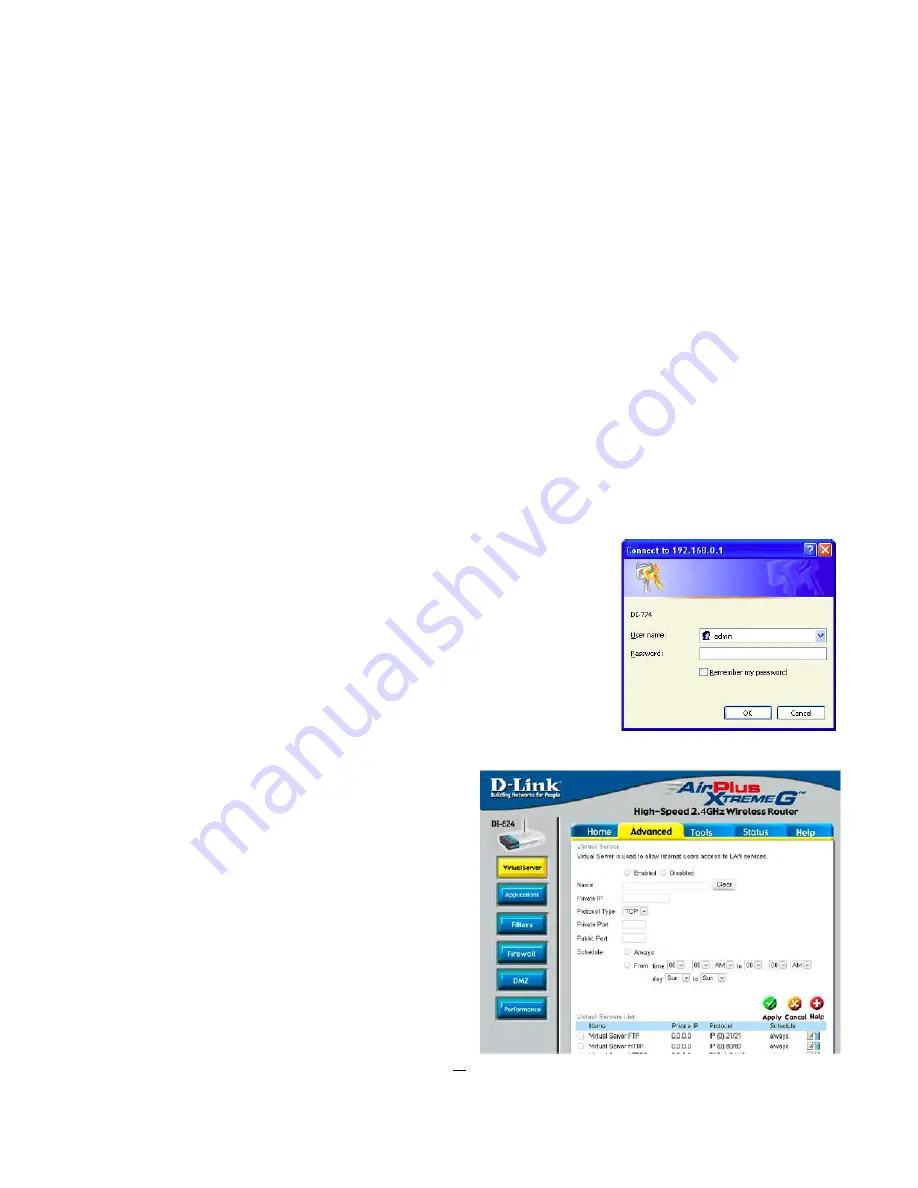
Whenever you want to configure your network or the DI-624, you can access the
Configuration Menu by opening a web-browser and typing in the IP Address of the DI-
264.
The DI-264 default IP Address is 192.168.0.1.
Type “admin” in the
User Name
field
Leave the
Passwor
d blank
Click
OK
The first screen that shows up is the
Home Tab
. This is the
starting point for all the router’s settings and functions.
Click Virtual Servers on the left to bring up the screen
shown on the right.
Virtual Servers allows users who are connecting remotely to
access services on the router’s Local Network. The functions
of each field are described below.
Virtual Server -
Select
Enabled
or
Disabled
Name -
Enter the name referencing the virtual service
Private IP -
The IP address of the device running the


