


Value IP Series Network Cameras – H265, 2MP / 5MP / 8MP
57
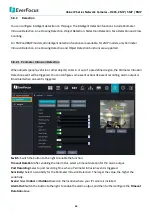
Send Email:
Switch the button to the right to enable the Email alert function. When a Perimeter Intrusion event
is triggered, the camera will send an email alert with a snapshot image to the pre-configured Email receiver.
Note that for this function to work, you have to set up the Email function in advance (refer to
5
.
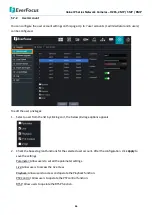
5.3 Email
).
Rule Number:
Select a number to configure the areas. Up to 4 areas can be configured.
Rule Switch:
Switch the button to the right to enable the Rule Type setup below.
Rule Type:
Select a rule type.
Enable Recording:
Switch the button to the right to enable the Perimeter Intrusion Detection recording
function. Note that for Perimeter Intrusion Detection recording function to work, the Record Schedule function
has to be configured (please refer to
5.8.1 Record Schedule
).
Click
Refresh
to refresh the page; click
Apply
to save the settings.
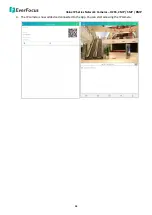
To configure the Perimeter Intrusion Detection function:
1.
Select
1
from the
Rule Number
drop-down list to configure the first area. Up to 4 areas can be configured.
2.
Enable the
Rule Switch
and then define a
Rule Type
:
A
B: Detects movement from A to B.
B
A: Detects movement from B to A.
A
B: Detects both movements from A to B and from B to A.
3.
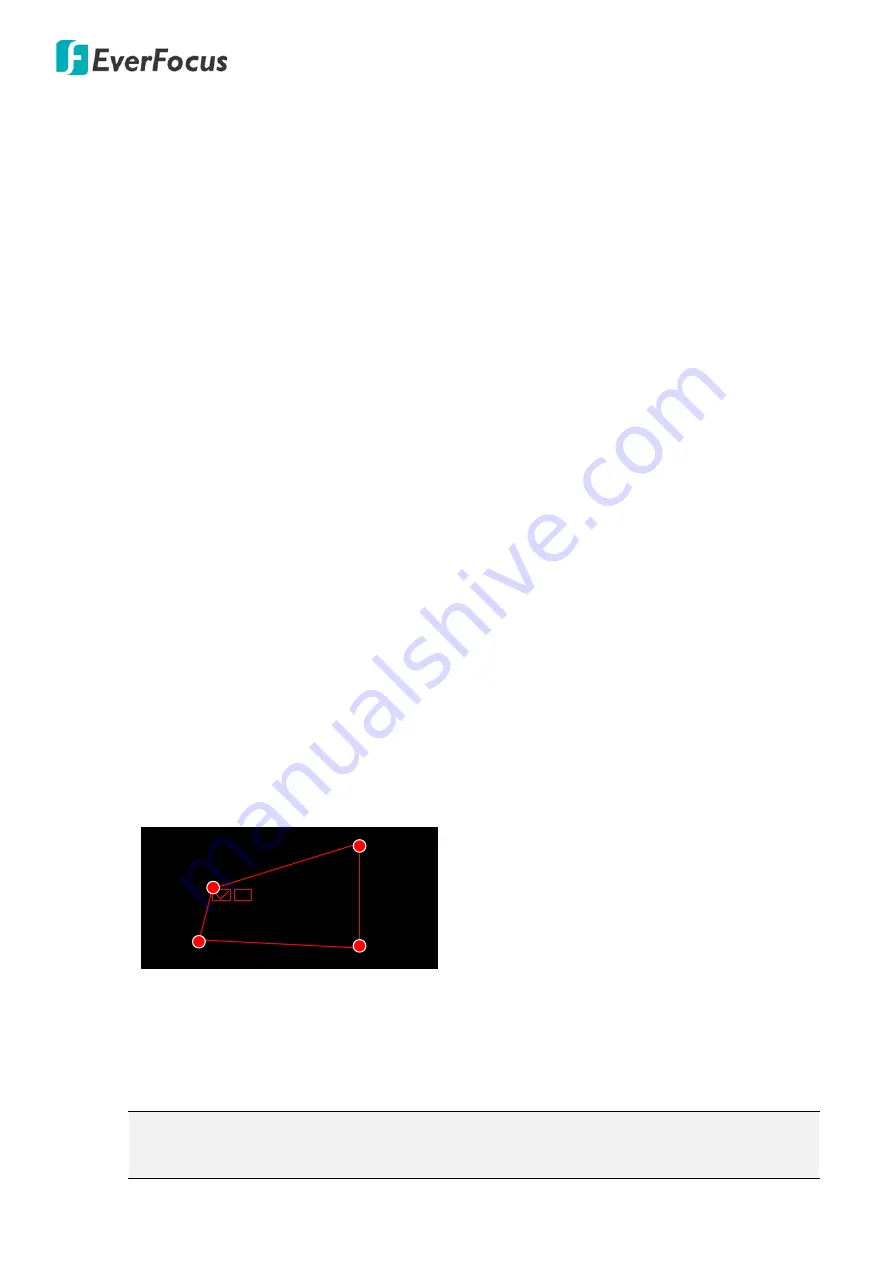
To draw an area:
a.
Use your mouse to click 4 points to draw a rectangle shape. The shape should be convex. Concave
shape is not allowed.
b.
If you want to move the area to other position or re-size the area, select the area by checking the red
box on the upper-left corner of the area, the borders of the area will change to red color. Drag and
drop the area to a desired position. Drag the red dots at the edge of the area can re-size the area.
1
c.
Click the
Apply
button to save the settings.
d.
You can follow the steps above to configure more areas. Up to 4 areas can be configured.
e.
You can click the
Clean All
button to remove all the areas. To remove a certain area, select the area
by checking the red box on the upper-left corner of the area, and then click the
Clear
button.
Note:
The configured areas should not be too narrow or small in order to enhance the
detection rate.