USER MANUAL > TRACER-CENTERER-BLOCKER CONFIGURATION
Mr Blue 2.0 > v4.0 -09.16
115
10.
1.
2.
3.
4.
I prepare edging - I center
Once the modification is made, press
to return to the work screen.
b. Decentration mode
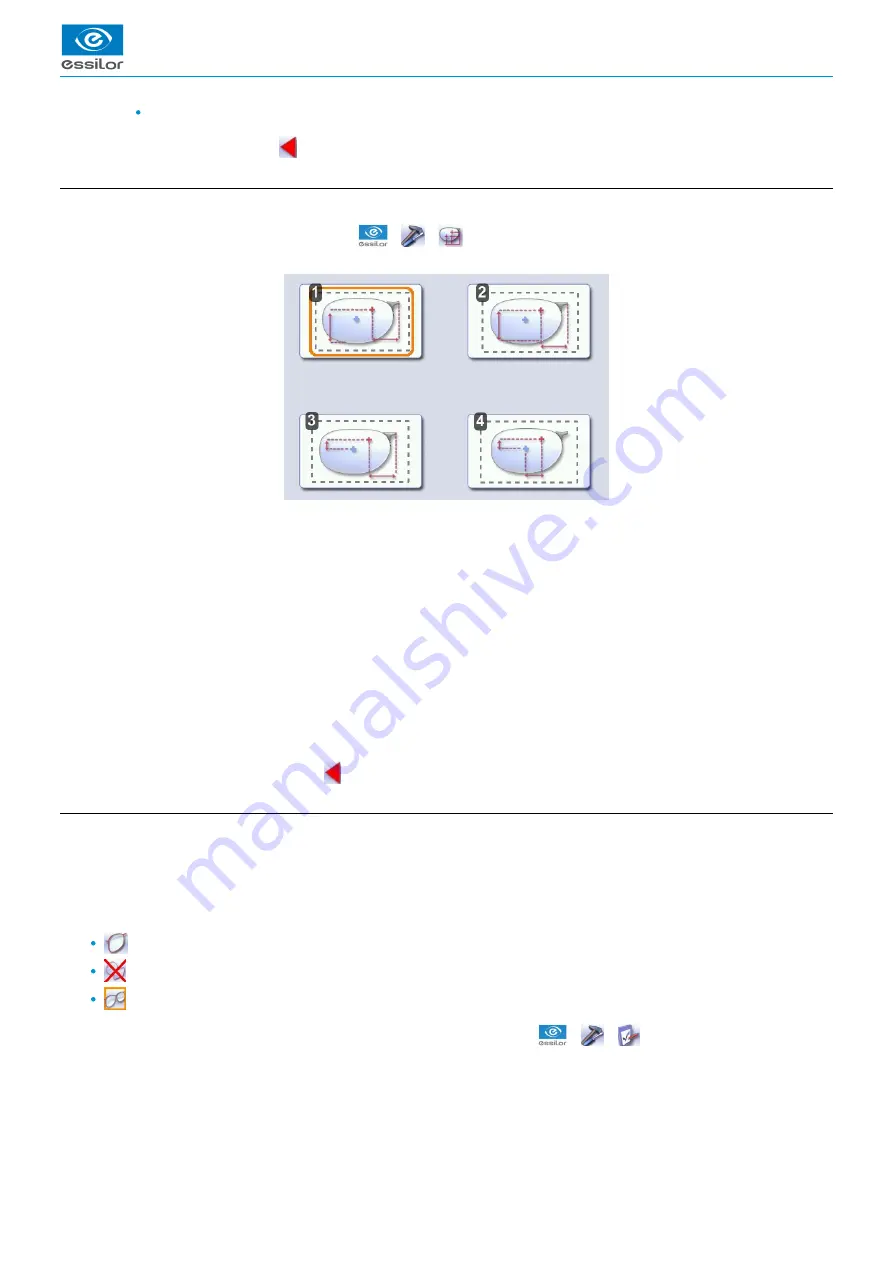
This menu enables you to select a default input mode for decentration data.
To access this menu from your work screen, select
>
>
.
The following screen is displayed:
Boxing mode (½ PD + Boxing Height)
The wearer's pupillary height is calculated in relation to the lowest point on the frame.
Datum mode (½ PD + Datum Height)
The wearer's pupillary height is calculated in relation to the point of intersection with the frame.
ΔY mode (½ PD + ΔY)
ΔY: This value corresponds to the difference in height between the boxing center of the shape and the center of the wearer's
pupil.
ΔX + ΔY mode
ΔX: This value corresponds to the horizontal distance between the boxing center of the shape and the center of the wearer's
pupil.
ΔY: This value corresponds to the difference in height between the boxing center of the shape and the center of the wearer's
pupil.
Once the modification has been made, press
to go back to the work screen.
c. Action bar
This menu enables you to customize the action bar according to your requirements. You can deactivate certain options that you do
not use so that they no longer appear in the choices of jobs (tracing and centering screens) and by selecting other default options
(press and hold)
Customizing the action bar
Press an option button several times to change its status in the tracing or centering screen:
Option activated: the option can be selected in the rolling menus on the action bar.
Option disabled: the option is no longer displayed in the action bar.
Option circled in orange: the option is displayed and selected by default in the action bar (press and hold).
To access the customization menu of the action bar from your work screen, select
>
>
.
The following screen is displayed:
Summary of Contents for Mr Blue 2.0
Page 1: ...User Manual ...
Page 2: ......
Page 6: ...USER MANUAL CONTENTS ...
Page 8: ...USER MANUAL INTRODUCTION 8 Mr Blue 2 0 v4 0 09 16 ...
Page 9: ...I FIRST STEPS WITH MR BLUE 2 0 ...
Page 10: ...USER MANUAL FIRST STEPS WITH MR BLUE 2 0 10 Mr Blue 2 0 v4 0 09 16 ...
Page 17: ...II TRACING ...
Page 18: ...USER MANUAL TRACING 18 Mr Blue 2 0 v4 0 09 16 ...
Page 36: ...USER MANUAL TRACING 36 Mr Blue 2 0 v4 0 09 16 ...
Page 37: ...III CENTERING A LENS ...
Page 38: ...USER MANUAL CENTERING A LENS 38 Mr Blue 2 0 v4 0 09 16 ...
Page 82: ...USER MANUAL CENTERING A LENS 82 Mr Blue 2 0 v4 0 09 16 ...
Page 83: ...IV MODIFYING THE LENS SHAPE ...
Page 84: ...USER MANUAL MODIFYING THE LENS SHAPE 84 Mr Blue 2 0 v4 0 09 16 ...
Page 91: ...V PREPARING A DRILLED JOB ...
Page 92: ...USER MANUAL PREPARING A DRILLED JOB 92 Mr Blue 2 0 v4 0 09 16 ...
Page 103: ...VI PREPARING LENS EDGING ...
Page 104: ...USER MANUAL PREPARING LENS EDGING 104 Mr Blue 2 0 v4 0 09 16 ...
Page 108: ...USER MANUAL PREPARING LENS EDGING 108 Mr Blue 2 0 v4 0 09 16 ...
Page 109: ...VII TRACER CENTERER BLOCKER CONFIGURATION ...
Page 110: ...USER MANUAL TRACER CENTERER BLOCKER CONFIGURATION 110 Mr Blue 2 0 v4 0 09 16 ...
Page 119: ...VIII MAINTENANCE SERVICING ...
Page 120: ...USER MANUAL MAINTENANCE SERVICING 120 Mr Blue 2 0 v4 0 09 16 ...
Page 134: ...USER MANUAL MAINTENANCE SERVICING 134 Mr Blue 2 0 v4 0 09 16 ...
Page 135: ...IX M EYE SIGN AND M EYE TOUCH ...
Page 136: ...USER MANUAL M EYE SIGN AND M EYE TOUCH 136 Mr Blue 2 0 v4 0 09 16 ...
Page 139: ...TECHNICAL DATA ...
Page 142: ...USER MANUAL TECHNICAL DATA 142 Mr Blue 2 0 v4 0 09 16 ...
Page 143: ...GENERAL INFORMATION ...
Page 147: ...GLOSSARY ...
Page 150: ...USER MANUAL GLOSSARY 150 Mr Blue 2 0 v4 0 09 16 ...
Page 151: ...USER MANUAL GLOSSARY Mr Blue 2 0 v4 0 09 16 151 ...


