14
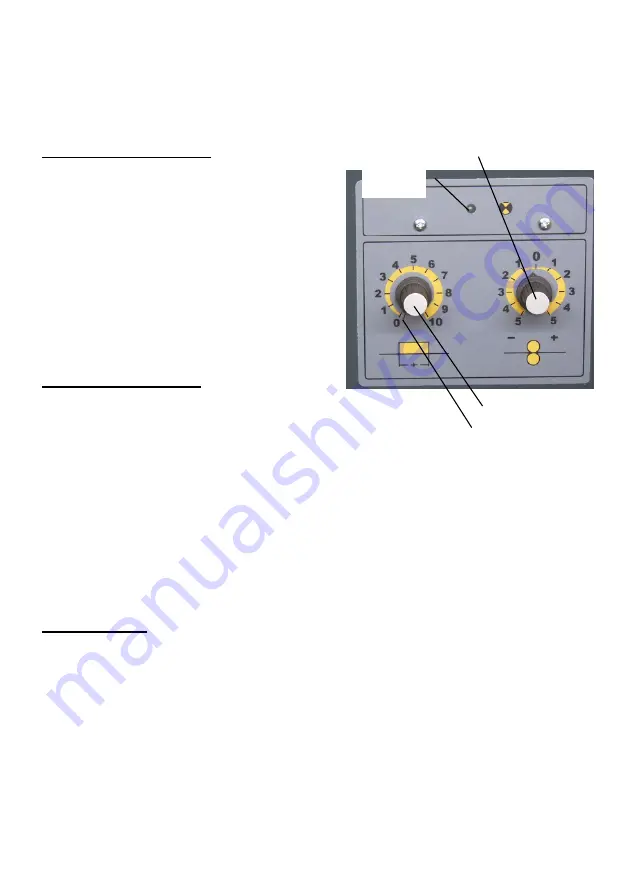
wire feed speed and one for the spot welding timer, the later combining two functions: for
continuous welding this knob must be turned to the extreme left, where a “click” should be
noticeable. To use the spot timer (see below) turn this timer clockwise to override the built-in switch
and set the desired spot time with this control (see spot welding section).
Setting the wire speed
Set the voltage and wire feed controls to the
approximate outputs to suit the thickness of the
materials to be welded. Some experimentation may
be required for operators not conversant with the
MIG
welding
process.
Your
welding
set
synchronizes the wire feed speed automatically with
the voltage setting. As the wire speed is also
depending upon wire size, shielding gas and welding
position, a manual fine adjustment may be necessary
either. Always ensure that the wire feed speed is set
correctly, as this is an important factor for a perfect
welding result.
Continuous Welding
Hold the gas nozzle about 5-10mm from the
workpiece. At this distance the gas shield is most
effective and the arc just about the right length (4-
7mm). A short arc produces greater penetration
which makes it more suitable for butt welding. A longer arc produces less penetration and a wider
weld bead and should be employed for capping runs in a multiple pass weld.
Set the machine to normal (continuous) welding as explained above. Press the torch switch and the
wire will start to feed, the shielding gas will flow and the arc will strike as soon as the wire gets
contact with the work-piece. Releasing the torch switch will immediately stop the arc and wire feed.
Using the wire feed speed control, adjust for a "Crisp" sounding arc. It may be necessary to adjust
both voltage and wire feed settings for optimum results. Low wire feed setting causes a long drawn
out arc and spattering. High wire feed speed causes a stubbing effect and an unstable arc.
Spot Welding
For spot welding two overlapping pieces of metal prepare the welding equipment as described:
•
Remove the standard gas nozzle from the torch and refit with a spot welding gas nozzle.
•
switch the voltage selector to a high setting
•
turn the wire feed speed control knob higher as normal
•
set the mode to spot welding (explained above). Adjust the spot welding time to suit the
thickness of the material to be welded.
•
some experimentation may be required in the voltage, wire feed and timer settings to obtain
optimum results
To make a spot weld push the spot welding gas nozzle firmly on to the workpiece and depress and
maintain the torch switch. The welding machine will then operate for the time as set on the spot
welding timer. When the spot weld is completed release the torch switch and repeat the process as
Wire feed speed
Spot timer
Normal Welding
Operation
Indicator


