background image

ELite 5, User  Manual 
 

Page 50 of 159 


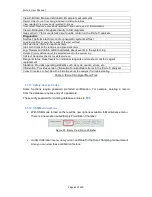
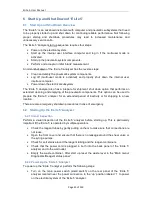
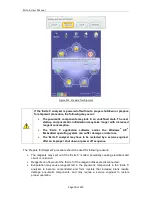
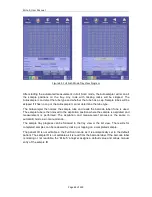
Figure 312. Prepare for shipment


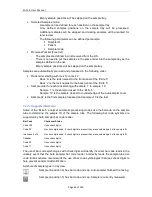
If the ‘ELite 5’ analyzer is powered off without a proper shutdown or prepare 
for shipment procedure, the following may occur: 

  The pneumatic components may lock in an undefined state. The next 

startup  and  pneumatic  initialization  may  take  longer  with  increased 
reagent consumption. 

  The  ‘ELite  5’  application  software  and/or  the  Windows

®

  XP

®


Embedded operating system can suffer damage or data loss. 

  The ‘ELite 5’ analyzer may have to be restarted by a service engineer 

after an improper shut down or power off sequence. 


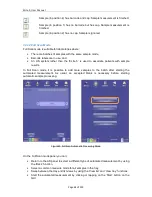
The ‘Prepare for Shipment’ procedure should be used for following reasons: 

  The reagents may spill out if the ‘ELite 5’ is tilted, potentially causing electrical short 

circuit or corrosion. 

  Reagents can flow out of the ‘ELite 5’ if the reagent intakes are disconnected. 

  Evaporation  may  cause  reagents  left  in  the  pneumatic  components  in  the  ‘ELite  5’ 

analyzer  to  become  concentrated  and  form  crystals  that  increase  blank  results, 
damage  pneumatic  components,  and  may  require  a  service  engineer  to  restore 
proper operation. 

Summary of Contents for ELite 5

Page 1: ...Erba Lachema s r o Kar sek 2219 1d 621 00 Brno CZ ELite 5 Hematology Analyzer USER MANUAL INS00068...

Page 2: ...d description of operation and use of the analyzer for laboratory purposes Despite careful revision and multiple grammar and content control mistakes can still be present in this manual Erba Lachema m...

Page 3: ...t indirect or consequential damages or delay resulting from the improper use or application of the product or the use of parts or accessories not approved by Erba Lachema or repairs by people other th...

Page 4: ...ampler Package 17 3 1 3 Small Sample Package optional 17 3 2 Connecting the reagents 18 3 3 Power connection 18 3 4 Connections to the peripherals 18 3 5 Environmental conditions 18 3 6 Visual inspect...

Page 5: ...tering Information 38 5 7 The Menu System 38 5 7 1 Primary Menu Items 38 5 7 2 Starting a Manual Single Tube Measurement 38 5 7 3 Start Automated Measurements 39 5 7 4 Access the Database 39 5 7 5 Ini...

Page 6: ...Result Display 72 7 6 Printing Reports 72 7 7 The Measurement Process 72 8 Result Interpretation 74 8 1 The Result Screen 74 8 2 Sample Identification Information 74 8 3 Parameter Information 75 8 3...

Page 7: ...s 104 13 1 Customize Settings 104 13 2 Laboratory Settings 105 13 3 External Devices 106 13 4 System Settings 107 13 5 Units 108 13 6 Printer Settings 109 13 7 Profile Limits Settings 110 13 8 X B Set...

Page 8: ...yzer Even With Open Front Panel 136 18 5 Needle Mechanics Vertical Motor Mvert Problems 136 18 5 1 The Needle Carriage Keeps Dropping Back Down At Initialization 136 18 6 Shear Valve SV Related Errors...

Page 9: ...20 4 2 Technical Data 145 20 4 3 Performance Data 148 20 4 4 Reagent System 151 20 4 5 Tab File Format 152 20 5 Fluidic System 153 20 6 Summary of Cleaning Products and Procedures for Elite Hematology...

Page 10: ...n irritation Warning General warning of possible hazard conditions Sharp needle warning The sampling needle may be a hazard to the operator 1 3 General Precautions The analyzer weighs 35kg 77lbs Pleas...

Page 11: ...ling and disposal of these materials The ELite 5 is designed for laboratory operation Mobile operation is not supported Operate ELite 5 within the ambient temperature range described in section 1 4 Th...

Page 12: ...rs radars centrifuges X ray devices fans etc This analyzer is designed to be safe for transient voltages to INSTALLATION CATEGORY II and POLLUTION DEGREE 2 1 6 Space Requirements It is important to in...

Page 13: ...ELite 5 User Manual Page 13 of 159 Figure 1 ELite 5 with Autosampler Space Requirements...

Page 14: ...te 5 with optional Autosampler weighs 47Kg 104 lb Adding an external keyboard printer etc can bring the total weight up to 60 Kg 132 lb If you decide to store the reagents on the same surface then the...

Page 15: ...sonal protective when operating the ELite 5 and handling blood reagents and waste 1 9 Known Limitations The ELite 5 is not intended for analysis of animal blood samples Anti coagulated and homogenized...

Page 16: ...alyzer If you have additional questions regarding the ELite 5 please ask for manufacturer support through your sales representative Erba Lachema makes every effort to provide excellent support and up...

Page 17: ...ite 5 analyzer Final Check Report Please inform your Sales Representative if any item is missing or damaged Retain the original ELite 5 analyzer packaging for future transportation and storage 3 1 2 T...

Page 18: ...ons to the peripherals If you plan to connect any external devices printer host computer etc to ELite 5 then prior the installation please check the possible cable paths If it is necessary then make a...

Page 19: ...n the housing of the Autosampler The transparent cover opens and closes smoothly The sample tray and the racks have no visible damage 3 7 Moving to the selected location Check the presence of all nece...

Page 20: ...t tubes to the ELite 5 o Use the supplied connecting tubes and special bottle caps o Be sure that the color on each tube cap and connector in the back of the instrument match Connect the reagent conta...

Page 21: ...is field upgradeable to ensure up to date operation An automatic optional Autosampler is available sold separately for automated processing up to 100 sample tubes for increased laboratory efficiency T...

Page 22: ...en printout database and LIS transmission Table 1 ELite 5 Analyzer Parameters 4 1 2 Approved Reagents and Control Materials Always use reagents control and calibration materials that are recommended a...

Page 23: ...nual Page 23 of 159 HEM00003 Erb Dil 5P 20 l Additional cleaning solutions use as needed HEM00017 Erba Clenz 1 l HEM00016 Erba Hypoclean 1 l For package insert for reagents and cleaning solutions plea...

Page 24: ...e at a fixed rate Figure 4 Volumetric Impedance Method A constant direct current flows between the electrodes on either side of the aperture Each cell passing through the aperture causes a change in t...

Page 25: ...r diluent moving through a flow cell The cells scatter light as they flow through the path of the laser beam An optical detector senses changes in the intensity of the scattered laser light which are...

Page 26: ...tured by optical sensors providing the ELite 5 analyzer with two independent measurements for each cell crossing the path of the laser beam Figure 8 Cellular Light Scatter The light scatter data are g...

Page 27: ...ELite 5 User Manual Page 27 of 159 Figure 9 4DIFF Scatter Diagram...

Page 28: ...th the sample rotor Automatic processing can be resumed after stat sample processing is complete The START button allows easy one hand operation of the ELite 5 analyzer The color of the START button i...

Page 29: ...l 5P diluent Orange 1 connector Erba Diff 5P Yellow 1 connector Erba Lyse 5P Red 2 connectors Waste Main board back panel I O Ports these are the back panel computers of the ELite 5 analyzer main comp...

Page 30: ...process Small Measure buffer is a vacuum buffer used for impedance measurement Sheath buffer is a reservoir for Erba Dil 5P diluent for optical measurements Diff 5P buffer is a reservoir for Erba Diff...

Page 31: ...a blood sample from the sample tube Horizontal vertical motion unit positions the aspiration needle Washing head cleans the aspiration needle to prepare for the next sample Sample rotor holds the samp...

Page 32: ...onal Instruments which have the small sample module SSM installed can be used for taking sample from a small amount of whole blood sample which is not enough for normal sampling SSM measurements are o...

Page 33: ...e with Pre dilution chamber In small sample mode there is no possibility using the Auto Sampler It is working only in manual feeding mode through the sample rotor Small Sample Mode is NOT a cap pierce...

Page 34: ...touch screen The surface material is moderately resistant to liquids Avoid touching the screen with wet fingers or allow liquids to come in contact with the screen or the surrounding area If you find...

Page 35: ...dismiss the on screen virtual keyboard and complete the data entry using the external keyboard 5 5 Using the On Screen Virtual Keypads There are three types of virtual on screen keypads Alpha numeric...

Page 36: ...ELite 5 User Manual Page 36 of 159 Figure 18 Sticky Shift and Symbol Buttons Figure 19 Numeric Virtual On screen Keypad Figure 20 Date Virtual On Screen Keypad...

Page 37: ...powered up Figure 21 Graphical User Interface Sections 5 6 1 Quick Links The upper part of the GUI is always visible during all operations and presents several quick link buttons Selecting one of the...

Page 38: ...active for that field Information can be entered using the virtual on screen keypad or with an optional external keyboard 5 7 The Menu System The graphical user interface of the ELite 5 analyzer has...

Page 39: ...ted samples mode o Remote worklist mode Define sample parameters the parameter list depends which one of the three sample modes is selected Monitor the progress of the automated measurements View the...

Page 40: ...screen The Autosampler control panel allows you to see whether the Autosampler is operational and perform an Autosampler initialization See section 7 4 3 6 for more details about the Autosampler contr...

Page 41: ...t whether to automatically transmit results each time a sample is processed LIS Select Ethernet LIS connection IP IP address of Ethernet based LIS host computer listening port Port Port number of Ethe...

Page 42: ...mbers Prime Prime one or all reagent reservoirs Fill Fills the fluidic components of the system with reagents Show MS On Screen Keyboard Brings up a vertical keyboard Touch screen Calibrate the touch...

Page 43: ...tem log Self test Navigates directly to self test screen Reagent status Reset levels for individual reagents and waste or all for reagent replacement Statistics Provides operating statistics such as c...

Page 44: ...w line which is indicating the state on off of the Small Sample Mode In Self test the presence of Microdilutor is also indicated In measurement a new option will appear There is a square you have to m...

Page 45: ...he pneumatic components This option can be used to prepare the ELite 5 analyzer for an extended period of inactivity or for shipping to a new location There are also emergency shutdown procedures in c...

Page 46: ...tion Figure 27 Start Up Logo Screen The following sequence of events takes place after enabling the standby switch The internal computer starts displaying the EPIA logo in a rotated way The embedded W...

Page 47: ...to be initialized and a blank measurement run and accepted To start the pneumatic system and run a blank measurement click or tap the Measure icon with the single test tube graphic on the top left cor...

Page 48: ...ELite 5 was not in use for an extended period of time the start up of the pneumatic system components can take significantly longer time and require more blank measurements To prevent these problems u...

Page 49: ...erating system are shut down The analyzer saves all settings closes the file system and database and automatically shuts down the internal user interface computer The ELite 5 analyzer may ask to perfo...

Page 50: ...e or data loss The ELite 5 analyzer may have to be restarted by a service engineer after an improper shut down or power off sequence The Prepare for Shipment procedure should be used for following rea...

Page 51: ...Do not power off the analyzer during these steps unless the system indicates that is safe to do so Step 1 The analyzer will ask you to disconnect the reagents from the reagent connectors on the back...

Page 52: ...rocess is completed These droplets will not cause any malfunction during transportation or the next start up procedure The preparing for shipment procedure cleans the Small Sample Mode related lines t...

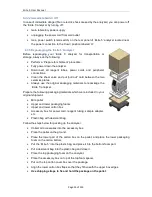
Page 53: ...nal packaging materials to repackage the ELite 5 analyzer Prepare the following packaging materials which were included in your original shipment Mini pallet Upper and lower packaging foams Upper and...

Page 54: ...ps or band to hold the package fixed on the pallet otherwise the analyzer can be seriously damaged during shipping Do not apply excess force to the straps because that may break the carton box and dam...

Page 55: ...n vial mode Can be handled by the tube centralizing mechanisms on the ELite 5 analyzer It is suggested to contact your sales representative before using the new sample tube type For automated sample h...

Page 56: ...0 31 inches or 0 3 to 0 5 ml of sample volume Make sure that the sample tube is filled to the sample level line indicated by the tube manufacturer The anticoagulant not only prevents the coagulation...

Page 57: ...OTE Alternate 1 and Alternate 2 are sample modes that are different than Human Male and Female and have user definable normal ranges Control QC mode the hematological parameters of QC materials are kn...

Page 58: ...panel is checked if you are manually presenting Sarstedt Monovette tubes in the sample rotor Needle damage tube damage and spilled blood may result if Sarstedt Monovette tubes are presented and this...

Page 59: ...iod of time After performing and accepting a blank measurement the other modes will be available Control QC sample is expected QC measurements initiated from this menu will not be saved into the QC da...

Page 60: ...shed cleaning and preparing for the next sample The Start button will change to green indicating it is ready to start the next sample measurement On the result screen you have the following options Yo...

Page 61: ...ine in physiological saline Please ensure that the sample is well mixed and placed on the analyzer immediately after preparation Step 2 Select the pre dilute mode on the analyzer Step 3 Place the dilu...

Page 62: ...n the AS panel by using the AS quick link at the top of the screen From the AS panel you can initiate automated sample measurement in 3 modes Full Scan mode The Autosampler will scan the whole sample...

Page 63: ...mple 10 is the sample closest to rounded edge of the Autosampler cover Sample A1 is the first sample processed and sample J10 is the last 7 4 3 1 Supported Barcode Some of the ELite 5 analyzer automat...

Page 64: ...o associate patients with sample results In Full Scan mode it is possible to add more samples to the batch after starting the automated measurement As usual an accepted blank is necessary before start...

Page 65: ...ne is used The sample tube is then moved to the aspiration position where the sample is aspirated and measurement is performed The aspiration and measurement process is the same in automatic mode as i...

Page 66: ...le on the sample tray of the Autosampler After restarting the full scan process the ELite 5 moves the Autosampler to the last processed position and continues scanning from there 7 4 3 3 Free List Mod...

Page 67: ...you can Return to the AS panel to select a different type of automated measurement by using the Back function Add or remove list items Define the following parameters for the new list items Measure mo...

Page 68: ...attached The automated mixing aspiration and analysis process is the same as the Full Scan Mode and the progress can be followed in tray or list view The main difference between the Free List mode an...

Page 69: ...des for different normal ranges Data security is a concern Selected Samples mode can also be used to rerun only certain samples in a sample tray already processed in one of the other two modes Samples...

Page 70: ...automatic processing to analyze the stat sample s without having to wait until the entire sample tray has been processed To interrupt automatic processing for stat specimens perform the following ste...

Page 71: ...lowing is a list of messages from the Autosampler Home message o Response after a successful reset o HOME_XX YY The XX YY is the software revision number VT zzzzzzz XY o Vacutainer style tube detected...

Page 72: ...play Figure 51 Results Display and Magnified Scatter Plot Comparison of parameters to the normal range can be displayed numerically or graphically See section 13 7 for more information on display of n...

Page 73: ...and free of major bubbles as it is moved to the shear valve The shear valve separates the primary sample into further samples of exact volumes of blood that are distributed to provide dilutions for th...

Page 74: ...rmal range linearity and high blank flags are also displayed in this area 3 Histograms and scatter diagrams visual elements that provide information about the measured population dispersion These are...

Page 75: ...r information area of the ELite 5 analyzer result screen lists information on 26 parameters Figure 54 Parameter Information Display Each row shows the parameter name value flags normal range linearity...

Page 76: ...eter was higher than the blank limit Flag Meaning Hierarchy Color Code The blank value of the related primary parameter is high Middle N A Table 7 High Blank Flag 8 3 1 Scatter Diagrams and Histograms...

Page 77: ...e RBC and PLT histograms can be zoomed Discriminators thresholds are displayed with red color Platelets are located on the leftmost part of the RBC histogram to the left of the red discriminator The P...

Page 78: ...The ELite 5 analyzer provides Warning flags Morphological flags and Interpretive messages in the Warnings panel The following tables describe these flags and messages in detail It also provides guidan...

Page 79: ...orm cleaning of the ELite 5 Repeat blank measurement See chapter 6 2 5 Pneumatics start and blank measurement Treat WBC result as reduced reliability b RBC blank is high RBC RBC blank high limit Check...

Page 80: ...ment If EO EO NEU NEU results reported then treat them as reduced reliability If not all the parameters reported or the sample is predicted as pathological then perform a manual count on a stained sme...

Page 81: ...erform a blank measurement If noise still appears make a flow cell backwash n Low angle noise The flow in the optical head is not clean or contains bubbles Perform a blank measurement If noise still a...

Page 82: ...t or perform a manual count on a stained smear V WBC vacuum warning There is a partial clogging or leakage in the RBC part of measurement system A faulty worn out pump can create vacuum errors as well...

Page 83: ...inated reagents Perform Clean process Perform Hard Clean process Table 8 Warning Flags Morphological flag Morphological flags are raised when the presence of morphologically abnormal cell types such a...

Page 84: ...phocytosis LYM Monocytosis MON Eosinophilia EOS Basophilia BASO Anemia RBC or RBC Polycythemia RBC or RBC Microcytic RBC MCV or MCV Macrocytic RBC MCV or MCV Hypochromic MCHC or MCHC Hyperchromic MCHC...

Page 85: ...e provides a powerful easy to use method of storing accessing and managing patient and sample result information The database of the ELite 5 analyzer is capable of storing up to 100 000 measurement co...

Page 86: ...viewport into the large amount of information inside your database You can scroll the database view to bring desired information into view The ELite 5 analyzer provides several powerful and easy to us...

Page 87: ...he same column heading again changes the ascending or descending order of values in the column 9 4 Manual Selection of Database Records Clicking or tapping on a row in the database display single sele...

Page 88: ...ton on the database panel will display the detailed results for the first record in the selection Clicking or tapping the Up or Down buttons on the details screen displays the details of the next reco...

Page 89: ...creen date keyboard All records analyzed on the date entered will be selected Select interval The two Change buttons allow entry of a start and end date All records on the start date the end date and...

Page 90: ...d database record files to load and view Select by performs the select by database function to select a group of imported records according to criteria entered by the operator Details views the detail...

Page 91: ...an available USB port on the back panel of the ELite 5 analyzer Select the directory to store the exported data and press the Ok button to start the export The file format of exported data is an inter...

Page 92: ...iles to help diagnose a service issue A confirmation password is required to save raw data The default factory set confirmation password is 555 This password can be changed only by Erba Lachema certif...

Page 93: ...n factors The new calibration factors take effect once they are accepted by the operator If you are using a human whole blood as a calibrator the calibration target values must be measured on a refere...

Page 94: ...re ensure that the ELite 5 pneumatic system is started up and that a valid blank measurement has been accepted Perform the following steps Prepare a sample tube with commercial calibration material or...

Page 95: ...on factors and the coefficient of variation CV of the sample runs for each parameter are also displayed Select Accept to replace the current calibration factors with the accepted factors Selecting Dis...

Page 96: ...the Delete button The system will ask you for a confirmation password to avoid accidental deletion of calibration data The confirmation password is set at the factory to 555 and can be changed by you...

Page 97: ...trol materials must be well mixed before use The ELite 5 analyzer does not limit the number of QC material lots or the number of QC measurement runs that are stored in the control database Each QC mea...

Page 98: ...value and tolerance range field empty Press the Save reference button after data entry is completed Tapping the Load QC reference button will allow filling QC material data electronically using a fil...

Page 99: ...see a list of QC lot references stored in the ELite 5 analyzer control database Target values and ranges can be viewed for any stored QC references 11 4 View QC Data Selecting View QC data displays QC...

Page 100: ...ch are generally stable For example the MCV MCH and MCHC values show the proportion between the blood components These values fall within narrow limits in human blood therefore these values are able t...

Page 101: ...te 5 User Manual Page 101 of 159 11 7 View X B diagrams View X B diagrams displays X B charts for MCV MC and MCHC View X B data function displays X B information in a table format similar to view QC d...

Page 102: ...t to change existing patient information Details displays patient data in a read only mode The Patient panel can also be accessed by clicking or tapping the Name or Patient ID field in the Measurement...

Page 103: ...ELite 5 User Manual Page 103 of 159 Figure 75 Edit Patient Panel The Save function saves any changes made To discard any changes made simply click or tap the Back button...

Page 104: ...user option is enabled Clicking or tapping one of the buttons in the Settings panel displays the selected panel where settings changes can be made Each panel has a Back and Save button The Save butto...

Page 105: ...al1 and Graphical2 display modes to change the display method for parameters outside the normal ranges on the result screens and printed reports Sound volume modify the sound volume up or down On scre...

Page 106: ...nalyzer will use an Ethernet connection rather than a serial connection of this check box is checked IP the IP address of the external LIS computer should be entered here if an Ethernet LIS connection...

Page 107: ...and displays all measurement results stored in the ELite 5 database Use only Sarstedt Monovette tube from sample rotor check this check box to change the sampling depth for manually presented tubes a...

Page 108: ...layed units for the HGB and MCHC parameters Count unit Choose cells L or cells L to change the displayed units for the parameters in the table below Parameter Cells L Cells L WBC 103 L 109 L LYM 103 L...

Page 109: ...paper or uncheck to print on one side only This option is only available if your installed printer supports double sided printing Items in queue indicates how many printouts are currently waiting in...

Page 110: ...E Alternate 1 and Alternate 2 are sample modes that are different than Human Male and Female and have user definable normal ranges The control at the top of the panel selects one of the five sample mo...

Page 111: ...rn to the Settings panel or select Back to discard any changes and return to the Settings panel The following X B settings are available Lower and upper limit A parameter is usable in X B statistics i...

Page 112: ...with Administrator privileges can have access all over the system Only an administrator user can grant or revoke administrator rights Regular users have limited access to the system A regular user is...

Page 113: ...splay a time date settings panel Change the time and date as needed and select OK to save the new settings Click or tap Cancel to exit the Time Date settings without saving Figure 84 Time Date Setting...

Page 114: ...rform diagnostic procedures check the operational history of the instrument set or check the status of the reagents and view stored information about the system Click or tap the Diagnostics button on...

Page 115: ...86 Diagnostics By using the Load last self test function you can check the results of the previous self test sequence Self test checks parameters for the ranges defined below Big puffer time Generate...

Page 116: ...Laser off 0 0 05mV Laser on 0 10 0 45mV HGB head HGB Dark 0 3000 pulses HGB light 3000 60000 pulses Electrode Voltage 45 55V Current 620 680 A Offset 3 0 1mV Reagent lock Status UNLOCKED LOCKED NA Ava...

Page 117: ...nel displays the level of each of the on line reagents and waste containers It provides the means to reset the levels of each of the reagents in the event of a reagent container change The analyzer ha...

Page 118: ...peration Statistical data can be reset by a certified service engineer only F Figure 89 Statistics display 14 5 Information This menu item displays instrument specific data serial numbers SW versions...

Page 119: ...libration factors If the instrument has a problem the collect file will help the engineer to analyze the problem check the measurements and read the log file With this function the service engineer ha...

Page 120: ...lyzer like tubes valves chambers containers should be handled as a potentially biologically and chemical dangerous material Observe the related law and regulations regarding handling Follow the hospit...

Page 121: ...ed by the analyzer Right side covers sampling unit wash head and sampling needle You need to open the right side cover if the wash head needs to be cleaned or replaced After removing the cover potenti...

Page 122: ...es Cleaning Bleaching cleans the diluent buffer and the connecting tubes with external cleaner reagent introduced through the sample rotor This type of cleaning does not affect the optical head s flow...

Page 123: ...Fill initial filling of the system with reagents This must be performed PRIOR to first use of the instrument after installation or after the system has been drained for transportation or storage Show...

Page 124: ...ve Clean function to initiate the procedure Figure 94 Maintenance menu shear valve The ELite 5 asks for confirmation to start the procedure After clicking or tapping the OK button the ELite 5 empties...

Page 125: ...he upper disk of the shear valve because some attached tubes can get pulled Make sure that the thin tube connecting the shear valve and optical head is not pulled it can cause serious damage to the la...

Page 126: ...crew clockwise until it clicks into the lower part 11 Twist the axis thumbscrew until it stops The mechanical design of the thumbscrew prevents over tightening Figure 99 Reassembling the shear valve 1...

Page 127: ...n the 2 2 screws on the front and rear of the side panel The panel can be pulled off the analyzer Figure 100 Wash head Locate the sampling needle Be careful The sampling needle is sharp and can cause...

Page 128: ...EANING SOLUTION OTHERWISE THE RUBBER WILL HARDEN UP AND SMALL PARTICLES WILL FALL INTO THE SOLUTION WHICH CAN CAUSE CLOGGING IF ASPIRATED BY THE SAMPLING NEEDLE After this operation you can leave ELit...

Page 129: ...buffers keep regents sufficient for one measurement cycle The analyzer will warn the user when a reagent is about to run out An exclamation mark within a yellow triangle will be displayed by the reag...

Page 130: ...the new container Replace the old containers with the new ones Dispose of used containers according to local regulations When a reagent is replaced it is not enough to replace the external container...

Page 131: ...a warning message about this counter decreasing When the number available reaches zero the analyzer will not run more samples To increase the number of remaining measurements you have to upload measur...

Page 132: ...k measurements If you want to check whether the reagent path was contaminated during the reagent replacement then perform 4 5 blanks measurements before accepting the blank result The reagents from th...

Page 133: ...logging related flags are added systematically to measurement results After service actions service level maintenance Measurement results QC results are drifting perform hard cleaning Clog formation i...

Page 134: ...t of the times try to offer solutions or will try to resolve the problem and retry the current operation If this recovery process fails or the problem keeps coming back please contact your service eng...

Page 135: ...the shear valve Incorrect operation of cleaning of the system especially after long inactive periods of time can cause valves or tubes to get filled with somewhat dried salt These problems can be the...

Page 136: ...ing quality or amount of sample The wash head position relative to the needle and to the SR is not correct The wash head comes down too much and even if lifted leaves no room for the SR door to turn T...

Page 137: ...rvice 18 9 2 Touch Sensitive Surface Not Working Connect an external USB mouse o this will allow clicking on the screen elements o contact service for resolution of the problem 18 9 3 Touch Click Is I...

Page 138: ...nd that Blank PLT values are increasing and decreasing unprecedentedly please run a Hard Cleaning function Go to Main Menu Maintenance Tap the Hard Cleaning button to initiate the procedure You will n...

Page 139: ...age 139 of 159 19 Accessories The following items can be found along with the analyzer Power cord Reagent tube kit Cleaning tube kit Waste container 20L Cardboard box for waste container Sample tube a...

Page 140: ...0 0 11 Cleaning 6 7 0 7 133 Hard cleaning 6 7 0 7 144 2 Clean in SSM 6 7 0 7 138 Hard clean in SSM 6 7 0 7 154 Flow cell cleaning 0 0 63 Shear Valve cleaning 9 1 2 100 2 Offline overnight rinsing 6 7...

Page 141: ...99 103 l cells l cells l RBC 0 00 9 99 106 l cells l cells l HGB 0 300 g l g dl g l mmol l HCT 0 100 percentage absolute PLT 0 9999 103 l cells l cells l NEU 0 100 LYM 0 100 MON 0 100 EOS 0 100 BAS 0...

Page 142: ...ELite 5 User Manual Page 142 of 159 20 3 Printed Report Formats...

Page 143: ...ELite 5 User Manual Page 143 of 159...

Page 144: ...absolute RBC x MCV Mean Corpuscular Hemoglobin MCH pg fmol Average hemoglobin content of erythrocytes calculated from RBC and HGB values MCH HGB RBC Mean Corpuscular Hemoglobin Concentration MCHC g d...

Page 145: ...pulations 20 4 2 Technical Data 20 4 2 1 Main Unit Sample volume Closed and Open mode 110 l Sample small module only open mode 25 l Sample type Human whole blood K3 EDTA anticoagulant Tube Identificat...

Page 146: ...r Erba Hypoclean CC 100 ml Emergency cleaner Dilution ratios WBC BAS 1 170 RBC PLT 1 21250 4 DIFF 1 50 Sheath fluid Diluent Quality Control Levey Jennings charts QC database Flagging Pathological diag...

Page 147: ...elative humidity 80 Guidelines for transport The instrument in its export package should fulfill the following transport storage conditions Does not exceed 15 C 5 F for 24 hours Does not exceed a dry...

Page 148: ...4 7 103 l WBC 38 103 l NEU CV 5 87 4 NEU 47 LYM CV 8 35 6 LYM 15 MON CV 20 16 3 MON 5 3 EOS CV 25 11 EOS 1 5 BAS CV 40 2 4 BAS 1 NEU CV 5 NEU 30 LYM CV 8 LYM 15 MON CV 20 MON 5 EOS CV 25 EOS 1 5 BAS C...

Page 149: ...WBC 56 3 103 l RBC r 0 99 2 2 106 l RBC 6 3 106 l HGB r 0 99 68 8 g l HGB 173 g l HCT r 0 99 19 5 HCT 52 6 PLT r 0 98 12 5 103 l PLT 699 103 l NEU r 0 99 5 8 NEU 94 6 LYM r 0 99 2 5 LYM 79 5 MON r 0 9...

Page 150: ...103 l RBC r 2 0 95 0 4 106 l RBC 7 5 106 l HGB r 2 0 95 13 g l HGB 227 g l PLT r 2 0 95 10 103 l PLT 2000 103 l 20 4 3 4 Carryover Values and Ranges Carryover High to low effect Range WBC 0 5 or less...

Page 151: ...centration 20 4 4 2 Lyser Erba Lyse 5P WBC 5 Part Reagent for stromatolysis of RBC and quantitative determination of WBC 5 part differentiation LYM MON NEU EOS BAS and HGB concentration measurement of...

Page 152: ...09 TAB 0 TAB 0 TAB 80 2 TAB 4 1 TAB 15 7 TAB 0 TAB 0 TAB 1 83 TAB 63 TAB 33 3 TAB 181 8 TAB 34 4 TAB 190 TAB 75 8 TAB 16 TAB 17 TAB 16 3 TAB 43 TAB 8 9 TAB 0 02 TAB 7540 TAB 02 04 2009 16 11 13 TAB 4...

Page 153: ...ELite 5 User Manual Page 153 of 159 20 5 Fluidic System...

Page 154: ...used at any time Erba Clenz Cat No 50004375 1 L Strong enzymatic cleaning solution Recommended for systems with high workload for more effective cleaning Daily and or as needed None Can be used at any...

Page 155: ...er mode to call the shutdown procedure The user is able to log out during pneumatic activities Naming conventions Number of digits on the QC is different The length of some language nodes are longer t...

Page 156: ...8 134 135 D diluent 144 Diluent 30 123 140 146 151 dilutor 135 137 E EDTA 55 56 132 145 EOS 21 24 25 84 141 145 148 149 151 F flow cell 25 80 82 146 H hemoglobin 144 HGB 21 22 24 30 41 48 73 80 93 108...

Page 157: ...6 148 149 150 151 152 reagent 10 24 29 30 38 40 42 43 45 49 50 51 52 53 79 107 117 122 129 130 131 132 137 146 reagent consumption 50 52 117 S sample ID 35 38 57 58 60 62 65 69 70 75 sampling needle 1...

Page 158: ...acturer Erba Lachema s r o Kar sek 2219 1d 621 00 Brno Czech Republic Tel 420 517 077 111 e mail diagnostics erbamannheim com Website https www erbamannheim com en product support Contact your local t...

Page 159: ...ELite 5 User Manual Page 159 of 159 24 Appendix package inserts for reagents and cleaning solutions Revision 3 0 Date of Revision 07 2017 HEMA PI 27 17 C...

Page 160: ...ended for use with blood specimens collected by vein puncture in EDTA anticoagulant Specimens for hematological analysis may be stored for up to 8 hours at 15 to 30 C or up to 24 hours after collectio...

Page 161: ...r use with blood specimens collected by vein puncture in EDTA anticoagulant Specimens for hematological analysis may be stored for up to 8 hours at 15 to 30 C or up to 24 hours after collection when r...

Page 162: ...aboratory gloves when handling the reagent All body fluid samples should be considered potentially infectious materials Treat all blood and other potentially in fectious materials with appropriate pre...

Page 163: ...nded for use with blood specimens collected by vein puncture in EDTA anticoagulant Specimens for hematological analysis may be stored for up to 8 hours at 15 to 30 C or up to 24 hours after collection...

Page 164: ...s intended for use with blood specimens collected by vein puncture in EDTA anticoagulant Specimens for hematological analysis may be stored for up to 8 hours at 15 30 C or up to 24 hours after collect...

Page 165: ...i als Treat all blood and other potentially infectious materials with appropriate precautions Use gloves masks and gowns if blood exposure is anticipated Please refer to the MSDS associated with the r...

Reviews: