6.
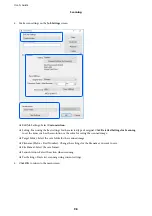
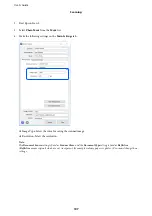
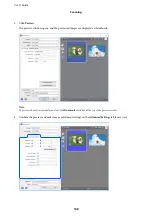
Set the file saving settings.
❏
Image Format: Select the save format from the list.
You can make detailed settings for each save format except BITMAP and PNG. Select
Options
from the list
after selecting the save format.
❏
File Name: Confirm the save file name displayed.
You can change settings for the file name by selecting
Settings
from the list.
❏
Folder: Select the save folder for the scanned image from the list.
You can select another folder or create a new folder by selecting
Select
from the list.
7.
Click
Scan
.
Related Information
&
“Placing Originals” on page 61
Scanning Photos or Pictures (Photo Mode)
Using
Photo Mode
in Epson Scan 2, you can scan originals with wide variety of image adjustment features that are
suitable for photos or pictures.
1.
Place the originals.
By placing multiple originals on the scanner glass, you can scan them all at the same time. Make sure there is a
gap of at least 20 mm between the originals.
User's Guide
Scanning
106

