6.
Press one of the
buttons.
The nozzle pattern prints.
7.
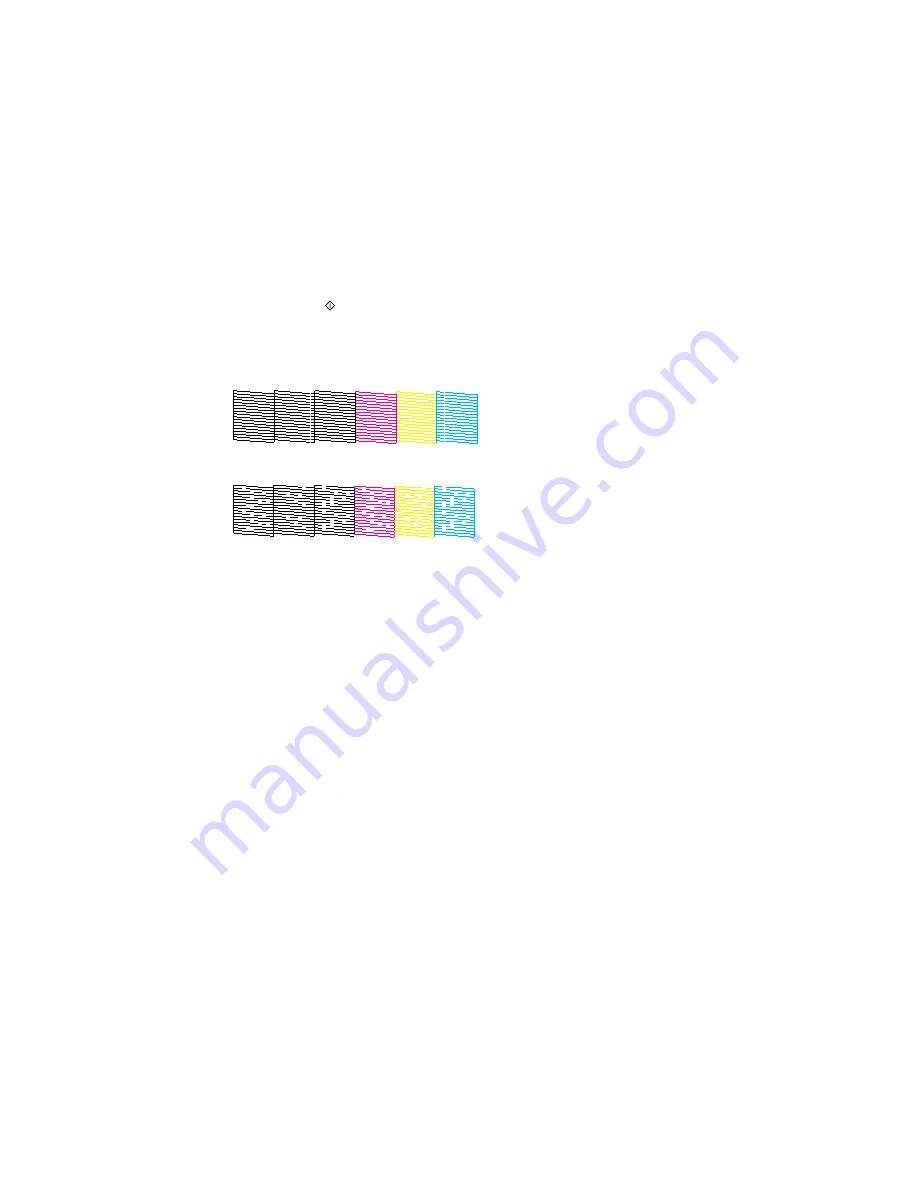
Check the printed pattern to see if there are gaps in the lines.
Print head is clean
Print head needs cleaning
8.
Do one of the following:
• If there are no gaps, select
Done
.
• If there are gaps or the pattern is faint, select
Clean the Print Head
and continue.
9.
Follow the instructions on the screen to clean the print head, check the nozzles, and repeat the
process as necessary.
If you don’t see any improvement after cleaning the print head up to 4 times, wait at least 6 hours. Then
try cleaning the print head again. If quality still does not improve, one of the ink cartridges may be old or
damaged and needs to be replaced.
Parent topic:
Print Head Nozzle Check
Related concepts
Print Head Cleaning
Related topics
Replacing Ink Cartridges and Maintenance Boxes
Loading Paper
Checking the Nozzles Using a Computer Utility
You can check the print head nozzles using a utility on your Windows or Mac computer.
1.
Load a few sheets of plain paper in the cassette (or in cassette 1 if your product has two cassettes).
252
Summary of Contents for WorkForce WF-3540
Page 1: ...WF 3540 User s Guide ...
Page 2: ......
Page 13: ...WF 3540 User s Guide Welcome to the WF 3540 User s Guide 13 ...
Page 37: ...4 Slide the edge guide to your paper size 37 ...
Page 41: ...1 Close the paper stopper and output tray if necessary 2 Pull out the paper cassette 41 ...
Page 42: ...3 Slide the edge guides outward 4 Slide the edge guide to your paper size 42 ...
Page 46: ...2 Pull out the paper cassette 3 Slide the edge guides outward 46 ...
Page 70: ...Parent topic Copying 70 ...
Page 129: ...129 ...
Page 156: ...1 Telephone wall jack 2 DSL filter 3 DSL modem ISDN connection one phone number 156 ...
Page 157: ...1 ISDN wall jack 2 Terminal adapter or ISDN router ISDN connection two phone numbers 157 ...
Page 158: ...1 ISDN wall jack 2 Terminal adapter or ISDN router 158 ...
Page 176: ...3 Select Fax Settings for Printer Select your product if prompted You see this window 176 ...
Page 185: ...3 Select Fax Settings for Printer Select your product if prompted You see this window 185 ...
Page 285: ...3 Carefully remove any jammed paper 4 Remove any jammed paper from the duplexer 285 ...
Page 286: ...5 Open the duplexer 286 ...
Page 287: ...6 Carefully remove any jammed paper stuck inside 7 Reattach the duplexer 287 ...
Page 290: ...6 Carefully remove any jammed pages in the direction shown 290 ...


