


53
7.
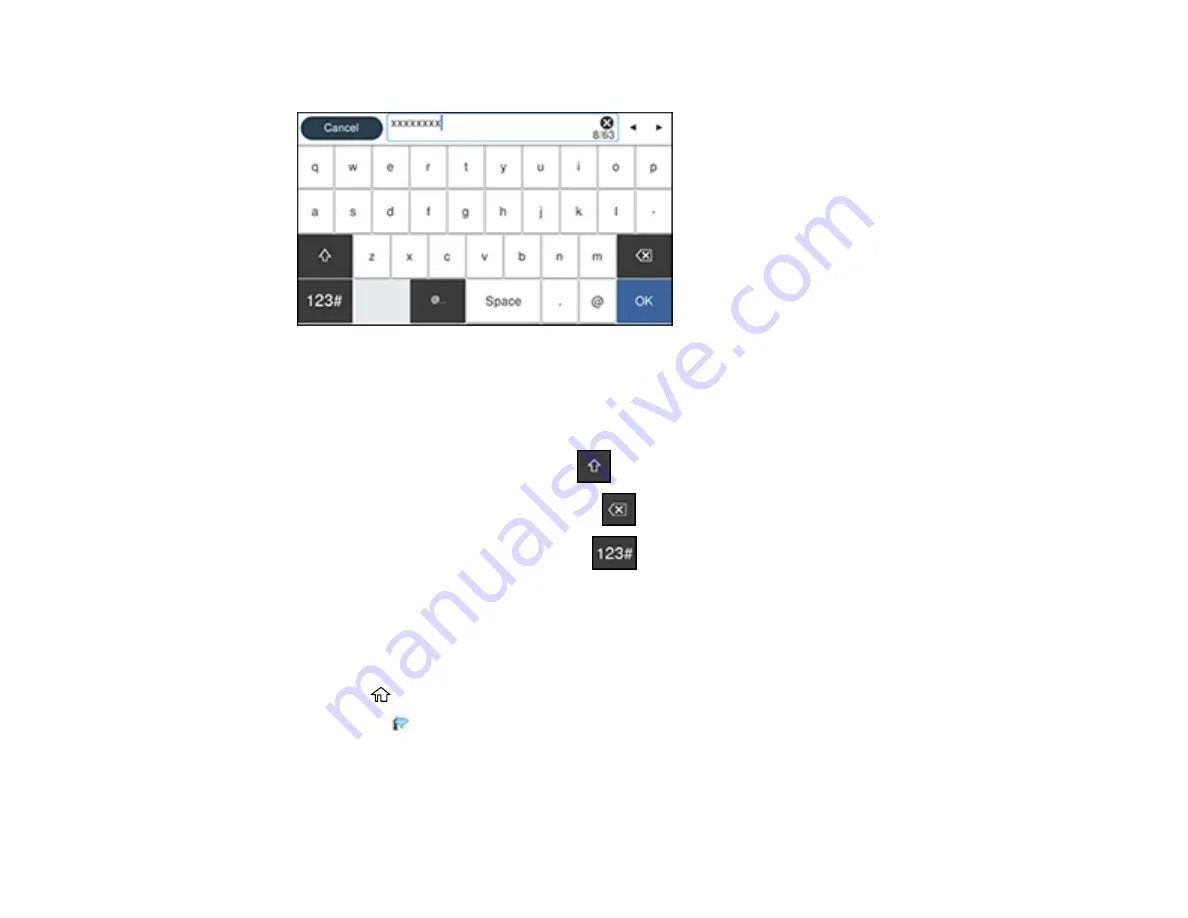
Select the
Password
field and enter your wireless password using the displayed keypad.
Note:
The network name and password are case sensitive. Be sure to correctly enter uppercase and
lowercase letters, and numeric or special characters.
• To move the cursor, press the left or right arrows.
• To change the case of letters, press
.
• To delete the previous character, press
.
• To enter numbers and symbols, press
.
• To enter a space, press
Space
.
8.
Press
OK
when you finish entering your password.
9.
Confirm the displayed network settings and select
Start Setup
to save them.
10. If you want to print a network setup report, select
Print Check Report
. (Otherwise, select
OK
.)
11. Press the
home button to exit.
You see the
icon on the LCD screen and should be able to connect to your product directly from
your computer or device, and then print. If you are printing from a computer, make sure you installed
the network software as described on the
Start Here
sheet.
Summary of Contents for WF-4820 Series
Page 1: ...WF 4820 WF 4830 Series User s Guide ...
Page 2: ......
Page 14: ......
Page 34: ...34 Product Parts Inside 1 Document cover 2 Scanner glass 3 Control panel ...
Page 49: ...49 Related topics Wi Fi or Wired Networking ...
Page 97: ...97 1 Open the document cover ...
Page 160: ...160 3 Select Scan You see a screen like this 4 Select Computer You see a screen like this ...
Page 176: ...176 You see an Epson Scan 2 window like this ...
Page 178: ...178 You see an Epson Scan 2 window like this ...
Page 192: ...192 You see a screen like this 2 Click the Save Settings tab ...
Page 197: ...197 You see this window ...
Page 251: ...251 Parent topic Printing Fax Reports ...
Page 293: ...293 Related tasks Loading Paper in the Cassette ...
Page 295: ...295 5 Open the document cover ...
Page 297: ...297 8 Open the ADF cover ...
Page 324: ...324 3 Open the ADF cover 4 Carefully remove any jammed pages ...


