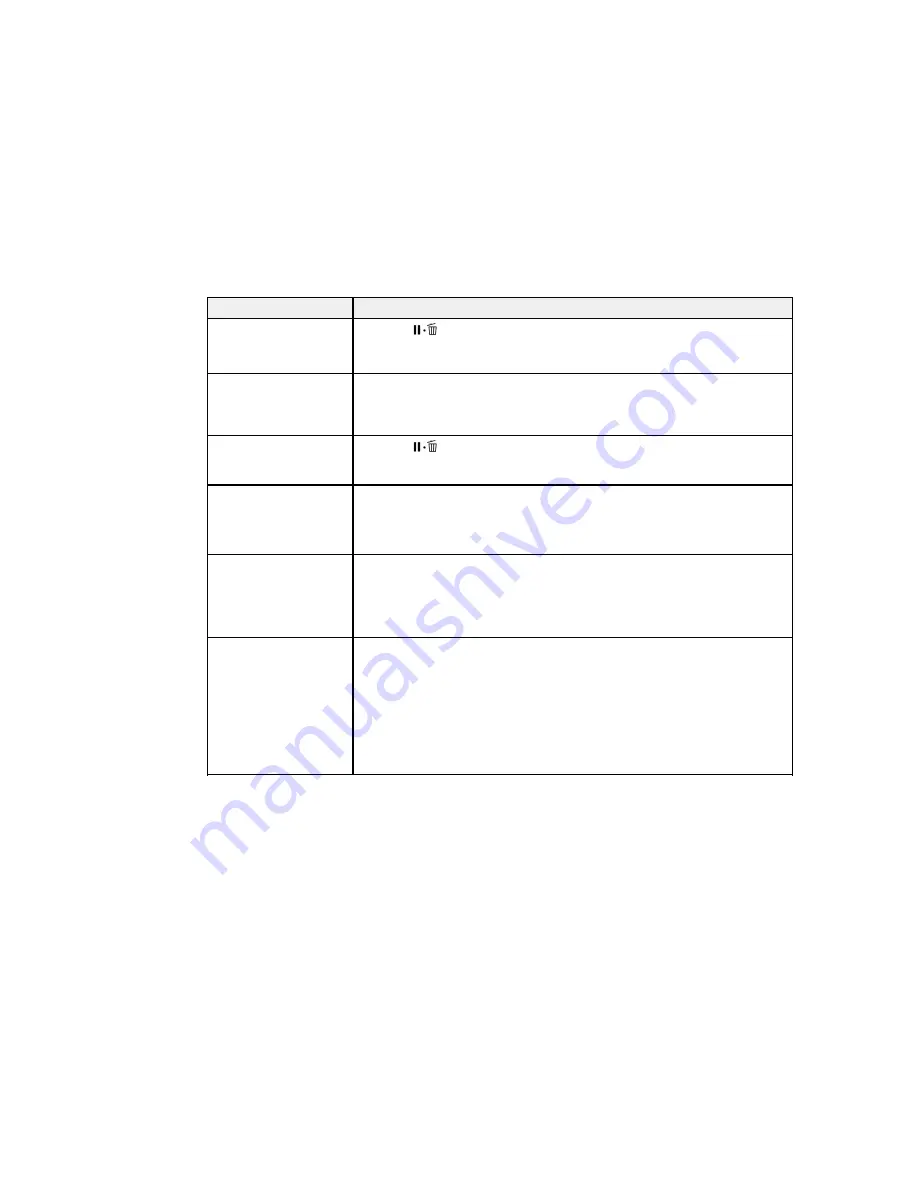
LCD screen message
Solution
Command Error
Press the
pause/cancel button and select
Job Cancel
. Make sure the
installed RIP software is compatible with the product.
Check print settings on
RIP.
F/W Install Error
Turn off the product, wait a few minutes, and turn it on again. Then reinstall
the firmware again.
Firmware update failed.
If this message persists, contact Epson for support.
Restart the printer.
Auto Take-up Reel Unit
Press the
pause/cancel button and select
Job Cancel
to cancel printing.
stopped.
Then set the
Auto
switch on the auto take-up reel to the
off
position, set it
back to the original position, and reattach the media to the auto take-up reel.
Media Size Error
Raise the media loading lever and remove the currently loaded media. Be
sure the media is at least 11.8 inches (300 mm) wide.
Load correct size media.
If this message appears even when the media is the correct width, turn off
the
Media Size Check
setting and try printing again.
Maintenance Request
The product part indicated is nearing or at the end of its service life. Contact
Epson for support and provide them with the service code shown on the LCD
Replace Part Soon or
screen.
Replace Part Now
You must replace the part before printing again. If you continue to print, a call
XXXXXXXXXX
for service occurs.
Call For Service
A call for service occurs when:
XXX Error XXX
• The power cable is not connected securely
Power off and then on. If • An error occurs that cannot be cleared
this doesn't work, note
When a call for service has occurred, the printer automatically stops printing.
the code and call for
Turn off the printer, disconnect the power cable from both the outlet and the
service.
printer, and then reconnect them. Turn the printer on and off several times. If
the same call for service is displayed on the LCD screen, contact Epson for
support and provide them with the service code shown on the LCD screen.
Status Icons
179
Summary of Contents for SureColor F9200
Page 1: ...Epson SureColor F9200 User s Guide ...
Page 2: ......
Page 7: ...Epson SureColor F9200 User s Guide Welcome to the Epson SureColor F9200 User s Guide 7 ...
Page 11: ...Slider Chip Holder Parts 1 Slider 2 Ink inlet cover 3 Chip unit LAN Port Parts 11 ...
Page 26: ...Printable side in 6 Place your media on the roll supports temporarily 26 ...
Page 29: ...9 Tighten the roll holder fixing screw until it no longer turns 29 ...
Page 38: ...23 Open the front cover 24 Lower the media loading lever to hold the media in place 38 ...
Page 55: ...1 Move the Auto switch to the off position 55 ...
Page 60: ...9 Tighten the left roll core holder locking screw to secure the roll core holder in place 60 ...
Page 77: ...7 Lower the media roll onto the roll support Parent topic Using the Auto Take up Reel 77 ...
Page 98: ...2 Grasp the loop at the top of the ink inlet cap and slowly remove the ink inlet cap 98 ...
Page 108: ...8 Open the ink inlet cover 108 ...
Page 110: ...Rest the stirring stick on the tab at the edge of the tank as shown 110 ...
Page 111: ...111 ...
Page 112: ...10 Cut or tear off the ink pack spout seal 112 ...
Page 139: ...1 Raise the ink splash guard on the waste ink bottle 139 ...
Page 143: ...3 Grasp the wiper cleaner and lift it out of your product as shown 143 ...
Page 149: ...5 Align the white line on a new media holding plate with the edge of the platen 149 ...
Page 174: ...7 Attach the left bracket over the loosened screws as shown and slide it to the left 174 ...
Page 177: ...10 Perform a parallel adjustment Parent topic Moving or Transporting the Product 177 ...
Page 194: ...6 Place the tabs over the screws at the front of the product and attach them as shown 194 ...
Page 215: ...19 Use the small hexagon wrench to loosen the two screws 215 ...


