EPSON Stylus C87/C88/D88
Revision A
DISASSEMBLY/ASSEMBLY
Dissasembly Procedures
54
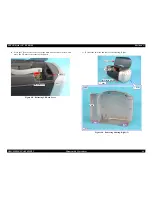
[Z-axis direction]
•
Make sure that there is no gap between main frame and
Housing, Lower.
•
Make sure that the left side of Printer Mechanism is
correctly fixed with two tabs.
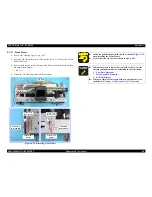
Figure 4-27. Z-axis Assembled Standard Position
Z-axis Assembled
Standard Position
Tabs
Z-axis Assembled
Standard Position
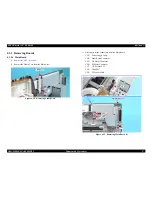
When installing the Cap Unit, pay attention to the following
instructions:
•
Route the Ink Tube so that the tube is fixed with the tabs of
the Housing, Lower Assy.
•
Make sure that the two bosses of the Cap Unit are located
under the Main Unit Frame.
Figure 4-28. Installing Cap Unit
Tabs
Ink Tube
Main Unit
Frame
Convex Portion
Summary of Contents for Stylus C87
Page 1: ...EPSONStylusC87 C88 D88 Color Inkjet Printer SEIJ05 002 SERVICE MANUAL ...
Page 5: ...Revision Status Revision Date of Issue Description A August 1 2005 First Release ...
Page 8: ...C H A P T E R 1 PRODUCTDESCRIPTION ...
Page 23: ...C H A P T E R 2 OPERATINGPRINCIPLES ...
Page 29: ...I C H A P T E R 3 TROUBLESHOOTING ...
Page 36: ...C H A P T E R 4 DISASSEMBLY ASSEMBLY ...
Page 80: ...C H A P T E R 5 ADJUSTMENT ...
Page 92: ...C H A P T E R 6 MAINTENANCE ...
Page 98: ...C H A P T E R 7 APPENDIX ...
Page 100: ...104 PX V630 EPSON Stylus C88 D88 D88 Photo Edition C87 No 1 Rev 01 C617 ACCE 001 400 ...
Page 102: ...PX V630 EPSON Stylus C88 D88 D88 Photo Edition C87 No 3 B A Rev 01 C617 ELEC 001 300 200 ...
Page 107: ...Model PX V630 Stylus C87 C88 D88 Board C528 MAIN Rev M Sheet 1 1 ...
Page 108: ...Model PX V630 Stylus C87 C88 D88 Board C528 PSH Rev A Sheet 1 1 ...
Page 109: ...Model PX V630 Stylus C87 C88 D88 Board C528 PNL Rev A Sheet 1 1 ...


