EPSON Perfection 4490 Photo
Revision B
Disassembly / Assembly
Disassembly Procedure
53
4.2.18 Removing the SUB_C Board, SUB_D Board, and
the Lamp
1. Remove the TPU Carriage Unit.
See Section 4.2.16 on page 50.
2. Remove the TPU Inverter Board.
See Section 4.2.17 on page 51.
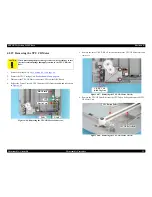
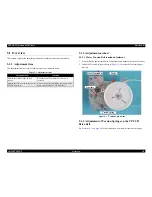
3. Remove the SUB_C and SUB_D Boards in the following procedure.
1.
Pull up the A tabs and slide each of the SUB_C and SUB_D Boards in the
direction of the arrows (3-1).
2.
Slide the SUB_C and SUB_D Boards in the direction of the arrows (3-2) and
release them from the B tabs to remove the boards.
Figure 4-42. Removing the SUB_C Board and SUB_D Board
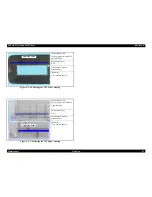
4. Remove the two C.B.P. M3 x 6 screws that secure the TPU Lamp Cover to remove
it.
Figure 4-43. Removing the TPU Lamp Cover
SUB_C Board
SUB_D Board
Notches and Tabs
3-1
3-2
3-2
Tab B
Tab A
C.B.P. 3 x 6
TPU Lamp Cover
Summary of Contents for Perfection 4490 Photo
Page 8: ...C H A P T E R 1 PRODUCTDESCRIPTION ...
Page 18: ...C H A P T E R 2 OPERATINGPRINCIPLES ...
Page 25: ...C H A P T E R 3 TROUBLESHOOTING ...
Page 29: ...C H A P T E R 4 DISASSEMBLY ASSEMBLY ...
Page 57: ...C H A P T E R 5 ADJUSTMENT ...
Page 59: ...C H A P T E R 6 MAINTENANCE ...
Page 63: ...C H A P T E R 7 APPENDIX ...
Page 66: ...Model GT X750 Perfection 4490 Photo Board Main Board Rev A Sheet 1 1 ...
Page 68: ...Model GT X750 Perfection 4490 Photo Board DRV Board Assy Rev A Sheet 1 1 ...
Page 69: ...Model GT X750 Perfection 4490 Photo Board Image Sensor Board Rev B Sheet 1 1 ...
Page 70: ...Model GT X750 Perfection 4490 Photo Board SUB Board Rev A Sheet 1 1 ...
Page 71: ...Model GT X750 Perfection 4490 Photo Board SUB C Board Rev A Sheet 1 1 ...
Page 72: ...Model GT X750 Perfection 4490 Photo Board SUB D Board Rev A Sheet 1 1 ...
Page 74: ...GT X750 Perfection 4490 Photo NO 1 Rev 02 B176 ACCE 0012 10 20 30 40 400 401 ...
Page 76: ...R ev 01 B176 CAS E 002 GT X750 Perfection 4490 Photo NO 3 110 111 101 102 ...

