2
Printing on Continuous Paper
2-1
Chapter 2
Printing on Continuous Paper
Setting the Paper Release Lever . . . . . . . . . . . . . . . . . . . . . . . . . . . . 2-2
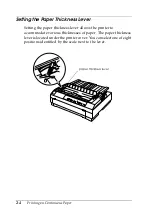
Setting the Paper Thickness Lever . . . . . . . . . . . . . . . . . . . . . . . . . . 2-4
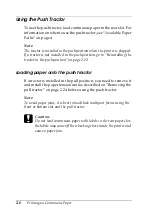
Using the Push Tractor . . . . . . . . . . . . . . . . . . . . . . . . . . . . . . . . . . . . 2-6
Loading paper onto the push tractor. . . . . . . . . . . . . . . . . . . . 2-6
Removing a printed document from the push tractor . . . . . 2-11
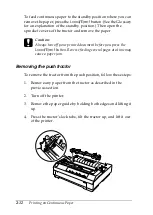
Removing the push tractor . . . . . . . . . . . . . . . . . . . . . . . . . . . . 2-12
Reinstalling the tractor in the push position . . . . . . . . . . . . . 2-13
Using the Tractor in the Pull Position . . . . . . . . . . . . . . . . . . . . . . . 2-14
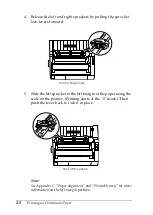
Installing the tractor in the pull position . . . . . . . . . . . . . . . . 2-14
Loading paper onto the pull tractor . . . . . . . . . . . . . . . . . . . . 2-16
Removing the paper from the pull tractor . . . . . . . . . . . . . . . 2-21
Using two tractors in the push/pull combination. . . . . . . . . 2-22
Removing the pull tractor . . . . . . . . . . . . . . . . . . . . . . . . . . . . . 2-24
Loading Multipart Forms . . . . . . . . . . . . . . . . . . . . . . . . . . . . . . . . . . 2-26
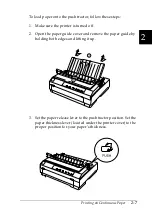
Loading Continuous Paper With Labels . . . . . . . . . . . . . . . . . . . . . 2-27
Removing continuous paper with labels . . . . . . . . . . . . . . . . 2-28
Switching to printing on single sheets . . . . . . . . . . . . . . . . . . 2-29
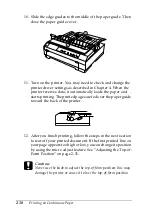
Switching to printing on continuous paper . . . . . . . . . . . . . . 2-30
Adjusting the Top-of-Form Position. . . . . . . . . . . . . . . . . . . . . . . . . 2-31
Advancing the Paper to the Tear-Off Edge . . . . . . . . . . . . . . . . . . . 2-34
Using the Tear Off/Bin button . . . . . . . . . . . . . . . . . . . . . . . . . 2-34
Advancing the paper to the tear-off position automatically 2-35
Adjusting the tear-off position . . . . . . . . . . . . . . . . . . . . . . . . . 2-35
Summary of Contents for LQ-570e
Page 1: ...24 Pin Dot Matrix Printer User s Guide 4011804 XXX 00 ...
Page 24: ...14 Getting to Know Your Printer ...
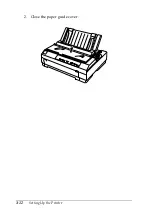
Page 36: ...1 12 Setting Up the Printer 2 Close the paper guide cover ...
Page 44: ...1 20 Setting Up the Printer ...
Page 94: ...3 14 Printing on Single Sheets ...
Page 136: ...5 12 Changing Printer Settings From the Printer s Control Panel ...
Page 140: ...6 4 Using EPSON Status Monitor 3 ...
Page 194: ...B 4 Cleaning and Transporting the Printer ...
Page 216: ...C 22 Specifications PC 861 Icelandic BRASCII Abicomp ISO Latin 1 ...
Page 217: ...C Specifications C 23 Roman 8 PC 858 ...
Page 218: ...C 24 Specifications ISO 8859 15 PC 437 Greek PC 853 Turkish PC 855 Cyrillic ...
Page 219: ...C Specifications C 25 PC 852 Eastern Europe PC 857 Turkish PC 866 Russian PC864 Arabic ...
Page 220: ...C 26 Specifications PC 869 Greek MAZOWIA Poland Code MJK CSFR ISO 8859 7 ...
Page 222: ...C 28 Specifications PC 771 Lithuanian ISO 8859 2 PC 866 LAT Latvian PC 866 UKR Ukranian ...
Page 223: ...C Specifications C 29 PC APTEC Arabic PC 708 Arabic PC 720 Arabic PC AR 864 Arabic ...
Page 226: ...C 32 Specifications ...
Page 242: ...6 Glossary Top of form position The letters ABC above are printed at the top of form position ...
Page 246: ...IN 4 ...
Page 248: ...24 Pin Dot Matrix Printer Printed in Japan 99 XX XX User s Guide ...

