131
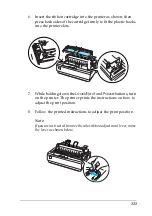
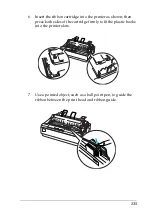
6. Insert the ribbon cartridge into the printer as shown; then
press both sides of the cartridge firmly to fit the plastic hooks
into the printer slots.
7. While holding down the
Load/Eject
and
Pause
buttons, turn
on the printer. The printer prints the instructions on how to
adjust the print position.
8. Follow the printed instructions to adjust the print position.
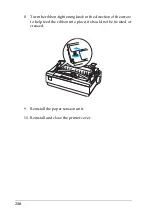
Note:
If you are instructed to move the color ribbon adjustment lever, move
the lever as shown below.
Summary of Contents for LQ-300+II
Page 12: ...12 ...
Page 14: ...14 ...
Page 72: ...72 6 A PC icon on your network appears 7 Click the PC icon A shared printer icon appears ...
Page 84: ...84 ...
Page 120: ...120 ...
Page 158: ...158 ...

