Paper Feeding Problems
If you have problems feeding paper, try these solutions:
• If paper does not feed for printing, remove it. Then reload it in the sheet feeder against the right side
and beneath the tab. Slide the edge guide against the edge of the paper, making sure that the paper
stack is not above the arrow mark on the edge guide.
• If multiple pages feed at once, remove the paper, fan the edges to separate the sheets, and reload it.
• If paper jams when you load only one or two sheets, try loading more sheets at a time. Do not load
more than the recommended number of sheets.
• If paper jams when you print on both sides of the paper, try loading fewer sheets.
• For best results, follow these guidelines:
• Use new, smooth, high-quality paper that is not curled, creased, old, too thin, or too thick.
• Load paper in the sheet feeder printable side up.
• Do not load paper with holes punched in it.
• Follow any special loading instructions that came with the paper.
Parent topic:
Related references
Paper Jam Problems
Paper Loading Capacity
Related topics
Paper Jam Problems
If you have problems with paper jams, try these solutions:
1. Cancel the print job from your computer, if necessary.
2. Gently pull out any jammed paper from the output tray and sheet feeder.
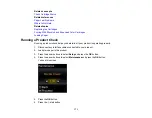
3. Press the
start button to resume printing. If the product messages still show an error, continue with
the next step.
4. Press the
power button to turn the product off.
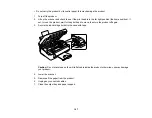
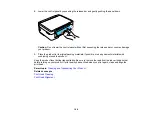
5. Lift up the scanner unit, and remove the jammed paper and any torn pieces.
181
Summary of Contents for Epson Stylus NX330
Page 1: ...Epson Stylus NX330 User s Guide ...
Page 2: ......
Page 10: ...Default Delay Times for Power Management for Epson Products 221 Copyright Attribution 221 10 ...
Page 11: ...Epson Stylus NX330 User s Guide Welcome to the Epson Stylus NX330 User s Guide 11 ...
Page 20: ...Product Parts Back 1 AC inlet 2 USB port Parent topic Product Parts Locations 20 ...
Page 87: ...87 ...
Page 97: ...3 Adjust the scan area as necessary 97 ...
Page 104: ...104 ...
Page 112: ...3 Adjust the scan area as necessary 112 ...
Page 144: ...144 ...
Page 157: ...157 ...
Page 163: ...163 ...

