4.
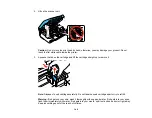
Before opening the new cartridge package, shake it gently four or five times.
Caution:
Do not shake the cartridges after opening the packages, or ink may leak.
5.
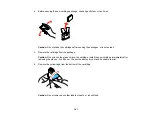
Remove the cartridge from the package.
Caution:
Do not touch the green chip on the cartridge. Install the new cartridge immediately after
removing the old one; if you do not, the print head may dry out and be unable to print.
6.
Remove the yellow tape from the bottom of the cartridge.
Caution:
Do not remove any other labels or seals, or ink will leak.
141
Summary of Contents for Epson Stylus NX330
Page 1: ...Epson Stylus NX330 User s Guide ...
Page 2: ......
Page 10: ...Default Delay Times for Power Management for Epson Products 221 Copyright Attribution 221 10 ...
Page 11: ...Epson Stylus NX330 User s Guide Welcome to the Epson Stylus NX330 User s Guide 11 ...
Page 20: ...Product Parts Back 1 AC inlet 2 USB port Parent topic Product Parts Locations 20 ...
Page 87: ...87 ...
Page 97: ...3 Adjust the scan area as necessary 97 ...
Page 104: ...104 ...
Page 112: ...3 Adjust the scan area as necessary 112 ...
Page 144: ...144 ...
Page 157: ...157 ...
Page 163: ...163 ...

