background image

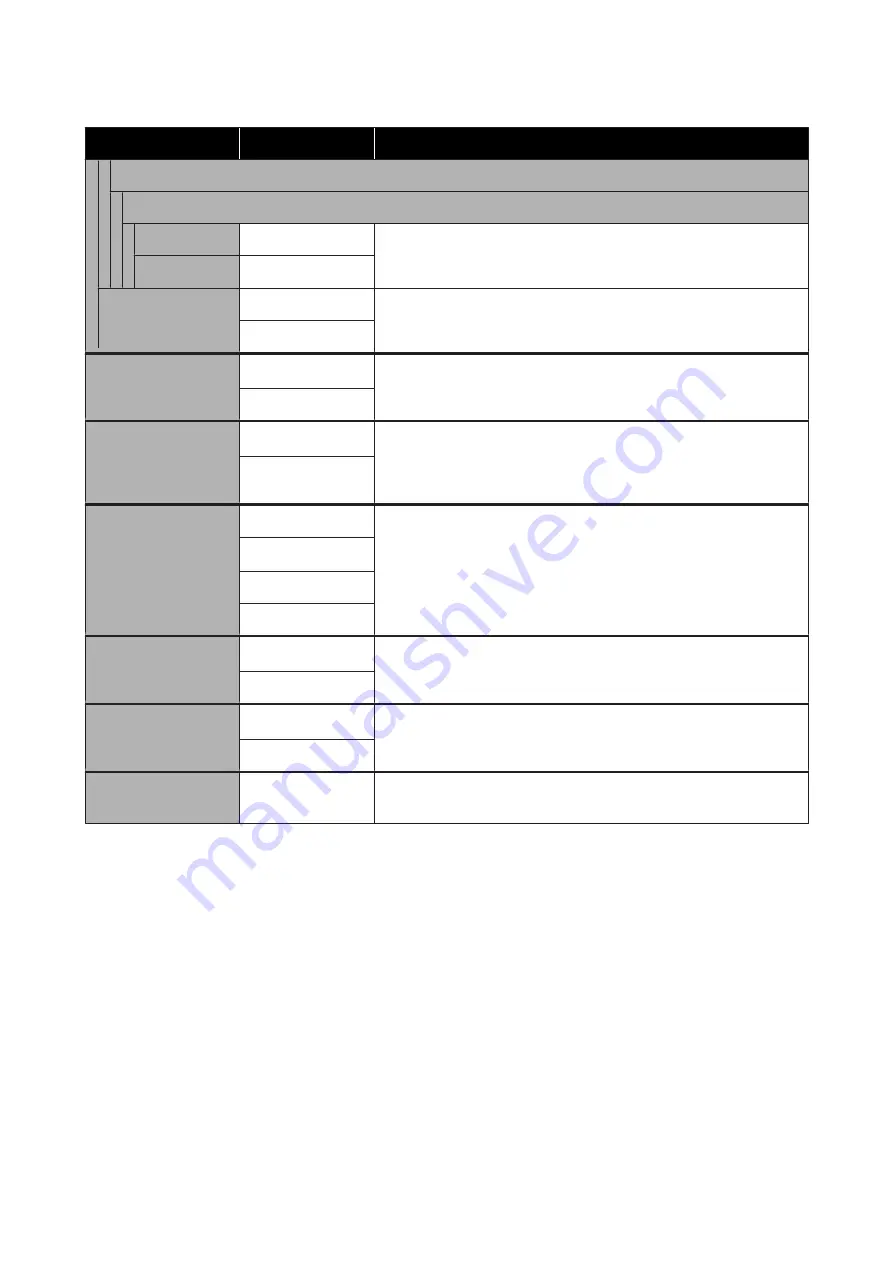
Settings item

Settings value

Explanation

Palette B

Pen 0 to Pen 15

Pen Width

0.13 to 12.00 mm

In 

Select Palette

, selecting 

Palette B

 will print in accordance with the

settings defined here.
Settings details are the same as for Palette A.

Pen Color

0 to 255

Restore default
HP-GL/2 Unique Set‐
tings

No

Select 

Yes

 to restore all HP-GL/2 Unique Settings settings to the default

settings.

Yes

Memory Device Inter‐
face

Enable 

*

Select whether to permit (Enable) or not permit (Disable) connecting a USB
flash memory to the printer and then directly printing the data in the
memory.

Disable

Thick Paper

Off 

*

If the paper is thick, the print head may scuff the print surface. Choose 

On

 to

prevent scuffing. If 

On

 is set, the platen gap, which is the distance between

the print head and paper, will widen. However, if the platen gap is already at
its maximum, then setting this to 

On

 will have no effect.

On

Self Check and Cleaning

Off

Self Check and Cleaning is a function to automatically perform a print head
clogging check and perform cleaning if there is clogging at times such as
when the power is turned on or before starting printing. Select the number
of times to perform automatic cleaning when there is clogging. If 

Off

 is

selected, both the check and cleaning will not be performed.

Once 

*

Twice

Three times

Bidirectional

On 

*

Setting this to 

On

 will cause the print head to print while moving both left

and right. Setting this to 

Off

 will reduce the ruled line misalignment, but

printing will take more time.

Off

PC Connection via USB

Enable 

*

Setting this to 

Enable

 allows access from a USB-connected computer.

Setting this to 

Disable

 does not allow access.

Disable

USB I/F Timeout Setting

0 sec, or 5 to 300 sec

(60

*

)

If printing stops mid-way when the printer and computer are connected by
a USB cable, set a longer time.

SC-T5400 Series/SC-T5400M Series/SC-T3400 Series/SC-T3400N Series     User's Guide

Using the Menu


156

Summary of Contents for C11CF85403

Page 1: ...User s Guide CMP0155 08 EN ...

Page 2: ...ingfromelectromagneticinterferencethatoccursfromtheuseofanyinterfacecables other than those designated as Epson Approved Products by Seiko Epson Corporation EPSON EPSON EXCEED YOUR VISION EXCEED YOUR VISION and their logos are registered trademarks or trademarks of Seiko Epson Corporation Microsoft Windows and Windows Vista are registered trademarks of Microsoft Corporation Apple Mac macOS OS X Bo...

Page 3: ...nal Software 30 Checking Whether Updates Available and Updating Software 30 Receiving Update Notifications 30 Uninstalling Software 31 Windows 31 Mac 31 Changing the Network Connection Methods Switching to Wired LAN 32 Switching to Wireless LAN 32 Directly Connection Wirelessly Wi Fi Direct 33 Loading and Setting the Paper Notes on Loading the Paper 34 Paper Load Position 34 Loading and Removing t...

Page 4: ...Folder SC T5400M Series Only 100 Function Summary 100 Preparing a Shared Folder 100 Print from Folder Procedure 101 Direct Printing of Files on USB Flash Memory 101 Copy SC T5400M Series Only Placing Documents in the Scanner 103 Loadable Document Sizes 103 Loadable Paper Types 103 Documents That Cannot Be Loaded 104 When loading documents that are thin that are easily torn or that you do not want ...

Page 5: ...ble Paper 224 Printable area 227 Roll Paper 227 Cut Sheet 228 Moving or Transporting the Printer 229 Notes for Moving or Transporting the Printer 229 Moving to a Different Location in the Same Building 230 When Transporting 231 Handling if Transporting Leaving the Printer in an Environment of 10 C or Less 231 System Requirements 232 Printer Driver 232 Web Config 233 Specifications Table 235 Where ...

Page 6: ...ew Mac Setup Guide booklet Provides information on how to setup the printer after unpackingitfromthebox Make sure you read this manual to perform operations safely Operator s Guide booklet or PDF Provides selected information on how to use the printer and frequently used features of the printer General Information PDF Provides important safety instructions printer specifications and contact detail...

Page 7: ...mes of items you want to confirm For Windows Right click on a page in the PDF manual and select Findin the menuthat is displayed to open the search toolbar For Mac Select Find in the Edit menu to open the search toolbar F To enlarge the text in the display that is too small to see well click Click to reduce the size To specify a part of an illustration or screenshot to enlarge do the following For...

Page 8: ...x U Replacing Maintenance Box on page 188 C Paper basket Output from the printer collects in this basket keeping the media clean and free of creases D Casters There are two casters on each leg The casters are normally kept locked once the printer is in place E Cartridge cover Open when replacing ink cartridges U Replacing Ink Cartridges on page 186 SC T5400 Series SC T5400M Series SC T3400 Series ...

Page 9: ...ights or flashes when an error occurs Lights or flashes Anerroroccurred Howthelamplightsorflashesvarieswiththetypeoferror Thecontrolpanel displays a description of the error Off No error I Cut sheet cover Open the cover when loading a cut sheet of paper U Loading Cut Sheet 1 sheet on page 42 Scanner SC T5400M Series only A Document guide This guide allows you to feed originals straight into the pr...

Page 10: ...s for feeding originals that you are copying or scanning C Scanner cover Open this when there is a paper jam or when you want to clean the scanner SC T5400 Series SC T5400M Series SC T3400 Series SC T3400N Series User s Guide Introduction 10 ...

Page 11: ...ile moving left and right to print D Attachments Attach them to the spindle for loading a 3 inch core roll of plain paper U Loading Roll Paper on page 35 E Spindle When loading roll paper into the printer insert this through the roll paper F Movable flange transparent This fixes the roll paper placed onthe spindle Attachor detachit when placingorremoving rollpaperon fromthe spindle SC T5400 Series...

Page 12: ...a cut sheet of paper load the sheet while sliding its edge against the guide U Loading and Removing Cut Sheet 1 sheet on page 42 SC T5400 Series SC T5400M Series SC T3400 Series SC T3400N Series User s Guide Introduction 12 ...

Page 13: ...21 C AC inlet Connect the supplied power cable here D USB port Use when connecting to a computer using a USB cable E OPTION port Connect a scanner to perform enlarged copying U Making Enlarged Copies with an A3 or A4 Scanner SC T5400 Series SC T3400 Series SC T3400N Series Only on page 111 F LAN port Connects the LAN cable SC T5400 Series SC T5400M Series SC T3400 Series SC T3400N Series User s Gu...

Page 14: ...by a lit or flashing light On Connected Flashing Receiving data H Status light green orange The color indicates the network transmission speed Off 10BASE T Orange 100BASE TX Green 1000BASE T SC T5400 Series SC T5400M Series SC T3400 Series SC T3400N Series User s Guide Introduction 14 ...

Page 15: ...gently touching tapping them and scroll the screen by moving your finger while it remains touching the screen Understanding and Operating the Screen Home screen operations Overview of Home screen operations U Operator s Guide booklet or PDF A Information display area Displays the printer s status error messages and so on B Roll paper information area When roll paper is loaded Displays information ...

Page 16: ...will not disappear G Network icon The network connection status is indicated by an icon as shown below Touching the icon allows you to switch the network connection status U Changing the Network Connection Methods on page 32 Not connected to a wired LAN or the wired LAN or wireless LAN not set Connected to a wired LAN Wireless LAN Wi Fi is disabled Searching for SSID IP address not set or signal s...

Page 17: ...ur Presets The following screen has a Presets button at the top right of the screen The following illustration shows an example of the Copy screen Enlarged Copy screen except for the SC T5400M Series Copy Scan Memory Device screen SC T5400M Series only Press Presets and then Overwrite User Settings to continue using the current settings from the next time you print Press the Presetsbutton press Sa...

Page 18: ...sets andthenpressthe trash buttononthe next screen to delete the preset WhenrestoringtheinitialvaluesforCopy Scantothe manufacturer s settings Select General Settings System Administration Restore Default Settings and then select Copy Settings or Scan Settings This procedure does not delete your saved presets SC T5400 Series SC T5400M Series SC T3400 Series SC T3400N Series User s Guide Introducti...

Page 19: ... they are printed using ink with excellent water resistance U Printing CAD Drawings on page 61 Posters and displays that are vivid andalsoallowforshort termoutdoor display Posters with vivid hues can be printed simply by selecting for example Poster Photo Perspective in Select Target of the supplied printer driver Short term outdoor display is even supported since ink that also has excellent light...

Page 20: ...ed where desired without considering cable routing because it can connect with a computer via a wireless LAN to print Of course it also supports a wired LAN connection Furthermore even if your device is not connected to a LAN this printer also allows printing by directly connecting with it using Wi Fi Direct U Switching to Wireless LAN on page 32 U Directly Connection Wirelessly Wi Fi Direct on pa...

Page 21: ... points when using this printer to avoid breakdowns malfunctions and print quality decline When using the printer observe the operating temperature and humidity range described in the Specifications Table U Specifications Table on page 235 Even when the conditions above are met you may not be able to print properly if the environmental conditions are not suitable for the paper Be sure to usethe pr...

Page 22: ...not capped turn the printer on and then turn it off To prevent the accumulation of dust and other foreign matter in the printer close all covers before placing it in storage If the printer will be not be used for an extended period protect it with an anti static cloth or other cover The print head nozzles are very small and they can become clogged easily if fine dust gets on the print head and you...

Page 23: ...oved ink cartridges may have ink around the ink supply port so be careful not to get any ink on the surrounding area when removing the cartridges To maintain the quality of the print head this printer stops printing before ink cartridges are completely expended Although the ink cartridges may contain recycled materials this does not affect printer function or performance Do not dismantle or remode...

Page 24: ...See the documentation supplied with Epson special media for detailed information on handling the paper after printing The colors of photos posters and other printed materials appear different under different lighting conditions light sources The colors of print outs from this printer may also appear different under different light sources Light sources include sunlight fluorescent light incandesce...

Page 25: ...tting differs as follows depending on the model SC T5405 SC T5400M SC T3405 SC T3405N SC T5485 SC T5480M SC T3485N Set to 8h SC T5465 SC T5460M SC T3465 SC T3465N SC T5435 SC T5430M SC T3435 Set to Off PowerOff Timer settings canbechanged from theBasic Settings menu U General Settings Basic Settings on page 143 SC T5400 Series SC T5400M Series SC T3400 Series SC T3400N Series User s Guide Introduc...

Page 26: ...lows you to update the firmware and already installed software of the printer U Updating Software or Installing Additional Software on page 30 LFP Print Plug In for Office Windows Only Plug insoftwareforMicrosoftOfficeapplications Word Excel andPowerPoint Installing thisplug indisplaysribbonitemsinOfficeapplicationsthatgivequickaccesstohorizontal and vertical banner printing and enlarged printing ...

Page 27: ...are disc Network EpsonNetConfig U Administrator s Guide Download software from the Internet and install Connect the computer to the Internet and install Built in Software in the Printer The following software comes preinstalled in the printer Start and use it from a Web browser via the network Software Name Function Web Config ThenetworksecuritysettingscanbeconfiguredfromWebConfig Thissoftwarealso...

Page 28: ...e Web browser Function Summary This section introduces the main functions of Web Config See the Administrator s Guide for more details Main Functions Check the printer s status such as the remaining amount of ink Check and update the printer s firmware version Configure the printer s network settings and advanced security settings such as SSL TLS communication IPsec IP filtering and IEEE802 1X whi...

Page 29: ...d Alternatively from Start click All apps or All Programs Epson Software Epson Edge Dashboard Mac From the desktop menu click the Epson Edge Dashboard icon and select Show Epson Edge Dashboard B The Epson Edge Dashboard screen appears See the Epson Edge Dashboard help for more details Closing Close the Web browser to close the Epson Edge Dashboard screen Since Epson Edge Dashboard is a resident so...

Page 30: ...en type the software name in the search box of the displayed window the software appears immediately The software can also be started by clicking the printer icon on the Taskbar of the desktop and then selecting Software Update Mac Select Go Applications Epson Software EPSON Software Updater C Select the software or manuals to be updated and then update them Follow the on screen instructions cImpo...

Page 31: ...nter Uninstall E Select the printer icon and then click OK F Follow the on screen instructions to continue When the delete confirmation message appears click Yes Restart the computer if you are reinstalling the printer driver Mac When reinstalling or upgrading the printer driver or other software follow the steps below to uninstall the target software first Printer Driver Use the Uninstaller Downl...

Page 32: ...r and the printer with a LAN cable See the following for the location of the printer s LAN port U Side right side on page 13 Switching to Wireless LAN The SSID network name and password of the access point to which the printer is to be connected are required Confirm them in advance The printer can be connected to a wireless LAN while the LAN cable is still connected Note If your access point suppo...

Page 33: ... shape and color of the icon differ depending on the connection status U Home screen operations on page 15 B Touch Wi Fi Direct When Wi Fi Direct is already enabled the network SSID password numberofconnected devices etc are displayed Proceed to step 5 Note When any of the displayed network SSID device name etc is partially not visible because it is cut off at the right edge of the screen touch th...

Page 34: ...e opposite way or use paper with no problem Unsupported paper Do not use paper that is wavy torn cut folded too thick too thin has a sticker affixed etc Doing so may cause paper jams or soiled prints See the following for paper supported by the printer U Epson Special Media Table on page 220 U Supported Commercially Available Paper on page 224 Paper Load Position Roll paper and cut sheets can be l...

Page 35: ...oll paper cImportant The printer only supports plain paper for 3 inch roll cores Epson cannot guarantee feed and print quality for 3 inch roll cores for other than plain paper Loading Roll Paper Note You can load the paper while viewing the loading procedure on the screen To view the procedure on the screen touch the Roll paper information area of the Home screen A Check that Load paper is display...

Page 36: ...ange remove the attachment from the spindle 3 inch roll core Attach the attachments to the both flanges Align thetrianglemarksontheflangewiththoseonthe attachment and push in until the tabs are secured E Place the roll paper on a flat surface and then insert the spindle With the black flange is on the right orient the roll paper so that the leading edge is as shown in the figure below F Push the f...

Page 37: ...lot Inserting it skewed will cause a skew error or paper jam Note If the leading edgeof theroll paper is not horizontal or not cut cleanly it will be cut automatically after loading completes However it will not be cut if Auto Cut is set to Off K Close the roll paper cover and cut sheet cover L On the displayed screen set the paper type that matches the loaded paper and set remaining amount manage...

Page 38: ...procedure Cutting after Last Page Printed or at Desired Position Turn off auto cut in the printer driver print and then cut using the Feed Cut Paper menu of the printer after printing finishes A Select Off in Advanced Roll Paper Option Auto Cut of the printer driver and then print Leave the auto cut setting of the printer on Note The auto cut setting of the printer driver has priority over that of...

Page 39: ...er cut the paper with scissors as described in the following procedure Do not use a cutter The printer may be damaged A Turn off the auto cut setting and then print To print cut lines turn off the auto cut setting of the printer When printing via the printer driver also turn off the setting of the printer driver Printer settings Rollpaperinformationarea AdvancedMedia Setting Auto Cut Off from the ...

Page 40: ...may become wavy or curled due to damp which maycausepaperfeedingproblems paperjams orsoiled prints We recommend that you return the paper to its original package and store it flat and take it out of the package for use when printing A Touch the Roll paper information area Remove from the Home screen The paper is rewound and ejected When Manage Remaining Amount is set to On the barcode is automatic...

Page 41: ...rewindingtherollpapercarefully storeit in the original package F Attach the transparent flange to the spindle and return the spindle in the printer G Close the roll paper cover and cut sheet cover SC T5400 Series SC T5400M Series SC T3400 Series SC T3400N Series User s Guide Loading and Setting the Paper 41 ...

Page 42: ... of paper with the print side facing up alignitsrightedgewiththeguideontheright and move it downwards cImportant Insert all paper in portrait orientation Inserting paper in landscape orientation may cause a decline in print quality C Insert the leading edge of the paper straight into the paper slot until you hear a beep cImportant Insert the paper straight into the paper slot Inserting it skewed w...

Page 43: ...nter Make a flat area in front of the paper eject slot so that ejected paper does not catch on anything Note When printing long items such as banners we suggest that before the paper ejected from the printer touches the floor that you take it in both hands close to the paper eject slot and continue to lightly support it until printing is complete Removing Cut Sheet 1 Sheet To remove cut sheet that...

Page 44: ... used improving efficiency when multiple rolls of paper are used However depending on the paper the printer may not be able to read the barcode How to Set A The currently set paper type is shown on the screen displayed after loading roll paper When changing Paper Type Proceed to step 2 When setting Paper Remaining without changing Paper Type Proceed to step 5 When not changing either of them Touch...

Page 45: ... roll paper Remaining Alert Remaining amount value that will be the timing for displaying the remaining amount warning notification Note On the keypad screen for entering a numeric value enter numbers that include a number of the first decimal place For example if you want to enter 5 m touch 5 and 0 G Touch atthe top left ofthe screen to returnto the screen of step 5 and then touch OK Youcanstartp...

Page 46: ...three paper types are displayed in addition to Others C Select the paper type that matches the loaded paper Epson Special Media Select the same product name as the one shown on the package of the paper Commercially available non Epson paper Select from the following commercially available paper types Plain paper Coated Paper Generic Photo Paper Generic Tracing Paper Tracing Paper LowDuty Matte Fil...

Page 47: ...nd then enter the paper width and length On the keypad screen for entering a numeric value enter numbers that include a number of the first decimal place For example if you want to enter 5 m touch 5 and 0 E When the screen of step 1 is redisplayed touch OK YoucanstartprintingonceReadyappearsonthe screen SC T5400 Series SC T5400M Series SC T3400 Series SC T3400N Series User s Guide Loading and Sett...

Page 48: ...oad the paper that actually requires adjustment and then select the paper type that matches the loaded paper If paper with visible curls wrinkles waves folds or bends is used correct adjustment may not be possible Remove curled wavy or folded sections by cutting them off Ensure that light from outside direct sunlight etc does not enter the interior of the printer If this occurs the printer may not...

Page 49: ...mentresultsaresavedassettingsofthe currently selected paper type Note A print head nozzle clogging check is performed automatically before adjustment pattern printing If nozzles are determined to be clogged cleaning starts and the adjustment patterns will be printed after cleaning finishes Refer to the following when the error message Auto Adjustment is unable to start because there is a problem w...

Page 50: ...because there is a problem with the paper or printing status appears or when the adjustment results are not satisfactory U The prints are not what you expected on page 196 SC T5400 Series SC T5400M Series SC T3400 Series SC T3400N Series User s Guide Loading and Setting the Paper 50 ...

Page 51: ...er driver dialog will be displayed Note When printing a PDF file In the Print dialog box of Adobe Acrobat select the Actual size or Page Scaling None radial button and Choose paper source by PDF page size check box To enlarge or reduce the size configure the setting in the printer driver settings dialog box D CheckDocumentSizeonthePrinterSettingstab of the printer driver The paper size set in the ...

Page 52: ...ars ForRollPaperWidth PaperSizewhencutsheet and Media Type the settings configured in the control panel of the printer are applied automatically Note If the paper is loaded or changed after opening the printer driver s dialog box the paper size andpaper type settings configured on the printer will not be applied In this case click the Acquire Info button to apply the settings G Select Select Targe...

Page 53: ... ontherightside Seethehelpformore details Note See the printer driver help for more details on setting items Youcandisplaythehelpinthefollowingtwoways Click Help at the bottom right of the screen Right clicktheitemyouwanttocheckandthenclick Help This is not possible in the print preview screen Canceling Printing There are a few ways to stop printing operations depending on the situation When the c...

Page 54: ...sed Settings If you start the printer driver from the Control Panel changethesettingstothoseyouusefrequently andthen save the settings the printer driver s dialog box will be displayed with the saved settings from any application that it is displayed A Open View devices and printers or Devices and Printers Windows 10 8 1 8 7 Click in the following order Hardware and Sound or Hardware View devices ...

Page 55: ...100 The saved select settings can be recalled from Select Setting Note Howtoshare Select Setting settings with multiple computers Selectthesettingsyouwanttoshare clickExport and then export the settings to a file Display the same screen of the printer driver on another computer click Import and then import the settings Rearranging display items The display items of Select Setting Media Type and Pa...

Page 56: ...lick Delete Group Drag and drop unnecessary items to Not Display Note When Delete Group is performed the group folder is deleted but the settings in the deleted group folder remain Delete them individually from List in the save location D Click Save SC T5400 Series SC T5400M Series SC T3400 Series SC T3400N Series User s Guide Printing with the Printer Driver from Your Computer 56 ...

Page 57: ...ialog click the page settings option e g Page Setup in the File menu D Check that this printer is selected and then set the paper size Paper size settings set items including paper size borderless methods and paper source E Select Printer Settings from the list and set Output Size If Printer Settings is not displayed in the list the dedicated printer driver for this printer has not been added See ...

Page 58: ...check box is selected and then click Print If a preview is not necessary clear the check box and then click Print Note In the print preview you can check and change the printsettingswhileviewingtheimagetobeactually printed We recommend to check with the preview when printing on roll paper or large sized paper H Check the print settings in the print preview screen and if there is no problem click P...

Page 59: ...a to the printer you cannot cancel the print job from the computer Cancel on the printer Canceling from a Computer A Click the icon of this printer in the Dock B Select the job you want to cancel and then click Delete Ifthejobhasbeen senttotheprinter printdatais not displayed on the above screen Canceling on the printer The Cancel button is displayed on the control panel screen during printing Tou...

Page 60: ...ers installed on your computer The settings are saved to Presets You can then select the settings you saved from Presets Deleting from Presets A Click Show Presets in Presets of the Print dialog box B Select the setting you wantto delete clickDelete and then click OK SC T5400 Series SC T5400M Series SC T3400 Series SC T3400N Series User s Guide Printing with the Printer Driver from Your Computer 6...

Page 61: ...de Printing using the HP GL 2 or HP RTL mode This method is best suited for printing CAD and GIS drawings such as maps and blueprints You can print from an application that supports HP GL 2 compatible withHPDesignjet 750C andHP RTL See the following for more details U Printing Using the HP GL 2 or HP RTL Mode from a Computer on page 97 A Open the data to be printed and then click Plot B Select the...

Page 62: ...g Bi Level from the Select Target list Windows Mac F Check other settings and then start printing Note Iftheoutputsizeisportraitandtheheightissmaller than the width of the roll paper the print image is printed rotated 90 to save paper This function is enabled if the Auto Rotate check box is selected in Roll Paper Option on the Advanced tab SC T5400 Series SC T5400M Series SC T3400 Series SC T3400N...

Page 63: ...largement or reduction ratio Use this method for a non standard paper size Note Whenprintingfromapplicationsdesignedexpressly for horizontal or vertical banners adjust printer driver settings as described in the application documentation When using a Windows application designed for banners select Print Banner on the Layout tab if necessary Fitting Documents to the Width of the Roll Paper A Check ...

Page 64: ...cedures Mac on page 57 Note In the case of an application without a page setup menu item you can set the paper size if you open the Print dialog box from the Print menu item B Click Fit to Roll Paper Width on the Printer Settings tab of the printer driver and select either Fit Short Side to Roll Paper Width or Fit Long Side to Roll Paper Width Windows Mac Fit Short Side to Roll Paper Width Select ...

Page 65: ...e application If it differs click Settings and specify the correct size in the Change Paper Size dialog box U Basic Operating Procedures Windows on page 51 Mac Open the page setup screen of the application and check that this printer is selected in Printer and check the paper size Select a paper size that does not have Retain Scale or Roll Paper Banner If the size is different select the correct s...

Page 66: ...s tab of the printer driver Windows Display the Printer Settings tab of the printer driver from the application and check that the document size is the same as the setting of the application If it differs click Settings and specify the correct size in the Change Paper Size dialog box SC T5400 Series SC T5400M Series SC T3400 Series SC T3400N Series User s Guide Printing with the Printer Driver fro...

Page 67: ... size if you open the Print dialog box from the Print menu item B Display the Output Size input screen from the Printer Settings tab of the printer driver Windows Select Others and then select Specify Size in the displayed Output Size dialog box Mac Select Specify Size C Select the size specification method from Width Length and Scale to and then enter the setting value The print image is enlarged...

Page 68: ...length can be longer when using an application that supports banner printing However the actual print size depends on the application the paper size loaded in the printer and the computer environment cImportant The smallest size supported by the printer is 89 mm wide 127 mm long When a smaller size than this is set in Custom Paper Size of the printer driver trim the unnecessary margins For Custom ...

Page 69: ...t on the left To delete a saved paper size select the paper size name from the list on the left of the screen and then click Delete You can save up to 100 paper sizes C Click OK to close the User Defined Paper Size dialog box Also close the printer driver s dialog box Registration of the user defined size is now complete D Select the registered paper size in for example the page size settings of t...

Page 70: ...from the list on the left To duplicate a saved paper size select its name from the list on the left of the screen and click Duplicate To delete a saved paper size select its name from the list on the left of the screen and click The custom paper size setting differs depending on the operating system version Seeyouroperatingsystem sdocumentationfor details D Click OK to close the Custom Paper Sizes...

Page 71: ...alog box The registered paper size is displayed in Document Size on the Printer Settings tab U Basic Operating Procedures Mac on page 57 G Check other settings and then start printing SC T5400 Series SC T5400M Series SC T3400 Series SC T3400N Series User s Guide Printing with the Printer Driver from Your Computer 71 ...

Page 72: ...e Setup in the applications to set the size of the image data as follows Match the paper size and page setting for the print data If the application has margin settings set the margins to 0 mm Make the image data as large as the paper size Retain Size Create the print data larger than the paper size in the applications to produce borderless output The printer driver does not enlarge the image data...

Page 73: ...s the same as that for Double Cut When continuously printing multiple sheets the printer cuts1mminside onthetop edge of the first page and the bottom edge of the subsequent pages to avoid showing margins The top area may become slightly uneven depending ontheimagesincetheprint operation stops while cutting the top edge of the roll paper The printed paper is approximately 2 mm shorter than the spec...

Page 74: ...d 5 mm for right the image shifts 1 mm to the right Standard 3 mm for left and right Min 1 5mm for left and right Note MovingtheslidertowardsMindecreasestheimage enlargement ratio Therefore some margins may appear at the edges of the paper depending on the paper and printing environment D Whenprintingonrollpaper selecttheAdvanced tab and configure the Auto Cut setting in the Roll Paper Option area...

Page 75: ...play the page settings dialog B If Auto Expand is selected for paper size select Advanced from the list and click Expansion YoucanonlyselectExpansionifAutoExpandis selected in Paper Size The expansion values for each of the settings are as follows Max 3 mm for left and 5 mm for right theimageshifts1mmtotheright Standard 3 mm for left and right Min 1 5mm for left and right Note Movingtheslidertowar...

Page 76: ...ck box you can check which of the above color correction methods is used Standard of Select Target is the most suitable setting for the currently selected paper type Clicking the Settings button allows you to for example finely adjust the Gamma Brightness Contrast Saturation and color balance Use this option when the application in use does not have a color correction function Note The color corre...

Page 77: ...Display the Printer Settings tab of the printer driver and then clear the Simple Settings check box in the Print Quality area U Basic Operating Procedures Windows on page 51 C Select the print target If you want to select the color correction method yourself select Custom at the very bottom of the list D When Custom is selected for the print target select the color and color correction method sett...

Page 78: ...s 6 or later Adobe Photoshop Lightroom 1 or later In other applications set No Color Management Note For information on supported platforms see the website for the application in question Settings example of Adobe Photoshop CC Open the Print dialog box Select Color Management then select Printer Manages Colors in Color Handling and click Print B Display the Print screen U Basic Operating Procedure...

Page 79: ...ustom is selected for the print target select the color and color correction method settings G If necessary click Settings and then adjust items such as the Gamma Brightness Contrast Saturation and color balance See the printer driver help for more details on each item H Check other settings and then start printing SC T5400 Series SC T5400M Series SC T3400 Series SC T3400N Series User s Guide Prin...

Page 80: ...cannot match the colors on the printed results and display by color management between the input device and the printer To match both colors you need to perform color management between the input device and the display as well Color Management Print Settings You can perform color management printing using this printer s printer driver in the following two ways Choose the best method according to t...

Page 81: ...inter driver s settings screen U Color Management Printing by Driver ICM Windows Only on page 85 U Color Management Printing by Host ICM Windows on page 83 U Color Management Printing by ColorSync Mac on page 84 U Setting color management with the applications on page 81 Setting color management with the applications Print using applications with a color management function Make the color manageme...

Page 82: ...vice Pack 2 or later and NET 3 0 Off No Color Adjustment is selected automatically For Mac Select Printer Settings from the list and clear the Simple Settings check box in the Print Quality area and select Off No Color Adjustment from the print target list D Check other settings and then start printing SC T5400 Series SC T5400M Series SC T3400 Series SC T3400N Series User s Guide Printing with the...

Page 83: ... 3 0 or later Windows XP other than the above No Color Management In other applications set No Color Management Note For information on supported platforms see the website for the application in question Settings example of Adobe Photoshop CC Open the Print dialog box Select Color Management then select Printer Manages Colors in Color Handling and click Print When using an application without a co...

Page 84: ...lication color management printing by ColorSync may not be supported A Disable the color management functions in the application B Display the Print screen U Basic Operating Procedures Mac on page 57 C Select Color Matching from the list and then click ColorSync The printer profile corresponding to the currently selected paper type is specified automatically and displayed at the bottom of the prof...

Page 85: ... Adobe Photoshop Elements 6 0 or later Adobe Photoshop Lightroom 1 or later OS Color Management Settings Windows 8 1 Windows 8 Windows 7 Windows Vista Printer Manages Colors Windows XP Service Pack 2 or later and NET 3 0 or later Windows XP other than the above No Color Management In other applications set No Color Management Note For information on supported platforms see the website for the appl...

Page 86: ...Colorimetric Converts the data so that a set of color gamut and white point or color temperature coordinates in the original data match their correspondingprintcoordinates This feature is used for many types of color matching Absolute Colorimetric Assigns absolute color gamut coordinates to the original and print data and converts the data Therefore colortone adjustment is not performed on any whi...

Page 87: ...s in Windows A Display the Layout tab of the printer driver and select the Page Layout check box Then select N up and click the Settings button U Basic Operating Procedures Windows on page 51 B Set Number of pages per sheet and Page Order in the Print Layout dialog box If the Print page frames check box is selected page frames are printed on each page C Check other settings and then start printing...

Page 88: ... only Two consecutive pages can be printed on a single sheet The second page is flipped 180 and printed adjacent to the first page allowing the paper to be folded to make a 2 sided document A Display the Layout tab of the printer driver and select the Page Layout check box Then select Folded Double Side and click the Settings button U Basic Operating Procedures Windows on page 51 SC T5400 Series S...

Page 89: ...ster Print is selected the sheets can be joined without trimming the margins but because the portions outside the edges of the paper will be lost using borderless printing images at the joins may be imperfect A Display the Layout tab of the printer driver and select the Page Layout check box Then select Poster and click the Settings button U Basic Operating Procedures Windows on page 51 SC T5400 S...

Page 90: ...e paper will be cut 1 or 2 mm inside the image resulting in imperfect joins where the images meet When with margins is selected Clear the Borderless Poster Print check box Note If Borderless Poster Print is not selected a Print Cutting Guides option will be displayed Overlapping Alignment Marks Prints guides for joining the paper with overlapping The finished size is smaller only for the overlappi...

Page 91: ...e printed in black Thefollowingsectiondescribeshowtojoinfourprinted pages together A Ready the two top sheets and trim the excess from the left sheet by cutting along the line joining the two join guides the centers of the X marks B Lay the upper left sheet on top of upper right sheet Lineup the X marks as shown in the illustration below and temporarily fasten them using an adhesive tape on the ba...

Page 92: ...to 4 for the lower two sheets F Trim the bottom from the upper sheets by cutting along the line joining the two guides the lines above the X marks G Lay the upper sheet on top of the lower sheet Lineup the X marks as shown in the illustration below and temporarily fasten them using an adhesive tape on the back SC T5400 Series SC T5400M Series SC T3400 Series SC T3400N Series User s Guide Printing ...

Page 93: ...the two cut guides the lines above the X marks I Join the upper and lower sheets together Use an adhesive tape to stick the backs of the sheets together SC T5400 Series SC T5400M Series SC T3400 Series SC T3400N Series User s Guide Printing with the Printer Driver from Your Computer 93 ...

Page 94: ...ments created in different applications can be printed together in your choice of layout This allows you to improve print work efficiency and conserve paper Sample Multi Document Layout Sample Free Vertical Horizontal Layout SC T5400 Series SC T5400M Series SC T3400 Series SC T3400N Series User s Guide Printing with the Printer Driver from Your Computer 94 ...

Page 95: ...en open repeat steps 1 to 3 until all the print data has been added to the layout The objects are added to the Layout Manager screen E Arrange the objects on the Layout Manager screen Objects can be moved or resized by dragging as well as rearranged or rotated using the tool buttons or the options in the Object menu The overall size and placement of the objects can be changed using the Preferences...

Page 96: ...s A Right click the printer icon on the Windows taskbar and then click Layout Manager in the displayed menu The Layout Manager screen appears Note When the printer icon is not displayed on the Windows taskbar Open the Utility tab of the printer driver and click the Monitoring Preferences Select the Register the shortcut icon to the taskbar check box in the Monitoring Preferences dialog box B Click...

Page 97: ...c settings such as palette settings HP GL 2 Unique Settings Basic Print Settings A Touch Settings General Settings Printer Settings Universal Print Settings from the Home screen B Check Paper Source and change the setting if necessary Thedefaultsetting is Roll Paper When HP GL 2 or HP RTL print data is sent an error occurs if paper is not loaded for the paper source set here C Check the other item...

Page 98: ...uto to HP GL 2 When the computer and printer are connected via a network Select Settings General Settings Printer Settings Printing Language Network from the Home screen and then change the setting from Auto to HP GL 2 To print from the printer driver as usual after HP GL 2 or HP RTL finishes return the setting to Auto CAD Application Settings Set the output device as follows according to your mod...

Page 99: ... via the Web Upload and Print SC T5400M Series Only Function Summary Upload and Print is a function that prints by running Web Config from a computer on which the printer driver is not installed U How to Use Web Config on page 28 You can print by simply selecting the file you want to print andthenuploadingittotheprinter Ifthebrowser you are using supports drag and drop you can upload multiple file...

Page 100: ...g files can be printed from a network folder FTP JPEG HP GL 2 TIFF PDF Only data created using the scan function provided by Epson inkjet printers Preparing a Shared Folder Setup from the printer A Touch Settings on the Home screen B Touch in order General Settings Network Settings Advanced Shared Folder The shared folder settings screen appears C Enter each item Folder Name Within 255 characters ...

Page 101: ...g at actual size without advanced settings Proceed to step 5 D Touch the Advanced tab You can do the settings for reducing and enlarging in Reduce Enlarge Set Auto Fit Page to On to print after the file is automatically enlarged to fit either the width of the roll paper or the size of the cut sheets that is are loaded in the printer See the following for more details on other settings items U Netw...

Page 102: ...aracters in the folder or file names that cannot be displayed by the printer will be displayed as E Select Black White or Color Using advanced settings such as enlarging or reducing size Proceed to step 6 Printing at actual size without advanced settings Proceed to step 7 F Touch the Advanced tab Enlarge reduce settings can be configured in Reduce Enlarge If you set Auto Fit Page to On printing is...

Page 103: ...th may be different as shown below Copying Color and monochrome Quality With skew correction Without skew correction Super Fine 2747 mm Fine Speed 5494 mm Draft Scanning TIFF Monochrome binary black and white Output resolution With skew correction Without skew correction 600 dpi 2749 mm 30480 mm 400 dpi 4129 mm 300 dpi 5509 mm 200 dpi 8269 mm JPEG Color and monochrome grayscale Output resolution W...

Page 104: ...cut at right angles Originals with photos stickers or labels attached Originals that are transparent Originals that are glossy Originals that have become deteriorated Originals that are torn Originals that exceed the maximum width of the document size When loading documents that are thin that are easily torn or that you do not want to damage Use the optional carrier sheet for thin documents and do...

Page 105: ... the leading edge of the document into the scanner s paper slot until you hear a beep cImportant If the document has curls or creases stretch it before loading it The document may be jammed during scanning or scanning may fail Load the document in the direction indicated by the illustration When the leading edge of the document touches the back of the paper slot the document is automatically fed t...

Page 106: ... 170 If you are using the optional carrier sheet you must do the following settings in Advanced Specify the Original Size from a standard size Set Top Offset to 19 mm Note You can register and save frequently used settings as presets See the following for more details U Using your Presets on page 17 E Touch the numeric value for the number of prints and then enter the number of prints in the keypa...

Page 107: ...pient email addresses and the contacts for the shared folder Do the settings from the printer s screen or from Web Config This section explains the contacts settings in the shared folder from the printer s screen SeetheAdministrator sGuideforhowtodosettings in Web Config Creating Contacts A Touch Settings on the Home screen B Touch in order Contacts Manager Register Delete C Touch in order Add Ent...

Page 108: ...ing methods Select a recipient that is registered for frequent use Touch the icon that is displayed Keyboard Touch Keyboard Select Communication Mode and enter the location in Location Required Set any other locations as necessary Enter the Location in the following formats If the communication mode is SMB when using a shared folder on a computer host name server name folder path If the communicat...

Page 109: ... screen Select from your history Touch History select a recipient and then touch Close Note Thenumberof recipientthat you haveselected appears on the right side of the screen You can send an email to up to 10 recipients email addresses or groups If you include a group in your recipients you can also add the addresses in the group and send an email to up to 200 email addresses You cancheck alist of...

Page 110: ...e 174 If you are setting the scanning density do the setting from Advanced U Copy menu SC T5400M Series Only on page 170 If you are using the optional carrier sheet you must do the following settings Specify the Scan Size from a standard size Set Top Offset to 19 mm Note You can register and save frequently used settings as presets See the following for more details U Using your Presets on page 17...

Page 111: ... E 34x44in 2 A0 2 User Defined 3 1 Differs depending on the specifications of the scanner to be connected 2 Not supported by SC T3400 Series SC T3400N Series 3 89 to 914 mm wide up to 610 mm for SC T3400 Series SC T3400N Series Supported paper Roll paper only Enlarged copying to cut sheet is not possible Connecting the Scanner A Ready both the printer and the scanner For information on setting up ...

Page 112: ...ner a model that supports enlarged copying E Select the size of the document loaded in the scanner in OriginalSize and set the enlargement setting in Reduce Enlarge If you set Auto Fit Page to On printing is performed by automatically enlarging to fit the width of the roll paper loaded in the printer cImportant The image quality may decline or streaks may appear depending on the document or magnif...

Page 113: ...hen When JIS B1 or A0 is selected for Reduce Enlarge and multiple copies will be made The original is printed on thick stock e g postcards or photographs When multiple copies are made from an original placed on the glass the original may be scanned once for each copy Wait until all the copies have been printed before opening the scanner cover Use the ADF to scan multi page documents If multiple co...

Page 114: ...rence pages for more details on each item Paper Setting The Paper Setting menu is displayed if paper is loaded Details of each item U Paper Setting menu on page 136 Settings item Settings value Roll Paper SC T5400 Series SC T5400M Series SC T3400 Series SC T3400N Series User s Guide Using the Menu 114 ...

Page 115: ...isplayed when in Paper Type Custom Paper is selected Top Bottom Margins Standard Top 3 mm Bottom 3 mm Top15 mm Bottom 15mm Top 35 mm Bottom 15 mm Paper Suction 4 to 3 Back Tension Auto Standard High Extra High Drying Time Drying Time per Pass 0 to 10 0 sec Drying Time per Page 0 to 60 min Paper Size Check On Off Displayed when in Paper Type Custom Paper is selected Auto Cut On Off Remove Skew On O...

Page 116: ... supported paper types Coated Paper Generic Premium Glossy Sheet Others Paper Width A Series Display supported paper widths Displayed if Paper Size Check is set to Off US ANSI US ARCH B Series ISO B Series JIS Others User Defined Display paper size input screen Cut Sheet 1 sheet SC T5400 Series SC T5400M Series SC T3400 Series SC T3400N Series User s Guide Using the Menu 116 ...

Page 117: ...ck On Off Displayed when in Paper Type Custom Paper is selected Change Paper Type Paper Size Paper Type Plain paper Display supported paper types Coated Paper Generic Premium Glossy Sheet Others Paper Size A Series Display supported paper sizes US ANSI US ARCH B Series ISO B Series JIS Others User Defined Display paper size input screen Printer Status Details of each item U Printer Status menu on ...

Page 118: ... firmware version Print Status Sheet Configuration Status Sheet Print Settings Items marked with an asterisk are displayed only for SC T5400M Series Settings item Settings value General Settings Basic Settings Details of each item U General Settings Basic Settings on page 143 LCD Brightness 1 to 9 Sound Mute On Off SC T5400 Series SC T5400M Series SC T3400 Series SC T3400N Series User s Guide Usin...

Page 119: ...Z Length Unit m ft in Printer Settings Details of each item U General Settings Printer Settings on page 145 Paper Source Settings Error Notice Paper Size Notice On Off Paper Type Notice On Off Roll Paper Setup Detect Paper Meandering On Off Print Cutting Guideline On Off Cut for Borderless Print Two Cuts One Cut Quick Cut On Off Cut Mode Normal Quiet Margin Refresh On Off Back Tension 2 1 to 5 Cus...

Page 120: ...ng Time Drying Time per Pass 0 0 to 10 0 sec Drying Time per Page 0 0 to 60 min Paper Size Check On Off Auto Cut On Off Remove Skew On Off Restore Default Yes No Printing Language USB Auto HP GL 2 Network Auto HP GL 2 Universal Print Settings Paper Source Roll Paper Cut Sheet 1 sheet Quality Standard Speed Fine Super Fine Draft Color Mode Color Black White Page Margins option Clip By Margins Overs...

Page 121: ...Off Color Mode HP GL 2 EPSONStandard sRGB BusinessGraphics GIS LineDrawing Off No Color Management Select Palette Software Default Palette A Palette B Print Color Palette Print Define Palette Palette A Display screen to set pen width and pen color Palette B Restore default HP GL 2 Unique Settings Yes No Memory Device Interface Memory Device Enable Disable Thick Paper Off On Self Check and Cleaning...

Page 122: ...abled Display Wi Fi Direct wizard WhenWi FiDirectenabled Displaysettingsinformation andnumber of connected devices Change Network Name Change Password Disable Wi Fi Direct Delete Registered Device SC T5400 Series SC T3400 Series SC T3400N Series only Restore Default Settings Wired LAN Setup Start Setup Displayed when connected to a wireless LAN Network Status Wired LAN Wi Fi Status Display current...

Page 123: ...gs Off POP before SMTP SMTP AUTH Connection Check Start a test Scan Options Confirm Before Ejecting Scanned Document On Off Correct Skewed Image On Off Document Feed Adjustment 1 00 to 1 00 Image Stitching Adjustment 5 to 5 System Administration Details of each item U General Settings System Administration on page 161 Contacts Manager Register Delete Display the Register Delete screen for Contacts...

Page 124: ... Off On Access Control Off On Admin Settings Admin Password Register Change Clear All Settings Lock Setting Off On Restore Default Settings all Wi Fi network settings Yes No Copy Settings Yes No Scan Settings Yes No Clear All Data and Settings Yes No Firmware Update Update Start Checking Notification Off On Supply Status Display approximate remaining amounts as well as product number of consumable...

Page 125: ...ration Contacts Manager Enlarged Copy SC T5400 Series SC T3400 Series SC T3400N Series Only Displayed when an Epson A3 or A4 scanner is connected to the printer Set scaling in this menu to enable enlarged printing of the scanned documents Details of each item U Enlarged Copy menu SC T5400 Series SC T3400 Series SC T3400N Series Only on page 165 Settings item Settings value Copies 1 to 99 Color Mod...

Page 126: ...B 11x17in US C 17x22in US D 22x34in US E 34x44in ARCH A 9x12in ARCH B 12x18in ARCH C 18x24in ARCHD 24x36in ARCHE1 30x42in ARCHE 36x48in ISOB4 ISO B3 ISOB2 ISOB1 JISB5 JISB4 JISB3 JISB2 JISB1 24x30in 30x40 in 36 x 44in 30 x 40 cm 40 x 60 cm 50 x 70cm 60 x 90 cm 70x100 cm User Defined Only SC T5400 Series is displayed Color Mode SC T5400 Series SC T3400 Series SC T3400N Series Only EPSONStandard sRG...

Page 127: ...A1 ISO A1 A0 ISO A2 A1 ISO A0 A1 ISO A1 A2 ISO A0 A2 ISO A1 A3 ISO A0 A3 ISO A1 A4 ISO A0 A4 US ANSI ARCHA E USANSI ARCHB E USANSI ARCHA D USANSI ARCH C E USANSI ARCHB D USANSI ARCHD E USANSI ARCHC D US ANSI ARCH E D US ANSI ARCH D C US ANSI ARCH E C US ANSI ARCHD B USANSI ARCHE B USANSI ARCHD A USANSI ARCH E A Page Margins option Clip By Margins Oversize Borderless Advanced SC T5400 Series SC T54...

Page 128: ...fset 0 0 to 100 0 mm 0 00 to 3 94 inch Image Quality Contrast 4 to 4 Sharpness 4 to 4 Remove Background 4 to 4 Bidirectional On Off Color Mode EPSONStandard sRGB BusinessGraphics GIS LineDrawing Off No Color Management Clear All Settings Yes No Scan SC T5400M Series Only Details of each item U Scan menu SC T5400M Series Only on page 174 Settings item Settings value Network Folder FTP SC T5400 Seri...

Page 129: ...ns Password Password Setting Off On Password Enter password Printing Allowed Not Allowed Editing Allowed Not Allowed Resolution 200dpi 300dpi 400dpi 600dpi Scan Size Auto Detect ISO A Display supported scan sizes US ANSI US ARCH JIS B ISO B User Defined Display the Scan Size Input screen Top Offset 0 0 to 100 0 mm 0 00 to 3 94 inch Original Type Text Image Tracing Paper Recycled Blueprint Blueprin...

Page 130: ... 4 Sharpness 4 to 4 Remove Background 4 to 4 File Name Filename Prefix Enter the filename prefix Add Date On Off Add Time On Off Clear All Settings Yes No Email SC T5400 Series SC T5400M Series SC T3400 Series SC T3400N Series User s Guide Using the Menu 130 ...

Page 131: ...mpression PDF Settings Document Open Password Password Setting Off On Password Enter password Permissions Password Password Setting Off On Password Enter password Printing Allowed Not Allowed Editing Allowed Not Allowed Resolution 200dpi 300dpi 400dpi 600dpi Scan Size Auto Detect ISO A Display supported scan sizes US ANSI US ARCH JIS B ISO B SC T5400 Series SC T5400M Series SC T3400 Series SC T340...

Page 132: ...atercolor Rendering Density 4 to 4 Image Quality Contrast 4 to 4 Sharpness 4 to 4 Remove Background 4 to 4 Subject Enter subject Attached File Max Size 1MB 2MB 5MB 10MB 20MB 30MB File Name Filename Prefix Enter the filename prefix Add Date On Off Add Time On Off Clear All Settings Yes No Memory Device SC T5400 Series SC T5400M Series SC T3400 Series SC T3400N Series User s Guide Using the Menu 132...

Page 133: ...Compression Low Compression PDF Settings Document Open Password Password Setting Off On Password Enter password Permissions Password Password Setting Off On Password Enter password Printing Allowed Not Allowed Editing Allowed Not Allowed Resolution 200dpi 300dpi 400dpi 600dpi SC T5400 Series SC T5400M Series SC T3400 Series SC T3400N Series User s Guide Using the Menu 133 ...

Page 134: ...4 to 4 Image Quality Contrast 4 to 4 Sharpness 4 to 4 Remove Background 4 to 4 File Name Filename Prefix Enter the filename prefix Add Date On Off Add Time On Off Clear All Settings Yes No Network Folder SC T5400M Series Only Details of each item U Network Folder menu SC T5400M Series Only on page 182 Settings item Settings value Basic Settings Paper Source Roll Paper Cut Sheet 1 sheet Color Mode ...

Page 135: ...versize Borderless Bidirectional On Off Color Mode EPSONStandard sRGB BusinessGraphics GIS LineDrawing Off No Color Management Reduce Enlarge Auto Fit Page On Off Custom Size Actual Size User Defined SC T5400 Series SC T5400M Series SC T3400 Series SC T3400N Series User s Guide Using the Menu 135 ...

Page 136: ...er type settings even if the power is turned off Default setting Settings item Settings value Explanation Remove Rewind the roll paper until it is ejected from inside the printer U Removing Roll Paper on page 40 Feed Cut Paper Backward UseBackwardandForwardtomovethepapertothedesiredposition Touch Cut to cut the paper using the built in cutter U Cutting the Roll Paper on page 38 Forward Cut Media A...

Page 137: ...rmation U Lengths differ between the print results and print data on page 202 Manual Start Print length adjustment Start Print Head Alignment Auto Start Run this adjustment when ruled lines are duplicated lettering is warped or print results are grainy For details on Auto see the following U Print Head Alignment Auto on page 49 Run Manual if an error appears during automatic adjustment or you are ...

Page 138: ...s Dependingonthe paper type the ink may take a while to dry If the ink blurs on the paper set a longer time for drying the ink Increasing the drying time increases the time needed to print Drying Time per Page 0 0 to 60 minutes 0 0 Specify how long the printer pauses to allow the ink to dry after printing each page choose from values between 0 0 and 60 minutes Depending on the ink density or paper...

Page 139: ...setting valueofRemainingAlert andpapertypeareautomaticallyconverted to a barcode which is printed at the end of the roll paper The printer automatically reads the barcode and sets the settings when you load the roll paper next time Remaining Alert 1 0 to 15 0 m 5 0 Change Paper Type Paper Type Plain paper Select the type of the loaded paper The three options other than Others display the most rece...

Page 140: ...izontal banding or uneven colors appear in print results For details on Auto see the following U Paper Feed Adjust Auto on page 49 Run Manual if an error appears during automatic adjustment or you are not satisfied with the automatic adjustment results U Paper Feed Adjust Manual Procedure on page 198 Manual Start Print Head Alignment Auto Start Run this adjustment when ruled lines are duplicated l...

Page 141: ...t detect Off the paper width when paper is loaded Try choosing Off if a paper setting error is displayed even though the paper is correctly loaded Note however that the printer may print outside the paper when Off is selected If it prints beyond the edges of the paper the inside of the printer becomes dirty with ink We generally recommend using the printer with this set to On The changes are appli...

Page 142: ...wever ensure that a new ink cartridge of that color or a new Maintenance Box is readied in advance Furthermore theinkcolorcodesbesidethebarsindicatethefollowing Y Yellow M Magenta C Cyan K Black Message List Display a list of messages communicating printer status Select a message from the list to display detailed information Firmware Version Display the printer firmware version Print Status Sheet ...

Page 143: ...erting paper into the paper slot when loading paper Pattern2 Sleep Timer 1 to 60 minutes 15 Theprinterwillentersleepmodeifnoerrorshaveoccurred noprint jobs have been received and no actions are performed on the controlpanelforanextendedperiodoftime Thissettingselectsthe amount of time until the printer enters sleep mode U Saving Power on page 24 Power Off Timer Off You can select the time after wh...

Page 144: ...h Dutch Polish Russian Korean Simplified Chinese Traditional Chinese Operation Time Out On Setting this to On will display a message and return to the Home screenifthereisnooperationwithinacertainamountoftimewhile a screen other than the Home screen is displayed Off Keyboard QWERTY Select the key arrangement for the text input screen displayed when entering the name of Custom Paper or other name A...

Page 145: ...ral Settings Printer Settings Default setting Settings item Settings value Explanation Paper Source Settings SC T5400 Series SC T5400M Series SC T3400 Series SC T3400N Series User s Guide Using the Menu 145 ...

Page 146: ...t twice between pages Two Cuts or cut once between pages One Cut when printing multiple pages with borderless printing The setting selected with the printer driver takes priority when the printer driver is used U About Roll Paper Cutting on page 73 One Cut Quick Cut On Specify the cutting operation for printing multiple page jobs Setting this to On will cut the preceding printout when its trailing...

Page 147: ... Settings Printer Settings Custom Paper Setting Advanced Media Setting Back Tension Extra High If wrinkles are formed in the paper during printing even when High is set in the above Back Tension menu select Extra High and then configure the strength of the back tension in this setting A higher value produces a higher tension SC T5400 Series SC T5400M Series SC T3400 Series SC T3400N Series User s ...

Page 148: ...elect the media type that is the closest to the paper you are using Matte Paper Photo Paper CAD Others Advanced Media Setting Platen Gap 1 2 ThisisthePlatenGap distancebetweenprintheadandpaper forthepaper selected in Change Reference Paper so it does not normally need to be changed Change this to a setting that will widen the gap a higher value if print results are smeared 1 6 2 1 Top Bottom Mar g...

Page 149: ...er printing each page choose from values between 0 and 60 minutes Depending on the ink density or paper type the ink may take a while to dry If the ink blurs onthepaper setalongertimefordryingtheink Thelongerthedryingtime the more time required for printing Paper Size Check On Select whether to detect On or not detect Off the paper width when paper is loaded Try choosing Off if a paper setting err...

Page 150: ... a CAD application or plotter this is automatically determined and switched to HP GL 2 mode If HP GL 2 mode printing is not carried out normally or if normally printing in HP GL 2 or HP RTL set as HP GL 2 HP GL 2 Network Auto HP GL 2 SC T5400 Series SC T5400M Series SC T3400 Series SC T3400N Series User s Guide Using the Menu 150 ...

Page 151: ...e Super Fine Draft Color Mode Color Specifywhethertoprintincolororswitchtoblackandwhiteandthenprint Black White Page Margins option Clip By Margins Depending on the base output size setting adds the value selected for the page margin area of in the following illustration inside the hard clip area of the PS command of the data or the size selected for base output size area of in the following illus...

Page 152: ...mand of the data area of in the following illustration When set to a standard size or user defined size Adds the value selected for page margin area of in the following illustration outsidethesizeselectedforbaseoutputsize areaof in the following illustration With the actual output size the margin section becomes larger than the selected size the area of in the following illustration SC T5400 Serie...

Page 153: ...ing the print object becomes the base output size A Series ThecompatiblestandardsizesfortheselectedPaperSourcearedisplayed thereforeselecttheBaseOutputSize Theactualoutputsizedependsonthe Page Margins option For a cut sheet this setting is availableonly when the data does not contain a PS command If the data contains a PS command this setting is not available and the hard clip area of the PS comma...

Page 154: ...sdrawnbyRTLarenotrotated When both this setting and the RO command specify rotation rotation is performed using the combined amount of both values Note that rotation by the RO command is for objects only the arrow section in the following illustration and rotation is not performed for the drawn area the square section in the following illustration As a result objects in a section that protrude fro...

Page 155: ...lette cannot be changed Thebuilt inpalettespecifiesalogicalpenwithapenwidthof 0 35 mm and 256 colors Palette A Palette B Print according to the settings of the built in palette that you specified for Define Palette If Define Palette setting is not set the results are the same as when Default is selected When Default Palette A Palette B are set the pen configuration set in the application is ignore...

Page 156: ...On will have no effect On SelfCheck and Cleaning Off Self Check and Cleaning is a function to automatically perform a print head clogging check and perform cleaning if there is clogging at times such as when the power is turned on or before starting printing Select the number of times to perform automatic cleaning when there is clogging If Off is selected both the check and cleaning will not be pe...

Page 157: ...for connection Input of SSID and password is not required After selecting this menu item touch and hold the push button on the access point until it flashes then again touch Start Setup on the printer screen to connect Others PIN Code Setup WPS If the access point to use supports WPS Wi Fi Protected Setup then this menu item can be used for connection Touch this to display the PIN code and Start S...

Page 158: ...irect function on a smart device to connect to the printer a message is displayed on the printer prompting you to acceptor refusethe connection Ifrefuseis selected then subsequent connection with this device will not be possible To connect with devices for which connection has been refused open this menu and delete registered device information Restore Default Settings SC T5400M Series only Restor...

Page 159: ...ting from a folder U Printing Files from a Shared Folder Print from Folder SC T5400M Series Only on page 100 IPv6 Address Enable Select whether to enable or disable the IPv6 function Disable Link Speed Duplex Auto Normally set this to Auto 10BASE T Half Duplex 10BASE T Full Duplex 100BASE TX Half Duplex 100BASE TX Full Duplex Redirect HTTP to HTTPS Enable Selectwhethertoenableordisablethefunctiont...

Page 160: ... eject the original right after scanning it set this to Off Off Correct Skewed Im age On Automatically corrects a scanned image that is skewed and then saves it The range of correction is from the origin to a width of 914 4 mm Enable this only if the OriginalSize or ScanSize has been set to Auto Detect Off Document Feed Ad justment 1 00 to 1 00 0 If the length of the original and the print results...

Page 161: ...mail addresses of your contacts List of Email Contacts List of Folder FTP Contacts View Options Tile View Change how to view your contacts List View Search Options Begins with Change how to search for contacts Ends with Includes Security Settings Restrictions SC T5400M Series Only Access to Register Delete Contacts Off Administrators can be permitted individually to view and change settings On Acc...

Page 162: ...enus such as network configuration Thesemenuswillonlybedisplayedifthecorrectpasswordisentered preventing non administrators from accidentally changing settings Keep the password in a safe place Should you forget the password contact your dealer or Epson Support Change Clear All Settings Lock Setting Off Setting On will result in the administrator password being requested when any of the following ...

Page 163: ...e power cable from the outlet Failure to observe this precaution could lead to damage Notification Off Set On to automatically check periodically for new firmware If new firmware is found a message will be displayed when the power is turned on On Maintenance Settings item Settings value Explanation Print Quality Adjustment Start PerformthesameadjustmentasinMediaAdjustinthePaperSetting menu Whencar...

Page 164: ...er Whenleftforsometime theclogged ink may dissolve If the nozzles are still clogged contact your dealer or Epson Support Discharging Charging Ink Start The print head may fail if the environmental temperature becomes 10 C or lower Perform this action if you expect to be transporting storing the printer in an environment of 10 C or less Touch Start and follow the on screen instructions to discharge...

Page 165: ...her than those shown here cannot be used Reduce Enlarge Auto Fit Page On SetOntoenlargethecopysothattheshortedgeofthedocumentfits the width of the roll paper currently loaded in the printer Iftheshortedgeofthedocumentiswiderthantherollpaper this will be printed at actual size If the printer is unable to detect the width of the roll paper then an error will occur when copying is started Off Custom ...

Page 166: ... item Settings value Explanation Quality Speed Choose Copy Quality in view of image quality and print speed Fine SC T5400 Series SC T5400M Series SC T3400 Series SC T3400N Series User s Guide Using the Menu 166 ...

Page 167: ...aper is not loaded as in the set paper source then an error will occur during printing Cut Sheet 1 sheet Color Mode Black White Select whether to print in color or black and white Color Advanced Quality Speed Select the print quality Fine Super Fine Page Margins option Clip By Margins Add margins areas of in the following illustration inside the output size areas of in the following illustration s...

Page 168: ...ice between pages or cut once between pages in the following menu item Settings General Settings Printer Settings Paper Source Settings Roll Paper Setup Cut for Borderless Print Bidirectional On SettingthistoOnwillcausetheprintheadtoprintwhilemovingboth left and right Setting this to Off will reduce the ruled line misalignment but printing will take more time Off Color Mode SC T5400 Series SC T340...

Page 169: ...his to On this setting is returned to Actual Size If the printer is unable to detect the width of the paper an error will occur when the Print button is touched Off Custom Size Actual Size A4 A3 Super A3 A2 Super A2 A1 Super A1 A0 Super A0 Letter Legal US B 11x17in US C 17x22in US D 22x34in US E 34x44in ARCH A 9x12in ARCH B 12x18in ARCH C 18x24in ARCH D 24x36in ARCH E1 30x42in ARCH E 36x48in ISO B...

Page 170: ...the width of the roll paper currently loaded in the printer Iftheshortedgeofthedocumentiswiderthantherollpaper thiswill be printed at actual size If the printer is unable to detect the width of the roll paper then an error will occur when copying is started Off Custom Size Actual Size ISO A4 A0 ISO A3 A0 ISO A4 A1 ISO A2 A0 ISO A3 A1 ISO A1 A0 ISO A2 A1 ISO A0 A1 ISO A1 A2 ISO A0 A2 ISO A1 A3 ISO ...

Page 171: ...owing illustration set in the Reduce Enlarge settings With the actual output size the margin sections become larger than the set output size areas of in the following illustration Borderless This is enabled when Roll Paper is selected in Paper Source The print data is enlarged slightly in respect to the output size set in Reduce Enlarge to print so that margins do not appear within the output size...

Page 172: ...t 0 0 to 100 0mm 0 0 0 00 to 3 94inch 0 00 If you do not want to copy the top margin of the original you can adjust the top and then copy the original Enter the value for the length from the top of where you want to start copying If the carrier sheet is loaded set the value to 19 mm Image Quality Contrast 4 to 4 0 Setthecontrast Negativevalues areweakerandpositivevalues are stronger Sharpness 4 to...

Page 173: ...able for when printing GIS Geographic Information System topographical maps or similar Line Drawing Perform color correction suitable for the data of CAD drawings and other line drawings Off No Color Management Do not perform color correction Clear All Settings Yes Touch Yes to restore all Basic Settings and Advanced to the default settings No SC T5400 Series SC T5400M Series SC T3400 Series SC T3...

Page 174: ...an menu SC T5400M Series Only Default setting Settings item Settings value Explanation Network Folder FTP SC T5400 Series SC T5400M Series SC T3400 Series SC T3400N Series User s Guide Using the Menu 174 ...

Page 175: ...igh Compression Select the compression ratio for when you save the scanned image Standard Compression Low Compression PDF Settings Document Open Password Setting the file format to PDF allows you to set the security for the PDF Set Document Open Password when you create a PDF that requires a password to be opened To create a PDF file for which a password is needed to print or edit set the Permissi...

Page 176: ...aded set the value to 19 mm Original Type Text Image Select the type in accordance with the loaded original Tracing Paper Recycled Blueprint Blueprint Inverted Watercolor Rendering Density 4 to 4 0 Select the density for scanning Negative values are lighter and positive values are darker Image Quality Contrast 4 to 4 0 Setthecontrast Negativevalues areweakerandpositivevalues are stronger Sharpness...

Page 177: ...le format in which to save the scanned image PDF PDF A TIFF Multi Page CompressionRa tio High Compression Select the compression ratio for when you save the scanned image Standard Compression Low Compression PDF Settings Document Open Password Setting the file format to PDF allows you to set the security for the PDF Set Document Open Password when you create a PDF that requires a password to be op...

Page 178: ... of the original you can adjust the top and then scan Enter the value for the length from the top of where you want to start scanning If the carrier sheet is loaded set the value to 19 mm Original Type Text Image Select the type in accordance with the loaded original Tracing Paper Recycled Blueprint Blueprint Inverted Watercolor Rendering Density 4 to 4 0 Select the density for scanning Negative v...

Page 179: ...Add the date to the file name Off Add Time On Add the time to the file name Off Clear All Settings Yes Touch Yes to restore all Scan Settings to the default settings No Memory Device Basic Settings Color Mode Black White Select whether to scan in color or black and white Color File Format File Format JPEG Select the file format in which to save the scanned image PDF PDF A TIFF Multi Page Compressi...

Page 180: ...depending on the original it may not be possible to detect the width correctly even when the setting is Auto Detect Similarly tracing paper and the optional carrier sheet are not detected automatically In such cases change from the standard size and specify a width of your choosing If the desired size is not in the options then select User Defined and enter the length and width of the original ISO...

Page 181: ...ve Back ground 4 to 4 0 Set the adjustment value for removing the background Configure this setting when you are scanning originals with colors or originals that are thin or when removing unwanted backgrounds Negative values are weaker and positive values are stronger File Name Filename Prefix Enter the filename prefix Use single byte alphanumeric characters or symbols to enter the prefix for the ...

Page 182: ...k White Select whether to print in color or black and white Color Advanced Quality Speed Select the print quality Fine Super Fine Page Margins option Clip By Margins Add margins areas of in the following illustration inside the output size areas of in the following illustration set in the Reduce Enlarge settings When there is a print object in the margin section it is clipped and not printed SC T5...

Page 183: ...whether to insert a margin and cut twice between pages or cut once between pages in the following menu item Settings General Settings Printer Settings Paper Source Settings Roll Paper Setup Cut for Borderless Print Bidirectional On Setting this to On causes the print head to print while moving both leftandright Setting thistoOffreduces ruled linemisalignment but printing takes more time Off Color ...

Page 184: ...t to On Furthermore if the settings for the Paper Source are changed without replacing or loading the paper after setting this to On the settings return to the actual size in the default settings If the printer is unable to detect the width of the paper an error will occur when the Print button is touched Off Custom Size Actual Size User Defined Selecttheoutputsize IftheActualSizeisnotselected set...

Page 185: ...orderless printing Doing so may cause the pads to become detached D Use a soft cloth to remove any dust or dirt from the platen Thoroughly wipe the area shown in blue in the illustration below To avoid spreading the dirt wipe from the inside to the outside For stubborn dirt clean it using a soft cloth that has been dampened with a small amount of neutral detergent and then thoroughly wrung out The...

Page 186: ...um amount However if an ink cartridge with not much ink remaining is removed and reinstalled it may not be usable because some ink is consumed to ensure the reliability of the printer Supported ink cartridges U Options and Consumable Products on page 218 cImportant Epson recommends the use of genuine Epson ink cartridges Epson cannot guarantee the quality or reliability of non genuine ink The use ...

Page 187: ...el facingtowardyou slideitallthewayintotheslot Matchthecoloroftheinkcartridgetothecolorof the label on the printer Repeat Steps 3 to 5 to replace the other ink cartridges cImportant Install ink cartridges into all slots You cannot print if any of the slots are empty F Close the cartridge cover cImportant We recommend that you remove and shake the installed ink cartridges once every three months to...

Page 188: ...ace the Maintenance Box while viewing the procedure on the screen To see the guide from the Home screen touch Settings Maintenance Replace Maintenance Box When you open the Maintenance Box cover for SC T5400 Series SC T5400M Series you will find a Maintenance Box on both the left and right sides The replacement procedure is the same for both of them A Open the Maintenance Box cover B Pull out the ...

Page 189: ...re you start work Caution Store the cutter out of the reach of children The cutter s blade could cause an injury Pay careful attention when replacing the cutter cImportant Droppingthecutter orknockingitagainsthard objects may chip the blade Theprotectivesheetinserted inthenewcutteris to protect the blade Do not remove it until you are instructed to do so A Remove any paper from the printer U Remov...

Page 190: ...r so that the pin on the printer matches up with the hole on the cutter Use a cross head screwdriver to tighten down the screw to hold the cutter in place cImportant Screw the cutter firmly otherwise the cut position may be slightly shifted or skewed F Touch OK Thecutterreturnstoitsoriginalposition andthe protective sheet inserted in the cutter comes out Remove the protective sheet SC T5400 Series...

Page 191: ...aintenance Box with a new one The used Maintenance Box may be reinstalled after cleaning is completed U Replacing Maintenance Box on page 188 The paper was skewed or the paper size could not be detected Reload the paper Make sure the original is not at an angle and then reload it If the original is not rectangular or the leading edge is not straight it cannot be detected automatically Change Scan ...

Page 192: ...d A service call occurs if you continue to use the printer Printer Error Printer error Turn the power off and on again For details see your documentation XXXXXX Turn off the printer disconnect the power cable from the outlet and from the AC inlet on the printer and then reconnect Turn on the printer again multiple times If the same error is displayed on the LCD panel contact your dealer or Epson S...

Page 193: ...e option selected for Print to the following port s USB USBxxx x stands for the port number for the USB connection Network The correct IP address for the network connection If it is not indicated the printer driver is not installed correctly Delete and reinstall the printer driver U Uninstalling Software on page 31 The printer driver is not installed properly Mac o Is the printer added to the prin...

Page 194: ...system administrator or refer to the manual for your network system Printing from iPhone or iPad is not possible o Check printer settings Connect the iPhone or iPad to the same network SSID as the printer In Web Config enable AirPrint settings U How to Use Web Config on page 28 The printer has an error o View the message displayed in the control panel U What to do When a Message is Displayed on pa...

Page 195: ...93 The Driver Version shown on the test page is the version number of the Windows internal driver This differs from the Epson printer driver version that you installed The print head moves but nothing prints Cannot print from the printer driver o Have you selected Print Preview in the Mac printer driver Dependingon the applicationyouare using youmay not be able to print when Print Preview is enabl...

Page 196: ... page 218 Supported Commercially Available Paper on page 224 U Notes on Loading the Paper on page 34 Check that the paper type setting matches the loaded paper and if not change it U Setting Loaded Paper on page 44 If print results do not improve o Perform Easy Adjustment Paper settings are optimized for the paper loaded U Optimizing Paper Settings Media Adjust on page 48 If Auto Adjustment is una...

Page 197: ...nozzles are not clogging Clogging is resolved but streaks still appear in the print results Perform Paper Feed Adjust Manual U Paper Feed Adjust Manual Procedure on page 198 If ruled lines are duplicated lettering is warped or print results are grainy Perform Print Head Alignment Manual U Print Head Alignment Manual Procedure on page 198 SC T5400 Series SC T5400M Series SC T3400 Series SC T3400N S...

Page 198: ...attern 0 or 2 enter 1 D Select the adjustment pattern of 2 in the same way as for 1 E Touch OK Printing of the second set of adjustment patterns starts For cut sheet smaller than A2 size load the second sheet of paper cImportant Whenusingrollpaperwiththeautocutturned off thepartwiththefirstsetofpatternsprinted on it is pulled inside the printer in order to print the second set of patterns Do not t...

Page 199: ...ose enter the numeric value that comes between them For example if you are unsure whether to enter pattern 0 or 2 enter 1 When Print head alignment complete appears the procedure is finished The adjustment results are saved as settings of the currently selected paper type When you want to unclog the print head We recommend checking for clogging by performing a print head nozzle check if the printe...

Page 200: ...es to return to Step 2 Repeat Steps 2 to 4 and check if the problem has been resolved If the nozzles are still clogged after performing print head cleaning three times in a row then perform Powerful Cleaning Select Maintenance Powerful Cleaning to perform Powerful Cleaning U Maintenance on page 163 SC T5400 Series SC T5400M Series SC T3400 Series SC T3400N Series User s Guide Problem Solver 200 ...

Page 201: ...nd then print o AreyouusingagenuineEpsoninkcartridge This printer is developed for use with Epson ink cartridges If you use non Epson ink cartridges printouts may be faint or the color of the printed image may be changed because the remaining ink level is not correctly detected Be sure to use the correct ink cartridge o Are you using an old ink cartridge The print quality drops when an old ink car...

Page 202: ...e roll paper margin set wide If margins narrower than the margins set in the roll paper Advanced Media Setting Top Bottom Margins menu are set in the application software then priority is given to the printer settings U Roll Paper menu on page 136 Lengths differ between the print results and print data If you want to print to roll paper with lengths exactly as specified in the print data such as w...

Page 203: ...reen touch Settings Printer Settings Thick Paper On U General Settings Printer Settings on page 145 When using commercially available roll paper registered as custom paper touch the Roll paper information area Advanced Media Setting Platen Gap and try changing the setting to a value that will widen the platen gap a higher value o Is the print head scuffing the edge of the paper If smearing or soil...

Page 204: ...arry out cleaning with the following procedure Clean the platen and outer edges of the pads for borderless printing U Cleaning the platen and outer edges of the pads for borderless printing on page 204 Soiling occurs on the back of the paper again right after cleaning Replace the pads for borderless printing U Replacing the pads for borderless printing on page 205 cImportant Continuing use with pa...

Page 205: ... available cotton swabs G After cleaning close the front cover Replacing the pads for borderless printing Obtain the Borderless Replacement Pad Kit for this printer and then replace the pads for borderless printing U Options and Consumable Products on page 218 When replacing the pads for borderless printing replace only the ones at the places where soiling occurs on the paper back side There is no...

Page 206: ...all ink that has accumulated at the following three places Bottom Sides Center groove F Bend a new pad for borderless printing as shown in the illustration cImportant Do not bend the new pads for borderless printing at other than the specified place SC T5400 Series SC T5400M Series SC T3400 Series SC T3400N Series User s Guide Problem Solver 206 ...

Page 207: ...orderless printing is higher than the surrounding surface If any portion of the pads is higher than the surrounding surface it will rub against the print head and may result in printer failure J Close the front cover Dispose of the used pads for borderless printing and cleaning sticks U Handling of Used Consumables on page 186 To store any unused new pads for borderless printing return them into t...

Page 208: ...ouch inorderfrom the Home screen Roll paper information area Manage Remaining Amount and then change Setup from On to Off Feeding or ejecting problems Unable to feed or eject paper o Is the paper loaded in the correct position See the following for the correct paper loading positions U Loading Roll Paper on page 35 U Loading Cut Sheet 1 sheet on page 42 o Is the paper loaded in the correct directi...

Page 209: ...dia Setting Back Tension High Paper does not collect in the paper basket or is creased or folded o Doestheprintjobrequirealotofink oristhe humidity of the workplace high Depending on the job and the work environment paper may not collect in the paper basket Take the following measures as appropriate Paper does not collect in the paper basket Use your hands to lightly press the paper into the paper...

Page 210: ...er and then turn it back on After removing the paper reload the paper and restart printing U Loading Roll Paper on page 35 cImportant Before you reload the roll paper cut the edge straight horizontally Cut any wavy or creased sections If there are any wrinkles on the edge then paper may not be fed or it may jam Cut sheets jam To remove jammed paper follow the steps below A Open the front cover B W...

Page 211: ...nter and then turn it back on After removing the paper reload the paper and restart printing U Loading Cut Sheet 1 sheet on page 42 Original Is Jammed SC T5400M Series Only To remove a jammed original follow the steps A Open the scanner cover cImportant Do not lean against or place objects on the scanner cover B Remove the jammed original C Close the scanner cover SC T5400 Series SC T5400M Series ...

Page 212: ...dministrator password contact your dealer or Epson Support Print head is automatically cleaned o To ensure print quality the printer may automatically perform head cleaning when the printer is turned on or before starting printing The printer turned off due to a power cut o Turn off the printer and then turn it back on When the printer is not turned off normally the print head may not be capped co...

Page 213: ...so the printer may not operate correctly A Open the scanner cover B Usingasoftcloth wipeoffanydust dirt orpaper particles resembles white powder Thoroughly wipe the area shown in blue in the illustration below C Use the cleaning kit or the clean side of the soft cloth to thoroughly wipe the area shown in blue in the illustration below SC T5400 Series SC T5400M Series SC T3400 Series SC T3400N Seri...

Page 214: ...t be fed properly change Original Size or Scan Size to the standard size from Auto Detect o Is the original loaded with skew Reload the original If the original is loaded with skew it cannot be fed properly o Is the original folded Unfold the original If the original is folded while the printer is set to Auto Detect in Original Size or Scan Size the width of the original may not be read correctly ...

Page 215: ...aper o Isthereduce enlargementcopysettingsetto Auto Fit Page On If Auto Fit Page is set to On in Reduce Enlarge from theCopymenu thescannermaynotbeabletodetect the size of the original correctly and the print result will not match the width of the roll paper In Advanced Original Size specify the size of the original you loaded Scanned Image Is Misaligned Blurred o Change the direction that the ori...

Page 216: ...lts and the length of the original of copied or scanned files do not match use the following procedure to do Document Feed Adjustment If you want to shorten the length of the print out press the minus button If you want to lengthen it press the plus button Differences in length may occur due to the type of paper used for printing A Touch Settings on the Home screen B Touch in order General Setting...

Page 217: ...about 0 1 mm in the actual size When the Scan Results Are Shifted Up in Relation to the Feed Direction of the Original Set the adjustment value toward the plus sign When the Scan Results Are Shifted Down in Relation to the Feed Direction of the Original Set the adjustment value toward the minus sign D Touch OK SC T5400 Series SC T5400M Series SC T3400 Series SC T3400N Series User s Guide Problem S...

Page 218: ...cause erratic printer behavior Information about non genuine ink levels may not be displayed and use of non genuine ink is recorded for possible use in service support Printer model Ink color Product Number 700 ml 350 ml 110 ml SC T5405 SC T5400M SC T3405 SC T3405N Black T41E5 T41F5 T41R5 Cyan T41E2 T41F2 T41R2 Magenta T41E3 T41F3 T41R3 Yellow T41E4 T41F4 T41R4 SC T5435 SC T5430M SC T3435 Black T4...

Page 219: ...ordance with a model you are using Roll Feed Spindle 36 for SC T5485 SC T3485N C12C933311 Roll Feed Spindle 24 except for SC T5485 SC T3485N C12C933281 Roll Feed Spindle 24 for SC T5485 SC T3485N C12C933291 Borderless Replacement Pad Kit S400064 Pads for borderless printing U The reverse side of the printed paper is soiled on page 204 Document Carrier Sheet A0 C12C935381 Used when loading thin ori...

Page 220: ...ommended not available Auto media adjust Describestheavailabilityofautomediaadjustments EasyAdjustment PaperFeedAdjust Auto andPrintHead Alignment Auto available available but may be less effective not available Note The paper names in the following table are displayed by the paper type settings in the menu of the printer driver or the printer Some parts of paper names may be omitted Example Premi...

Page 221: ...in 728 mm B1 914 mm 36 in Enhanced Synthetic Paper 432 mm 17 in 610 mm 24 in 914 mm 36 in Enhanced Adhesive Synthetic Paper 610 mm 24 in 914 mm 36 in Enhanced Low Adhesive Synthetic Paper 610 mm 24 in 914 mm 36 in Backlight Film Roll 610 mm 24 in 914 mm 36 in Available only with SC T5400 Series Cut Sheet Not all paper types and sizes are available in all countries or regions SC T5400 Series SC T54...

Page 222: ...egal A3 A3 SuperB A2 US C Archival Matte Paper A4 Letter A3 A3 SuperB A2 US C Photo paper Glossy A4 Letter A3 A3 SuperB US B Premium Glossy Photo Paper A4 Letter 11 x 14 in A3 A3 SuperB A2 US C SC T5400 Series SC T5400M Series SC T3400 Series SC T3400N Series User s Guide Appendix 222 ...

Page 223: ...less Auto media adjust Premium Semigloss Photo Paper A4 Letter A3 A3 SuperB A2 US C Premium Luster Photo Paper A4 Letter A3 A2 US C SC T5400 Series SC T5400M Series SC T3400 Series SC T3400N Series User s Guide Appendix 223 ...

Page 224: ...ies 254 to 914 mm 36 inches SC T3400 Series SC T3400N Series 254 to 610 mm 24 inches Paper thickness 0 08 to 0 3 mm Roll weight 12 kg or less 1Whenblueprintpaperisselected theprintdataisconvertedtoblueandthenprinted Youcanperformblueprinting printingblue lines on a blue background For blue paper use light blue high quality paper approximately 60 to 80 g m2 2 Only plain paper with a 3 inch core is ...

Page 225: ...t and right for cut sheet 254 mm 10 inches 300 mm 11 8 inches A3 329 mm 13 inches 406 mm 16 inches A2 US C 432 mm 17 inches ISO B2 500 mm JIS B2 515 mm A1 594 mm A1 ARCH D 610 mm 24 inches 700 mm 27 5 inches JIS B1 728 mm A0 841 mm A0 ARCH E 914 mm 36 inches Only supported by SC T5400 Series SC T5400M Series SC T5400 Series SC T5400M Series SC T3400 Series SC T3400N Series User s Guide Appendix 22...

Page 226: ...Adjust Paperadjustmentresultswillbesaved as the newly added paper type settings Refer to the following menu for details on custom paper settings U General Settings Printer Settings on page 145 Select the paper type from the following Epson Special Media settings and perform Media Adjust Enhanced Adhesive Syn Enhanced Low Adh Syn Heavyweight Polyester Glossy Film2 Backlight Film Roll Byperformingth...

Page 227: ...iver settings and the computer environment Margins for roll paper depend on the settings values for Top Bottom Margins in the menu as shown in the table below Settings of Top Bottom Margins U Roll Paper menu on page 136 The default setting is Standard Settings of Top Bottom Margins Margin Values Standard A C 15 mm B D 3 mm Top 3 mm Bottom 3 mm A C 3 mm B D 3 mm Top 15 mm Bottom 15 mm A C 15 mm B D...

Page 228: ...nd right margins will be 0 mm The gray area in the illustration below shows the printablearea Thearrowintheillustrationindicatesthe direction that the paper is ejected 1 SC T5400 Series SC T5400M Series 2 SC T3400 Series SC T3400N Series 3 SC T5400 Series SC T3400 Series SC T3400N Series The top and bottom margins vary depending on the print quality setting Speed Fine etc 4 SC T5400M Series The to...

Page 229: ...N Series 2 or more persons When you lift the printer maintain a natural posture When you lift the printer place your hands at the specified locations on the left and right as indicated in the following illustration If you lift the printer while holding other sections you may be injured For example you may drop the printer or your fingers may be pinched when lowering the printer SC T5400 Series SC ...

Page 230: ...ands moving the printer on casters is possible providing there are no steps or unevenness in the floor along the route however pay attention to the following points Caution Formodelswithstands ensurethatyouabidebythe following points in order to prevent damage from falling over Do not move the printer with casters locked Avoid areas with steps or unevenness After moving ensure the casters are lock...

Page 231: ...capacity If the remaining capacity box is low first prepare a new replacement Maintenance Box A If paper is loaded remove all paper U Removing Roll Paper on page 40 U Removing Cut Sheet 1 Sheet on page 43 B From the Home screen touch Settings Maintenance Discharging Charging Ink C Touch Start Ink discharging starts and the power turns off automatically when it finishes cImportant Do not open the c...

Page 232: ... 3 05 GHz or more Available memory space 1 GB or more Hard disk Available volume to install 32 GB or more Display resolution WXGA 1280 800 or better Connection method with the printer USB Ethernet or Wi Fi For details on the connection methods interface specifications see the following U Specifications Table on page 235 Mac Operating system Mac OS X v10 6 8 or later CPU Intel Core2 Duo 3 05 GHz or...

Page 233: ...with the printer 2 Ethernet or Wi Fi 1 Use the latest version 2 See the following for details on the network interfaces U Specifications Table on page 235 Mac Browser Safari 1 Firefox 1 Chrome 1 Connection method with the printer 2 Ethernet or Wi Fi 1 Use the latest version 2 See the following for details on the network interfaces U Specifications Table on page 235 SC T5400 Series SC T5400M Series...

Page 234: ...r more Available memory space 1 GB or more Hard disk Available volume to install 10 GB or more Display resolution 1024 768 or higher Connection method with the printer SuperSpeed USB Ethernet 1000Base T Browser Windows Internet Explorer Microsoft Edge Use the latest version Internet Explorer 11 or later Mac Operating system Mac OS X 10 7 Lion or later CPU Intel Core2 Duo 2 0 GHz or more Available ...

Page 235: ... a month at 40 C In storage After unpacking Ink charged 10 to 40 C Within a month at 40 C Ink discharged 1 20 to 25 C Within a month at 25 C Printer Specifications Humidity Printing 20 to 80 40 to 60 is recommended without condensation In storage 5 to 85 without condensation Temperature and humidity range for operating the range shown by diagonal lines is recommended Dimensions Width x Depth x Hei...

Page 236: ...Wi Fi Standards IEEE802 11b g n 4 Frequency Range 2 4 GHz Coordination Modes Infrastructure Wi Fi Direct Simple AP 5 Wireless Securities WEP 64 128bit WPA PSK TKIP WPA2 PSK AES 6 WPA2 Enterprise Network Printing Protocols Func tions 7 EpsonNet Print Windows Standard TCP IP Windows WSD Printing Windows Bonjour Printing Mac IPP Printing Mac AirPrint iOS Mac Printing from FTP client Security Protocol...

Page 237: ...an Magenta Yellow Use by date See the expiration date printed on the ink cartridge package or on the cartridge store at normal temperature Print quality guar antee expiry One year after installing to the printer Storage temperature Uninstalled 20 to 40 C Within four days at 20 C within a month at 40 C Installed 20 to 40 C Within four days at 20 C within a month at 40 C Transporting 20 to 60 C With...

Page 238: ...reaisnotlistedbelow contactthedealerwhere you purchased your product Epson support will be able to help you much more quickly if you give them the following information Product serial number Theserialnumberlabelisusuallyonthebackofthe product Product model Product software version Click About Version Info or similar button in the product software Brand and model of your computer Yourcomputeroperat...

Page 239: ...number Fax number Address 05 2784222 05 2784555 No 463 Zhongxiao Rd East Dist Chiayi City 600 Taiwan 06 2221666 06 2112555 No 141 Gongyuan N Rd North Dist Tainan City 704 Taiwan 07 5520918 07 5540926 1F No 337 Minghua Rd Gushan Dist Kaohsiung City 804 Taiwan 07 3222445 07 3218085 No 51 Shandong St Sanmin Dist Kaohsiung City 807 Taiwan 08 7344771 08 7344802 1F No 113 Shengli Rd Pingtung City Pingtu...

Page 240: ...Support via e mail are available Epson HelpDesk Toll Free 800 120 5564 Our HelpDesk team can help you with the following over the phone Sales enquiries and product information Product usage questions or problems Enquiries on repair service and warranty Help for Users in Thailand Contacts for information support and services are World Wide Web https www epson co th Information on product specificat...

Page 241: ... sales services users are welcome to contact Epson Hong Kong Limited Internet Home Page Epson Hong Kong has established a local home page in both Chinese and English on the Internet to provide users with the following information Product information Answers to Frequently Asked Questions FAQs Latest versions of Epson product drivers Users can access our World Wide Web home page at https www epson c...

Page 242: ...s in the Philippines To obtain technical support as well as other after sales services users are welcome to contact the Epson Philippines Corporation at the telephone and fax numbers and e mail address below Trunk Line 63 2 706 2609 Fax 63 2 706 2665 Helpdesk Direct Line 63 2 706 2625 E mail epchelpdesk epc epson com ph World Wide Web https www epson com ph Information on product specifications dr...

Reviews: