


116
Note:
The two Rear projection modes cannot be used with the interactive features.
You can change the projection mode using the remote control or by changing the
Projection
setting in
the
Extended
menu.
Changing the Projection Mode Using the Remote Control
Changing the Projection Mode Using the Menus
Parent topic:
Using Basic Projector Features
Changing the Projection Mode Using the Remote Control
You can change the projection mode to flip the image over top-to-bottom.
1.
Turn on the projector and display an image.
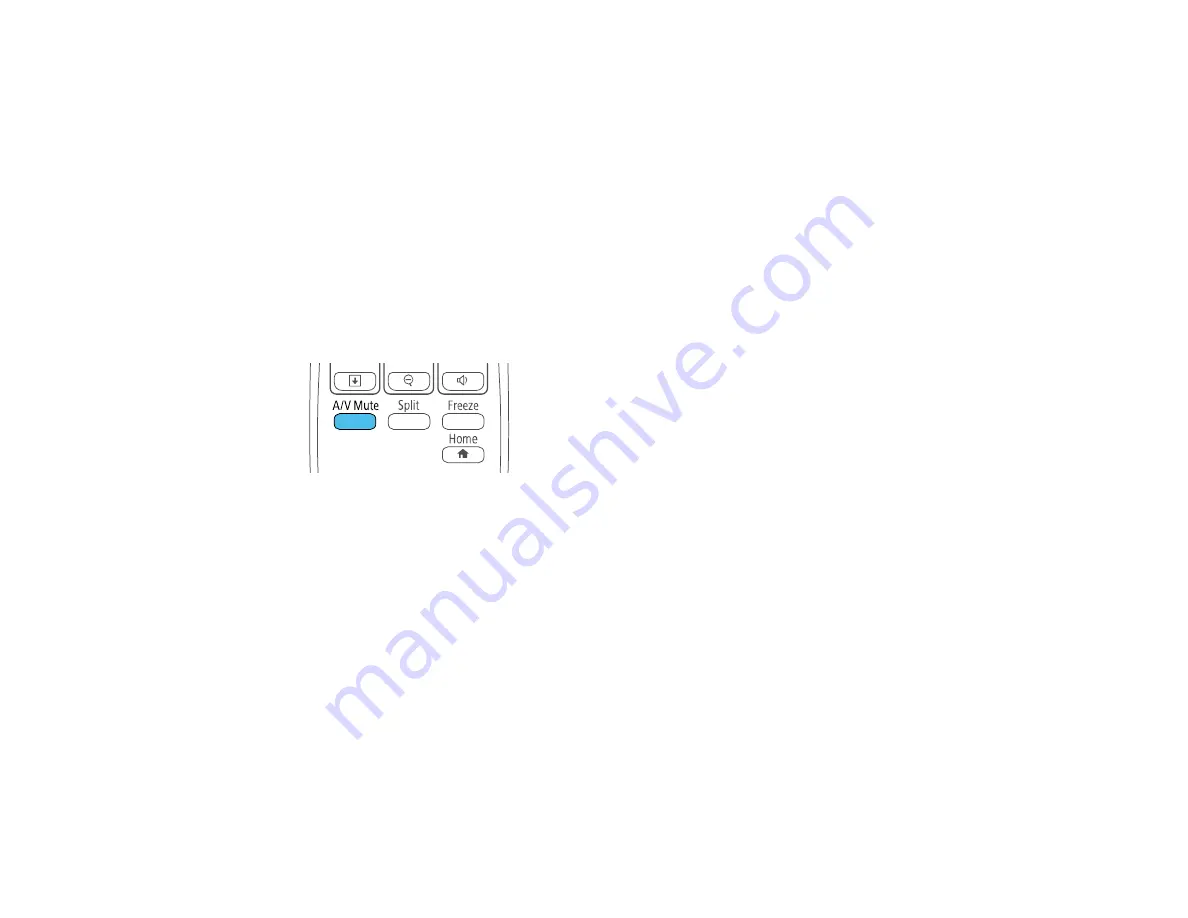
2.
Hold down the
A/V Mute
button on the remote control for 5 to 10 seconds.
The image disappears briefly and reappears flipped top-to-bottom.
3.
To change projection back to the original mode, hold down the
A/V Mute
button for 5 to 10 seconds
again.
Parent topic:
Changing the Projection Mode Using the Menus
You can change the projection mode to flip the image over top-to-bottom and/or left-to-right using the
projector menus.
1.
Turn on the projector and display an image.
2.
Press the
Menu
button.
Summary of Contents for BrightLink 710Ui
Page 1: ...BrightLink 710Ui User s Guide ...
Page 2: ......
Page 28: ...28 Projector Parts Remote Control ...
Page 33: ...33 Rear 1 Laser diffusion ports 2 Installation magnets Parent topic Projector Part Locations ...
Page 57: ...57 1 Remove the battery cover 2 Insert the batteries with the and ends facing as shown ...
Page 66: ...66 2 Unscrew and remove the cable cover if it is attached screwdriver not included ...
Page 186: ...186 3 Select Touch Unit Setup and press Enter 4 Select Touch Calibration and press Enter ...
Page 251: ...251 2 Slide the air filter cover latch and open the air filter cover ...
Page 255: ...255 1 Twist off the tip of the pen to remove it ...
Page 257: ...257 1 Twist off the tip of the pen to remove it 2 Remove the soft tip ...
Page 296: ...296 Side ...


