


109
Note:
This feature is not available if the
Zoom
option is set to the widest setting.
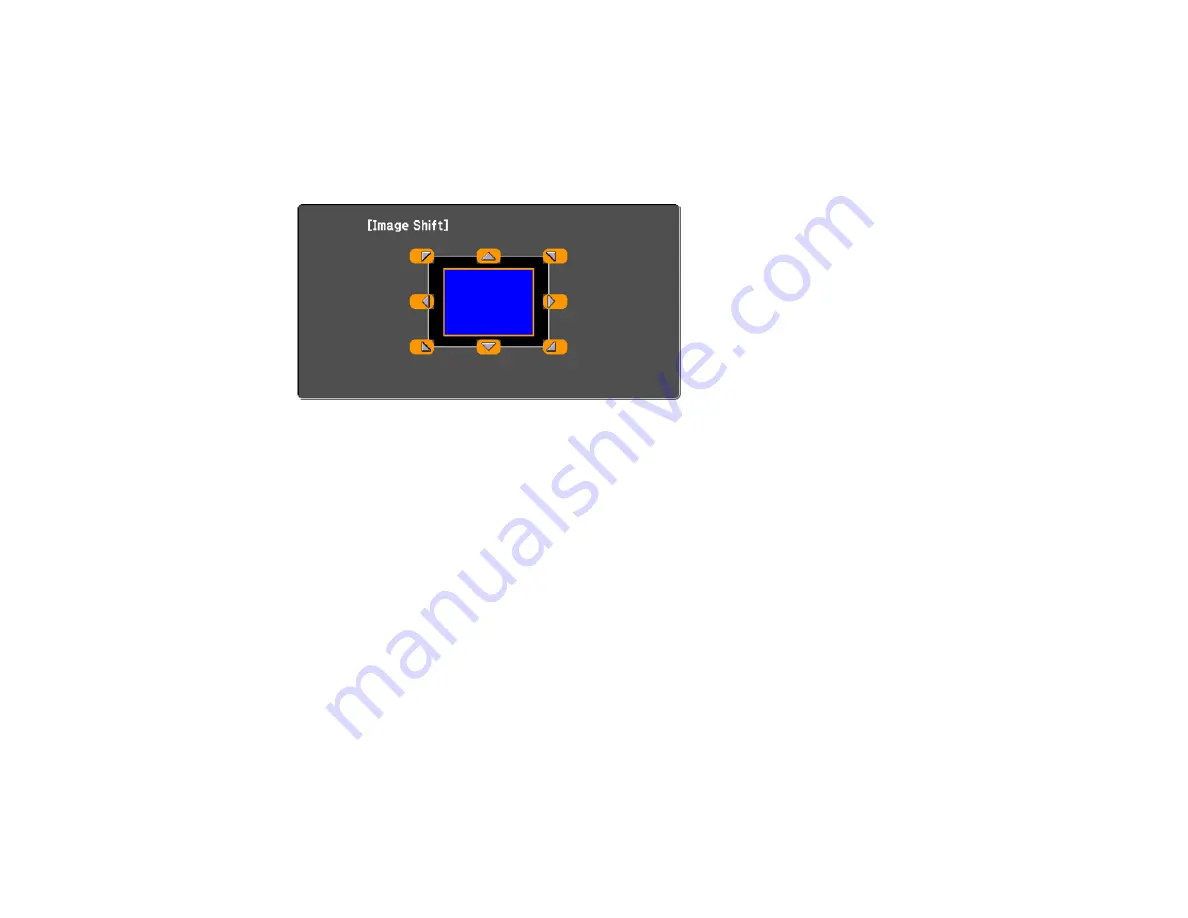
1.
Turn on the projector and display an image.
2.
Adjust the image size using the
W
(Wide) and
T
(Tele) buttons.
After you adjust the image size, the Image Shift screen is displayed automatically.
3.
Use the arrow buttons on the projector or remote control to adjust the image position.
Note:
You can also use the Settings menu to adjust the
Image Shift
setting.
Parent topic:
Using Basic Projector Features
Related references
Projector Feature Settings - Settings Menu
Focusing the Image
1.
Turn on the projector and display an image.
Note:
You can display a pattern to aid in adjusting the projected image using the Settings menu.
Summary of Contents for BrightLink 710Ui
Page 1: ...BrightLink 710Ui User s Guide ...
Page 2: ......
Page 28: ...28 Projector Parts Remote Control ...
Page 33: ...33 Rear 1 Laser diffusion ports 2 Installation magnets Parent topic Projector Part Locations ...
Page 57: ...57 1 Remove the battery cover 2 Insert the batteries with the and ends facing as shown ...
Page 66: ...66 2 Unscrew and remove the cable cover if it is attached screwdriver not included ...
Page 186: ...186 3 Select Touch Unit Setup and press Enter 4 Select Touch Calibration and press Enter ...
Page 251: ...251 2 Slide the air filter cover latch and open the air filter cover ...
Page 255: ...255 1 Twist off the tip of the pen to remove it ...
Page 257: ...257 1 Twist off the tip of the pen to remove it 2 Remove the soft tip ...
Page 296: ...296 Side ...


