


245
• To remove stubborn smudges, moisten a soft, lint-free cloth with lens cleaner and gently wipe the
projection window.
Warning:
Do not use a lens cleaner that contains flammable gas. The high heat generated by the
projector may cause a fire.
Caution:
Do not use canned air, or the gases may leave a flammable residue.
Parent topic:
Related tasks
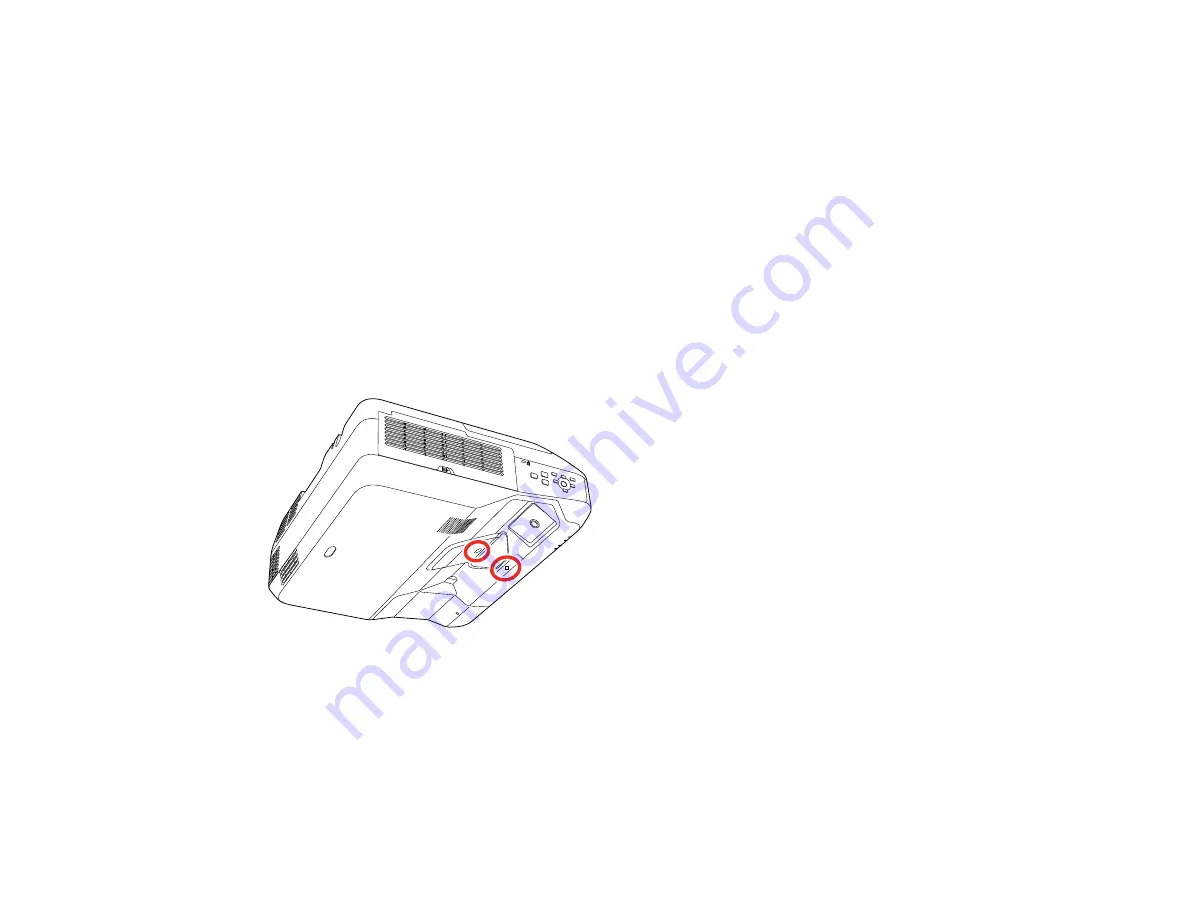
Cleaning the Obstacle Sensor
Clean the projector's obstacle sensor glass (circled in red) periodically, or if you see a message telling
you to remove any obstacles that are interfering with the projection area.
• To remove dust or smudges, gently wipe the obstacle sensor glass with lens-cleaning paper.
• To remove stubborn smudges, moisten a soft, lint-free cloth with lens cleaner and gently wipe the
obstacle sensor glass.
Warning:
Do not use a lens cleaner that contains flammable gas. The high heat generated by the
projector may cause a fire.
Summary of Contents for BrightLink 710Ui
Page 1: ...BrightLink 710Ui User s Guide ...
Page 2: ......
Page 28: ...28 Projector Parts Remote Control ...
Page 33: ...33 Rear 1 Laser diffusion ports 2 Installation magnets Parent topic Projector Part Locations ...
Page 57: ...57 1 Remove the battery cover 2 Insert the batteries with the and ends facing as shown ...
Page 66: ...66 2 Unscrew and remove the cable cover if it is attached screwdriver not included ...
Page 186: ...186 3 Select Touch Unit Setup and press Enter 4 Select Touch Calibration and press Enter ...
Page 251: ...251 2 Slide the air filter cover latch and open the air filter cover ...
Page 255: ...255 1 Twist off the tip of the pen to remove it ...
Page 257: ...257 1 Twist off the tip of the pen to remove it 2 Remove the soft tip ...
Page 296: ...296 Side ...


