background image


Code: I.H4.V10.3003 


Installation and Maintenance Manual 

Version: 07 


14 / 66 


 Ennera Energy and Mobility, S.L. 

This document contains confidential information which is property of Ennera Energy and Mobility, S.L. The copy, transmission or use by other people, of the whole document or 

part of its contents, is not allowed without written permission from Ennera Energy and Mobility S.L.


6.


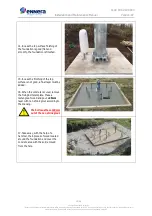
Put  the  tower  first  section  back  to 

previous  position  and  tight  fully  the  3 
M30 nuts of the tower base. 
 

Once  tightened,  ensure 
again  that the tower  fixing 
bolts  pass  freely  through 
the  first  section  holes  as 
shown on step 5.


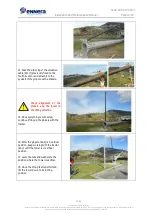
7.


With the tower first section in 

parallel to the ground, pass the cable 
guide (TW-4) through it. 

The  cable  guide  helps  to 
pass  the  tower  cable 
through the whole tower.


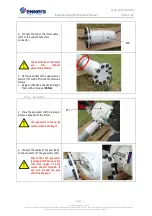
8.


Insert the tower second section over 

the first section. To do this: 


Ensure that the weld seam of the 
new section is aligned with the 
previous section. 


Pass the guide through the new 
section. 


With tape, mark the interference 
distance. In this case, at 520mm 
from the edge. 


Apply some grease or oil over the 
lower up section (interference area). 


Fit manually first and second tower 
sections. 


The  interference  distance  is  the  distance  that  one 
section should be introduced in the previous one.


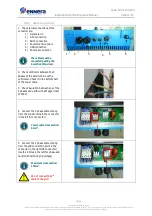
9.


Adjust both sections until 

interference distance mark is reached: 


Put both tractels hooks on the new 
section edges. 


Secure both hooks of the other side 
to the base section. 


Using the tractels adjust joined 
sections until the interference 
distance mark is reached. 

In  case  that  the  mark 
cannot  be  reached,  put  a 
wooden  block  across  the 
upper  section  and  hit  it 
with a mallet.


Weld seam indicator 

520 mm 

TW-4 

Summary of Contents for Windera S

Page 1: ...dential information which is property of Ennera Energy and Mobility S L The copy transmission or use by other people of the whole document or part of its contents is not allowed without written permis...

Page 2: ...nd turbine assembly 7 5 INSTALLATION 8 5 1 Foundation 8 5 2 Ennera design multi section tower assembly 13 5 3 Ennera design 2 section tower assembly 17 5 4 Ambor design 3 section tower assembly 17 5 5...

Page 3: ...allowed without written permission from Ennera Energy and Mobility S L 8 MAINTENANCE 41 8 1 Safety procedures 41 8 2 Routine inspections 41 8 3 Maintenance plan 42 9 TROUBLESHOOTING 43 10 FREQUENTLY...

Page 4: ...L The copy transmission or use by other people of the whole document or part of its contents is not allowed without written permission from Ennera Energy and Mobility S L 1 INTRODUCTION 1 1 Aim This...

Page 5: ...RBINE A wrong installation of the turbine could lead to a serious damage Read this procedure carefully before starting any installation The Windera S wind turbine must not be installed with a wind spe...

Page 6: ...shing JI H4 B5 4000 06 1 W11 Blade fixing plate JI H4 B5 4000 07 3 W12 Yaw cover JI H4 Y5 4000 50 1 W13 Converter housing JI H4 P5 4000 04 1 W14 Converter structure JI H4 P5 4000 02 1 W15 Screw kits 4...

Page 7: ...ing N units TW 1 Ratchet tensioner 15m 2 TW 2 Metallic mallet 1 TW 3 Molykote spray grease 1 TW 4 Cable guide 1 TW 5 Galvanizing spray 1 TW 6 Level 2 TW 7 Trestle 1 4 4 Wind turbine assembly Reference...

Page 8: ...other people of the whole document or part of its contents is not allowed without written permission from Ennera Energy and Mobility S L 5 INSTALLATION 5 1 Foundation See drawing JI H4 V10 4000 Annex...

Page 9: ...foundation reinforcement steel bars inside the hole fixing the bars between them with metallic wire up and bottom Lower reinforcement at a distance of 100mm from plain cement concrete 5 Attach an eart...

Page 10: ...f its contents is not allowed without written permission from Ennera Energy and Mobility S L 7 Place the 32mm corrugated tube One from the tower axis to the converter and the other from the converter...

Page 11: ...en permission from Ennera Energy and Mobility S L 10 Pour the concrete inside the hole Reinforced Cement Concrete minimum 30N mm2 at 28 days 11 During the concrete pouring review the levelling of the...

Page 12: ...y S L 14 In case the top surface finishing of the foundation is good flat and smooth the foundation is finished 15 In case the finishing of the top surface is not good a final layer must be added 16 W...

Page 13: ...e the base plate in the middle of the lifting direction as shown in the figure 3 Place the first section and the tower base plate over the foundation bolts FD 1 as shown in the figure Make sure that t...

Page 14: ...he tower cable through the whole tower 8 Insert the tower second section over the first section To do this Ensure that the weld seam of the new section is aligned with the previous section Pass the gu...

Page 15: ...terference distance In this case at 470mm from the edge Apply some grease or oil over the lower up section interference area Fit manually 2nd and 3rd sections 11 Adjust both sections until in terferen...

Page 16: ...l inter ference distance mark is reached by the fourth section follow step 9 14 Before connecting the fifth section make the anemometer assembly See section 5 5 15 To connect the fourth and fifth sect...

Page 17: ...tower plus the cylindrical pipe the interference distance is 705mm 2 The assembly process is the same than multi section tower 5 4 Ambor design 3 section tower assembly 1 In case the tower is an Ambor...

Page 18: ...ground anchor EL 1 on the fixing point with an angle of around 45 pointing to the tower and hit it on the top with a hammer before start screwing 4 With a metal rod EL 2 inserted in the ground anchor...

Page 19: ...ation cable W17 10 Connect the other shackles EL 4 to the ground anchor EL 1 eye and the ginpole EL 6 end 11 Connect the tractel EL 3 to the ground anchor EL 1 eyebolt 12 Insert the tractel cable trou...

Page 20: ...Take the other tip of the elevation cable W17 previously fixed to the fourth section and attach it to the eyebolt of the ginpole with a shackle Check alignment of the ginpole and the tower in the lift...

Page 21: ...with the M10x40 screw and nut The anemometer must be installed facing the prevailing wind direction 3 Connect the base of the U shaped bar to one screw of the tower flange 4 Fasten the hose clamp in t...

Page 22: ...not allowed without written permission from Ennera Energy and Mobility S L 2 All covers up and side panels are removable to have an easy access to the components 3 To open the box unbend the fixing p...

Page 23: ...le W7 to the yaw W6 bottom connector Check all holes of the tower are OK without galvanizing defects 5 Fix the yaw W6 to the upper tower section T5 with 8 M10x25 countersunk screws Apply Loctite 243 a...

Page 24: ...rs Tight them with a torque of 50 Nm 4 Put yaw cover W12 in the yaw W6 generator W1 union and fix it with two M4x16 countersunk allen screws and four M6x20 allen screws 5 7 4 Rotor 1 Put the generator...

Page 25: ...from Ennera Energy and Mobility S L 4 Locate the blade fixing plate W11 in the upper surface of the base 5 Fix the 3 blades W3 to the hub W9 with M10x55 allen screws washers and nuts Apply Loctite 24...

Page 26: ...r to rotate the generator to the position Ensure that the blades do not hit the ground during the process Hold the generator while doing this process Rotate the generator smoothly and leave the assemb...

Page 27: ...ion from Ennera Energy and Mobility S L 3 Place the converter assembly in position and proceed to drill holes in order to fix it to the foundation The corrugated pipes coming from the foundation must...

Page 28: ...onnect 5 USB connection 6 Antenna connection The cables must be connected peeling the insulation litz wires 2 Check continuity between the 3 phases of the wind turbine with a voltimeter Check it in th...

Page 29: ...pply 12V white X10 A4 Power supply 12V brown X10 B4 If the wind turbine is going to be installed in an icing area install an anemometer with heating Heating connection Power supply 230V green X8 L1 Po...

Page 30: ...r part of its contents is not allowed without written permission from Ennera Energy and Mobility S L 11 Connect the earthing cable of the foundation to the tower earth connection point 12 Connect the...

Page 31: ...l ground which is located into the foundation Both wind turbine and converter must be connected to this grounding point The grid protection equipment must be located always between the Windera S conve...

Page 32: ...Connect the 3 generator cables to the power converter and rotate the blades in clockwise direction As the electrical brake is active the blades can rotate very slowly 3 In case the wind turbine erecti...

Page 33: ...L 4 Put the guide nut up in the M30 bolt to avoid the tower to fail down Once the tower base plate has contacted the guide nut loosen this until the tower is in vertical position 5 Level the tower pla...

Page 34: ...noise of the cable hitting the tower ATTENTION Never leave the wind turbine without the tower cables connected in the converter or short circuited The wind turbine could start rotating without contro...

Page 35: ...6 Tower flange DIN 934 M12 Nut A4 8 Tower flange 6 2 Wind turbine assembly kit ROTOR Component Quality Quantity Connection Tightening torque DIN 912 M10x55 Allen screw A4 80 15 Blade hub yaw generator...

Page 36: ...commissioning of the wind turbine it is necessary to configure the converter parameters according to the country where it is going to be installed This operation can be done by connecting a laptop to...

Page 37: ...ple of the whole document or part of its contents is not allowed without written permission from Ennera Energy and Mobility S L 7 2 Change parameters When the firmware loaded in the converter is the l...

Page 38: ...sed to connect the wind turbine converter to the grid connection point 0004 Device Identifier Device identifier used to identify the WT in the supervision centre It should be set to the sequential par...

Page 39: ...trical brake activated till the start button is pushed When start button is pushed the machine is set to automatic mode Then the wind turbine electrical brake is deactivated and the wind turbine will...

Page 40: ...allowed without written permission from Ennera Energy and Mobility S L 5 Check GSM GPRS coverage Check that the Windera is connected to a GSM GPRS network It is checked in the GPRS level marked in bl...

Page 41: ...the Windera S wind turbine it is recommended to lowering the small wind turbine on a tilt up tower to bring the turbine to a standstill In this case the maintenance may be performed on the ground If...

Page 42: ...N QUARTERLY ANNUALLY From base Check for smooth running Listen for any abnormal noises or excessive vibrations X X Check tower base bolts M30 bolts X X Lower wind turbine Blade s visual inspection Esp...

Page 43: ...g or buzzing Rotor blades damaged Inspection the blades for anomalies detection The rotor is off balance causing the turbine to move slightly back and forth Blades unbalanced Inspection the blades for...

Page 44: ...ightning If it s a lightning area it is recommended to install an overvoltage protection 11 RECYCLING Ennera will make the necessary repairs throughout the useful life of the Windera S If any of the c...

Page 45: ...ains confidential information which is property of Ennera Energy and Mobility S L The copy transmission or use by other people of the whole document or part of its contents is not allowed without writ...

Page 46: ...is document contains confidential information which is property of Ennera Energy and Mobility S L The copy transmission or use by other people of the whole document or part of its contents is not allo...

Page 47: ...L This document contains confidential information which is property of Ennera Energy and Mobility S L The copy transmission or use by other people of the whole document or part of its contents is not...

Page 48: ...L This document contains confidential information which is property of Ennera Energy and Mobility S L The copy transmission or use by other people of the whole document or part of its contents is not...

Page 49: ...his document contains confidential information which is property of Ennera Energy and Mobility S L The copy transmission or use by other people of the whole document or part of its contents is not all...

Page 50: ...and Mobility S L This document contains confidential information which is property of Ennera Energy and Mobility S L The copy transmission or use by other people of the whole document or part of its c...

Page 51: ...and Mobility S L This document contains confidential information which is property of Ennera Energy and Mobility S L The copy transmission or use by other people of the whole document or part of its c...

Page 52: ...his document contains confidential information which is property of Ennera Energy and Mobility S L The copy transmission or use by other people of the whole document or part of its contents is not all...

Page 53: ...and Mobility S L This document contains confidential information which is property of Ennera Energy and Mobility S L The copy transmission or use by other people of the whole document or part of its c...

Page 54: ...This document contains confidential information which is property of Ennera Energy and Mobility S L The copy transmission or use by other people of the whole document or part of its contents is not a...

Page 55: ...and Mobility S L This document contains confidential information which is property of Ennera Energy and Mobility S L The copy transmission or use by other people of the whole document or part of its c...

Page 56: ...and Mobility S L This document contains confidential information which is property of Ennera Energy and Mobility S L The copy transmission or use by other people of the whole document or part of its c...

Page 57: ...and Mobility S L This document contains confidential information which is property of Ennera Energy and Mobility S L The copy transmission or use by other people of the whole document or part of its c...

Page 58: ...and Mobility S L This document contains confidential information which is property of Ennera Energy and Mobility S L The copy transmission or use by other people of the whole document or part of its c...

Page 59: ...and Mobility S L This document contains confidential information which is property of Ennera Energy and Mobility S L The copy transmission or use by other people of the whole document or part of its c...

Page 60: ...and Mobility S L This document contains confidential information which is property of Ennera Energy and Mobility S L The copy transmission or use by other people of the whole document or part of its c...

Page 61: ...and Mobility S L This document contains confidential information which is property of Ennera Energy and Mobility S L The copy transmission or use by other people of the whole document or part of its c...

Page 62: ...and Mobility S L This document contains confidential information which is property of Ennera Energy and Mobility S L The copy transmission or use by other people of the whole document or part of its c...

Page 63: ...he initial AutoShort Warning No automatic rearm Manual Rearm should be done Id Text Description Reaction Rearm 0000 HW grid high voltage High instantaneous grid voltage detected by converter HW Immedi...

Page 64: ...ases are short circuited No reaction Warning 110A High generator voltage 23 in emergency Generator phase to phase Voltage different to zero when the Windera is stopped and so the generator phases are...

Page 65: ...eed High wind speed It is based on a wind detection algorithm using power and rotational speed variables Slow Stop AutoShort 1504 Very High wind speed Very high wind speed It is based on a wind detect...

Page 66: ...Ennera Energy and Mobility S L Pol gono Industrial Apatta Erreka C Uzturre 1 Office 209 20400 Ibarra Gipuzkoa SPAIN www ennera com...

Reviews:

Related manuals for Windera S