background image


61

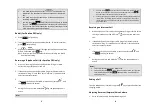
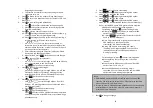
3. Press 

 2 

 to view, search, erase, edit and transfer


the phonebook (see 

Phonebook). 

 
4. Press 

 4


 to set sound-related settings: 

a.


Press 

 1 

 to select ringer volume: 

Use 

 or 

 to

 scroll 

through 6 options: Low, Medium, High, Vibrate, Vib and Ring, 
Off.  Press 

SAVE

 (Left) soft key to save selection.  Default = High. 

b.


Press 

 2 

 to select ringer tone: 

Use 

or 

 to

 scroll 

through 4 options: 0, 1, 2, and 3.  Press 

SAVE

 (Left) soft key to 

save selection.  Default = 0. 

c.


Press 

 3 

 to select key volume when a key is pressed: 

Use 


or 


to 

scroll through 3 options: High, Low, and Off.  Press 

SAVE

 (Left) soft key to save selection.  Default = Low.   

d.


Press 

 4 

 to select key tone: 

Use 

 or 

 to 

scroll through 

4 options: 0, 1, 2, and 3.  Press 

SAVE

 (Left) soft key to save 

selection.  Default = 0. 

 
5. Press 

 5 

 to change handset settings: 

a.   Press 

 1 

 to Group Select: see Handset Group Subscription. 

b.   Press 

 2 

 to clear phonebook:  

i.


Press 

 1 

 and confirm to delete the entire phonebook. 

c.   Press 

 3 

 to change the power-up LCD display to show, e.g., 

customer name or other greeting message:  

i.


Use 

 or 

 to move the cursor backward or 

forward to insert (to the left of the cursor) or delete (the 
character above the cursor, or left of the cursor if cursor is 
on the right of the last character). 

ii.


Enter characters using the Character Table and method 
discussed in the Phonebook section. 

iii.


When finished, press 

SAVE

 (Left) soft key to save change.  

d.    Press 

 4 

 to change LCD display contrast: 

i.


Use 

 or 

 to scroll through values 

1 to 8.

  Pick one 

that is most suitable to you.  Default = 

6

ii.


Press

 SAVE

 (Left) soft key to save setting. 

e.


Press 

 5 

 to change the LCD backlight: 

i.


Use 

 or 

 to scroll through options: On, Off, and 

20 Seconds.  Default = 20 seconds, meaning that the 
backlight is always on.  The 20-second option will turn off 


62

the backlight after 20 seconds of inactivity. 

ii.


Press 

SAVE

 (Left) soft key to save setting. 

f.


Press 

 6 

 to change Language: 

i.


Use 

 or 

 to scroll through options: English, 

Spanish and French. Default = English, meaning the LCD 
display shows in English. 

ii.


Press 

SAVE

 (Left) soft key to save setting. 

 
6.   Press 

 6 

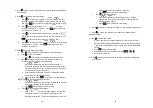
 to register or de-register handset:  See Handset Registration. 

 
7.   Press 

 7 

 to set up the intercom or broadcast via repeater(see 

Repeater Setup).  
 
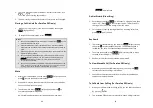
8.  Item 

 8 

 is to add new bases. 

  From an administrator handset (Handset 10 or 11) to set new 

Base 01~07. Maximum additional bases is up to 8. Before adding 
a new base, the Handset must be registered in master base(Base 
ID =00).  

a.  Press 

REG

 button on new Base. 

b.  Use Handset 10 or 11 to Add base: Press 

MENU

 8 

 1


c.  Enter 01~07 (base ID) 
 

9.  Press 

 9 

 to change system and Line setting:  See system setting and 

Line Setting.  


Summary of Contents for DuraFon PSL

Page 1: ...ET FEATURES 15 ADDITIONAL HANDSET FEATURES 17 ADMINISTRATOR FEATURES REGISTER TO PRO BASE 20 BASE ILLUSTRATION 21 BASE FEATURES 22 BASIC BASE STATION FEATURES 22 ADDITIONAL BASE STATION FEATURES 23 BROADCAST 23 A Broadcasting from Base to Handset 23 B Broadcasting from Handset to Base 23 INTERCOM CALL 23 A Intercom 2 Way from Base to Handset 23 ADMINISTRATOR FEATURES 24 CHARGER ILLUSTRATION 26 CHA...

Page 2: ... the risks of fire electric shock injury to person and damage to property General Safety Instructions 1 When using your wireless phone ensure your safety and the safety of others a Always watch where you are walking and standing b Don t let a phone call distract you from working safely c If power goes out it won t work Recommend backup power 2 In an emergency a If an emergency occurs dial the emer...

Page 3: ...not sure of the type of power supply to your home consult your dealer or local power company 6 11 Do not overload wall power outlets and extension cords as this may result in fire or electric shock 12 To avoid electric shock or burn do not disassemble this product Send this product to an authorized service center when service or repair work is required Call Customer Service for locations near you ...

Page 4: ...when using this phone Base Station Federal Communication Commission Interference Statement This equipment has been tested and found to comply with the limits for a Class B digital device pursuant to Part 15 of the FCC Rules These limits are designed to provide reasonable protection against harmful interference in a residential installation This equipment generates uses and can radiate radio freque...

Page 5: ... energy and if not 10 installed and used in accordance with the instructions may cause harmful interference to radio communications However there is no guarantee that interference will not occur in a particular installation If this equipment does cause harmful interference to radio or television reception which can be determined by turning the equipment off and on the user is encouraged to try to ...

Page 6: ...DuraFon PRO HC as the following components a Base Station x 1 b Base Antenna x 1 c Base AC DC Adaptor x 1 d Handset x 1 e Low Profile Handset Antenna x 1 f Optimal Performance Handset Antenna x 1 g 1700mA Li ion Battery Pack x 1 h Charger x 1 i Charger AC DC Adaptor x 1 j Telephone Cord x 1 k Audio in Cable x 1 l Belt Clip x 1 m Quick Guide and Warranty Card 2 In DuraFon USL it includes one base D...

Page 7: ...le c DuraPouch d Belt Clip e Spare Battery f Low Profile Handset Antenna g Optimal Performance Handset Antenna 14 Handset Illustration Antenna Receiver Belt Clip Holder Volume control Scrolling Broadcast key Travel charger jack Headset jack 2 5mm Battery pack 4 line LCD END Power ON OFF key 2 WAY INTERCOM TALK FLASH For PRO Microphone KEYLOCK For Walkie ...

Page 8: ...itable alphanumerical characters e The last line displays the left and right soft keys Re There is only right soft key in idle mode of DuraWalkie Note means only shown on DuraFon PRO handset 2 Ringer a Rings to an incoming call b Distinctive alert sounds indicating various events 1 Single Beep successful key entry 2 Double beep failed operation or invalid key entry also indicates power on off 3 Pe...

Page 9: ...ation on the same phone line when 1 st call is in progress needs Call Waiting with Caller ID service from local telephone company Re If behind a PBX or Key system Caller ID information will only be recognized if the PBX or Key system passes that information through the analog ports 5 Name Tagging with Caller ID For DuraFon PRO only Matches the Caller ID with the phone book entries once matched the...

Page 10: ... handset menu a handset user can manually select the base which is the nearest one with user before making an outgoing call 18 Repeater Operation In order to get better range performance for handset to handset calls intercom and broadcast install a repeater and make the calls via repeater is able to extend the range of handset to handset calls Administrator Features Register to PRO base Handsets 1...

Page 11: ...ED a Power it indicates base station has power b In Use it indicates an active telephone line c Intercom it indicates Intercom taking place d Broadcast it indicates Broadcast taking place 3 Reset Button a Restores base station to factory settings b Reset button is indented to prevent accidental system reset c All handsets including administrator and additional base s need to be re registered after...

Page 12: ...ering handset can end the call Notes 1 Due to for comply with existing DuraFon HC the display does not match the behavior For example the intercom call from base to handset it displays from Ext 90 instead of from Base xx 2 No support line detection feature in DuraFon PSL BU base Even you set Line Det from an administrator handset Handset 10 or 11 via pressing MENU 9 1 enter base ID 00 07 3 to enab...

Page 13: ...you can pre program the feature code of call transfer function b Need to adjust the Flash time to match your PBX setting Re If loosing administrator handsets handset 10 and 11 all settings must be reset reset the base and re register all handsets 26 Charger Illustration DC In Spare Battery Charging Slot Spare Battery Charging Indicator Handset Charging Slot ...

Page 14: ...of at least 1 meter about 3 feet between the base station and other electronic devices e g TV computer stereo fax machine answer machine cordless phone etc 1 Install base station antenna The base station s antenna port has a reverse thread connector to install antenna or cable turn counter clockwise to remove turn clockwise Improper installation may damage the connector 2 Plug the transformer end ...

Page 15: ... PBX 1 Base 1 Base 2 Base 3 2 3 4 1 2 3 4 1 2 3 4 10 Select Mode 1 Add Base 10 Added Base Number CANCEL 30 User capacity can be increased by adding additional base units Up to 8 base units can be supported Re Handsets can answer calls from any port or line unless port is dedicated to a specific handset or group 1 Handset Registration a Press REG button on Base 00 default four LEDs will light up in...

Page 16: ...tain procedures of functions can be performed Re The main difference between DuraFon PRO and DuraWalkie is the handset of DuraFon PRO has the capability to make telephone calls and the handset of DuraWalkie does not A Base Operation Modes 1 IDLE mode this is the default mode The intercom broadcast and volume keys are active in IDLE mode 2 TALK mode the base operates in this mode during a phone cal...

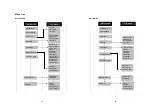
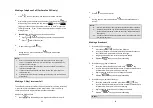
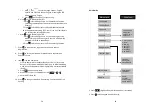
Page 17: ...Settings 4 Sound 3 Call Logs 9 Admin 8 Multi base Select Mode 1 Add Base Admin 1 System 2 Line Setting 3 Auto Attndnt 1 Register 2 Deregister 3 Remote REG 34 DuraWalkie Main menu Sub menu 1 KeyGuard 2 PhoneBook 1 Ring Volume 2 Ring Tone 3 Key Volume 4 Key Tone 1 Group Select 2 Clear 3 Naming 4 Contrast 5 Backlight 6 Language PA On Off 5 Settings 6 Registration 4 Sound 3 Unused 9 Admin 7 BC INT Typ...

Page 18: ...communication can be placed from handset to handset Handset to Handset Calls 1 Press key followed by a two digit handset ID or Group ID 36 2 Press key to end the call 3 During the call press and hold the key the speakerphone is active Notes 8 Intercom calls can be made regardless if the Base Station is present 9 If a Group ID is entered the first handset belonging to that group that answers will e...

Page 19: ...r 4 During the call press and hold the key the speakerphone is active Notes 38 1 You can press SILENT Left soft key if you choose to ignore the call Unlike turning off the ringer from the handset menu the SILENT key operation is valid only for the current call 2 If Caller ID service is available the LCD will display the incoming call information If the LCD shows Private or Unknown the caller s inf...

Page 20: ...e handset microphone 2 When mute is active the other party will not hear your voice but you can still hear the other party 3 To end the mute press OPTION Left soft key and press 0 to unmute the handset microphone Re If established an intercom call when end the mute press 40 UNMUTE Left soft key Do Not Disturb Silent Ring 1 Enter the key sequence MENU 4 Sounds 1 Ring Volume then select Off Press SA...

Page 21: ... means it is a new handset or the ID has been erased You need to register the handset with the base station In certain situations you may want to change a handset s ID For example you want to change a particular handset from a user to an administrator ID 10 or 11 or vice versa Or in some rare occasions you find another handset having the same Handset ID 3 Registration a Press MENU 6 to enter the r...

Page 22: ...the base f Upon successful operation the handset LCD will display Done 44 otherwise it will show Message not received try again g If the handset ID is already in use by another handset the administrator will be alerted In that case the administrator can choose another ID or asks the handset having the desired ID to vacate by de registering with the base h Perform registration immediately afterward...

Page 23: ...s the number 5 this will enter the handset setting menu 46 4 Press number 3 handset enters Base Select setting mode 5 Use or arrow to scroll up and down the selection on Off 6 Make a selection default off and press SAVE Left soft key Re When turns on the Base Select you must enter 2 digit Base ID after press key Notes 1 Because this setting allows handset manually select the base station the hands...

Page 24: ...et ID to be assigned by the base 2 From an administrator handset Handset 10 or 11 press MENU Right soft key 48 3 Press number 9 this will enter the administration menu 4 Press number 1 handset enters System setting menu a Dial tone Press 1 to set up the dial tone to be either Tone or Pulse Press 1 to choose Tone or press 2 to choose Pulse b Flash time Press 2 to set up the flash time from 100ms 20...

Page 25: ...se or to move the cursor to insert or delete 50 By default all letters are entered in the upper case Use the key to toggle between upper and lower cases A Pause entry represents a 0 5 second delay in dialing the following digits which is useful when calling a sequence of segmented numbers e g access code credit card number auto attendant entries etc Pause is entered by pressing the key twice LCD d...

Page 26: ... Get phonebook from Ext xx A beep emitted when receiving each phonebook When the phonebook receiving 2 digit countdown on the LCD to indicate the phonebook numbers which are waiting for receiving Re The phonebook transfer through the wireless interface it may partially miss transmission by interference 52 Repeater Operation 1 Due to the range performance of handset to handset calls intercom or bro...

Page 27: ... to handset P2P mode f A repeater will no linger to support any PSTN call g No support put the repeaters in cascade h When using a repeater if the repeater is busy or not available after time out period broadcast 8 sec intercom 40 sec the call will be convert to P to P instead 54 Menu Operations DuraFon PRO Main menu Sub menu 1 KeyGuard 2 PhoneBook 1 Dialed 2 Received 3 Missed 1 Ring Volume 2 Ring...

Page 28: ...l logs press DIAL Left soft key to dial the phone number 56 Notes 1 Only phone numbers are stored in the three call logs Intercom calls are not recorded 2 Caller ID service is required from your local phone company in order to receive phone numbers names and time stamps on incoming calls The Received and Missed Call Logs will register no incoming calls if Caller ID service is not available 3 The C...

Page 29: ...Left soft key to save setting i Press 9 to change the PBX options i Press ADD soft key to edit a PBX feature to be memorized and key in the name of the PBX features just like editing a phonebook entry 58 ii Press SAVE Left soft key to save setting iii Press OPTION and 1 following by entering PBX options mode you can erase the PBX option iv Press OPTION and 2 following by entering PBX options mode ...

Page 30: ...ndset See Handset Registration 8 Press 7 to set up the intercom or broadcast via repeater see Repeater Setup 9 Item 8 is to add new bases From an administrator handset Handset 10 or 11 to set new Base 01 07 Maximum additional bases is up to 8 Before adding a new base the Handset must be registered in master base Base ID 00 a Press REG button on new Base b Use Handset 10 or 11 to Add base Press MEN...

Page 31: ...e last character ii Enter characters using the Character Table and method discussed in the Phonebook section iii When finished press SAVE Left soft key to save change d Press 4 to change LCD display contrast i Use or to scroll through values 1 to 8 Pick one that is most suitable to you Default 6 ii Press SAVE Left soft key to save setting e Press 5 to change the LCD backlight i Use or to scroll th...

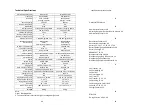
Page 32: ...20 50 Hz 15 90 Vrms NA Auto Attendant Coding 8 kbps G 729 8 kbps G 729 Flash Time 100 900 ms programmable NA Power Source 100 240V 12V AC DC Adapter 3 7V 1700 mAh Li ion Battery Charger Current NA 500 mA Charge Time NA 4 hours from empty Regulation Compliance FCC Part 15 Part 68 FCC Part 15 Part 68 Operating Temperature 0 50 C 10 60 C Storage Temperature 10 70 C 10 70 C Humidity 20 75 20 75 Dimens...

Page 33: ...ine Dedication 44 45 Line Indicator 13 Line Selection 45 66 M Making a 2 Way Intercom Call 33 Making a Broadcast 34 Making a Telephone Call 33 MENU mode 30 Multi base setups 26 Multiple handsets registration 15 Mute 17 37 N Name Tagging 16 P PBX option transfer 17 Phonebook 17 46 53 55 58 59 Placing a Call On Hold 37 R Receiving a Telephone Call 35 Receiving an Intercom Call 36 Redial 35 Registrat...

Page 34: ... equipment causes harm to the telephone network the telephone company may discontinue your service temporarily If possible they will notify you in advance But if advance notice is not practical you will be notified as soon as possible You will be informed of your right to file a complaint with the FCC Your telephone company may make changes in its facilities equipment operations or procedures that...

Page 35: ...valence de la sonnerie de tous les dispositifs n excède pas 5 70 USER MANUAL INFORMATION AGREEMENT This equipment complies with Part 68 of the FCC rules and the requirements adopted by the ACTA On the Bottom of this equipment is a label that contains among other information a product identifier in the format US AAAEQ TXXXX If requested this number must be provided to the telephone company USOC Jac...

Page 36: ...be repaired by the customer Connection to party line service is subject to state tariffs Contact the state public utility commission public service commission or corporation commission for information If your home has specially wired alarm equipment connected to the telephone line ensure the installation of this equipment does not disable your alarm equipment If you have questions about what will ...

Reviews: