ENFORCER DP-266-1C3Q Manual Download Page 4

ENFORCER Wireless Video Door Phone 

4


SECO-LARM U.S.A., Inc. 

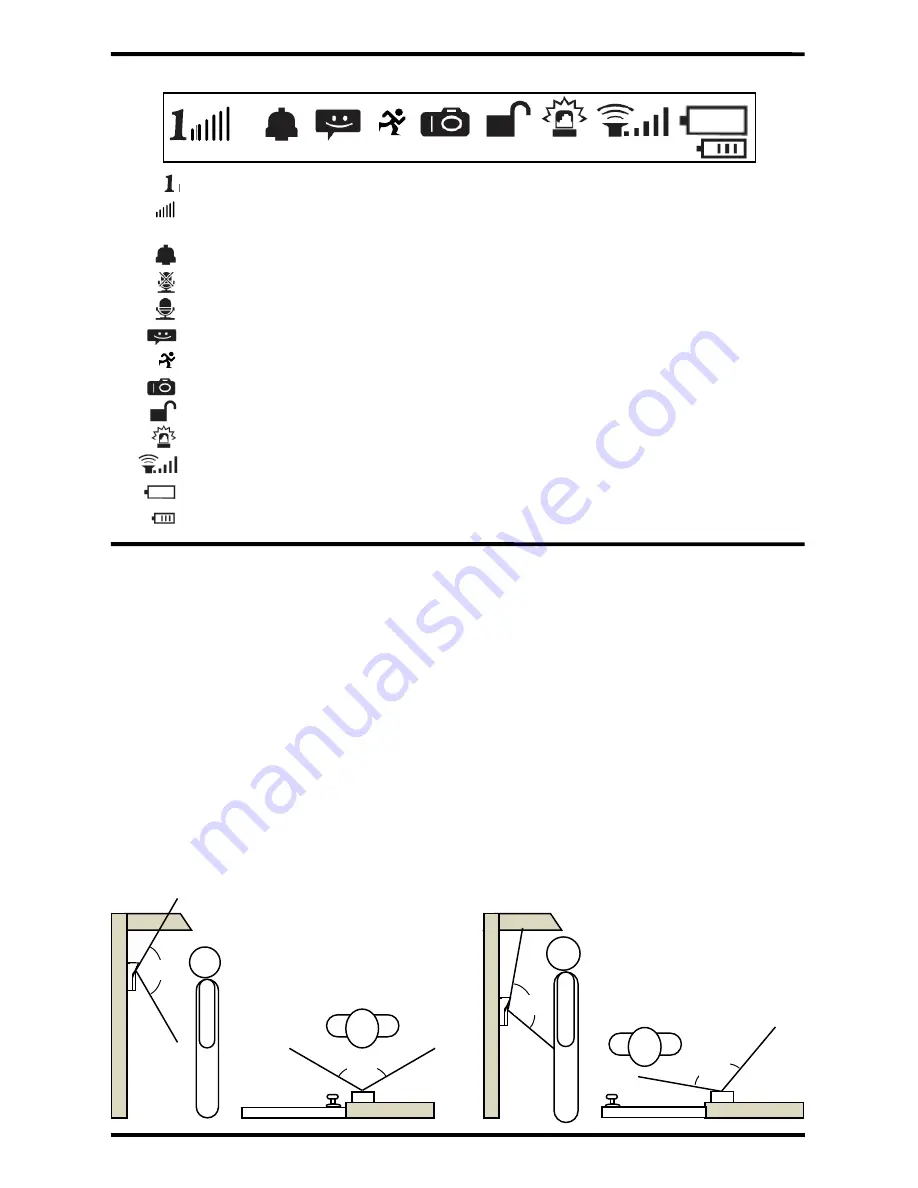
: ID – Displays the monitor ID number 
: Signal Strength – Displays the wireless signal strength 
: Communication Mode – Displays current communication mode 

– Bell indicates an incoming call 
– Crossed out microphone indicates one-way communication 
– Microphone indicates two-way communication 

: Message – Displays when there is a message due to a missed call 
: PIR – Displays when the PIR sensor is turned on 
: Photo – Displays when a photo is taken 
: Relay – Displays while the relay is active 
: Alarm – Displays when the tamper alarm has been activated 
: Monitor volume – Displays the current monitor volume  
: Monitor Battery: Displays the current monitor station battery level 
: Camera Battery: Displays the current camera station battery level 
 

Display Overview:  

Installation Notes:  

115

º


Camera with No Tilt 

Camera Tilted  

115

º


Up 20º 

170

º


Left 20º 

170

º


1.


Unpack the video door phone and note the included parts. 

2.


Read this manual thoroughly.  A clear understanding of the manual will make installation and 

operation much easier. 

3.


Find a good location to mount the monitor and camera. Approximately 5ft (1.5m) above the 

ground is optimal, where the visitor would stand approximately 2.5~5 ft (0.8~1.5 m) from the 
camera. Note that the camera tilt and pan angle can be adjusted up to 20° from centerline to 
compensate for less than optimal situations (see below).    

4.


Avoid mounting the camera or monitor near sources of strong electromagnetic signals or other 
electronic devices that may cause interference. 

5.


Avoid mounting the camera in direct sunlight or exposing the camera to strong vibrations, direct 

rain, or moisture, which could result in damage to the camera. Strong backlight or reflection 
may degrade the resulting video image. 

6.


The monitor and camera contain no user-serviceable parts.  Opening them may damage 
sensitive components and will void the warranty. 

Summary of Contents for DP-266-1C3Q

Page 1: ...red monitors Camera has built in IR LEDs for nighttime operation Camera includes a built in PIR sensor that activates the camera and takes photos of the visitor when they approach Monitor includes a k...

Page 2: ...3 Display Overview 4 Installation Notes 4 Camera Wiring Diagram 5 Sample Application 5 Installation Camera 6 Installation Monitor 6 7 On Screen Display Features 8 Programming and Using the On Screen D...

Page 3: ...e 9 16 VAC 5 16 VDC Relock delay 3 6 8 Seconds Relay output 3A 250VAC 30VDC Current draw Active 300mA 12VDC Standby 15mA 12VDC Battery life Active 7 Hours Standby 60 Days IR LED Range 5 1 5m IR LED Fr...

Page 4: ...ted 115 Up 20 170 Left 20 170 1 Unpack the video door phone and note the included parts 2 Read this manual thoroughly A clear understanding of the manual will make installation and operation much easi...

Page 5: ...wer supply is wired to the COM common output 1 Positive power input Connect to the red wire of the included AC adapter or to the positive wire of the doorbell s power supply 2 Negative power input Con...

Page 6: ...ole in the bracket to the optional door unlock device 5 Install the rechargeable lithium ion battery into the camera The battery will act as a backup power source in case of a power outage 6 Connect t...

Page 7: ...the ON OFF button for 3 seconds The monitor will turn ON with the ENFORCER screen Standby mode If the display is OFF press the ON OFF button momentarily to leave standby mode and turn the display ON...

Page 8: ...oved from the bracket and the tamper alarm activates 4 photos taken P Photos taken by the camera station automatically when the PIR function is activated 3 photos taken Messages View photos from misse...

Page 9: ...All to delete all photos after an additional prompt 5 Once viewing a photo press the Up or Down buttons to cycle through other photos 6 Press the OK button to either delete or exit the photo viewing...

Page 10: ...nlock button to open the on screen display 2 Highlight the Language icon and press the OK button to enter the Language screen 3 Use the Up and Down buttons to select a language English default German...

Page 11: ...8 seconds Pairing See the Resetting the Camera and Pairing a First Monitor and Programming Additional Monitors or Cameras sections on pgs 13 14 for information regarding the Pairing setting Alarm sett...

Page 12: ...to a visitor who has not pressed the doorbell button on the camera 1 Press the OK or Power button to turn the monitor s display ON 2 Press the Exit View button to monitor the camera station NOTE If mu...

Page 13: ...ton 5 Press the OK button when finished with the call Resetting the Camera and Pairing a First Monitor Communicating between monitors NOTE The Wireless Video Door Phone system can be set up with up to...

Page 14: ...can be learned to the system NOTE The intercom feature will not function until the connection is confirmed by the new monitor To pair an additional camera 1 Put the camera into pairing mode a Remove...

Page 15: ...the monitor Make sure the monitor s battery is charged Plug the charger directly into the monitor The monitor is not charging Remove the battery from the battery compartment and clean both the battery...

Page 16: ...nt or repair only at SECO LARM s option In no event shall SECO LARM be liable for any special collateral incidental or consequential personal or property damage of any kind to the purchaser or anyone...

Reviews: