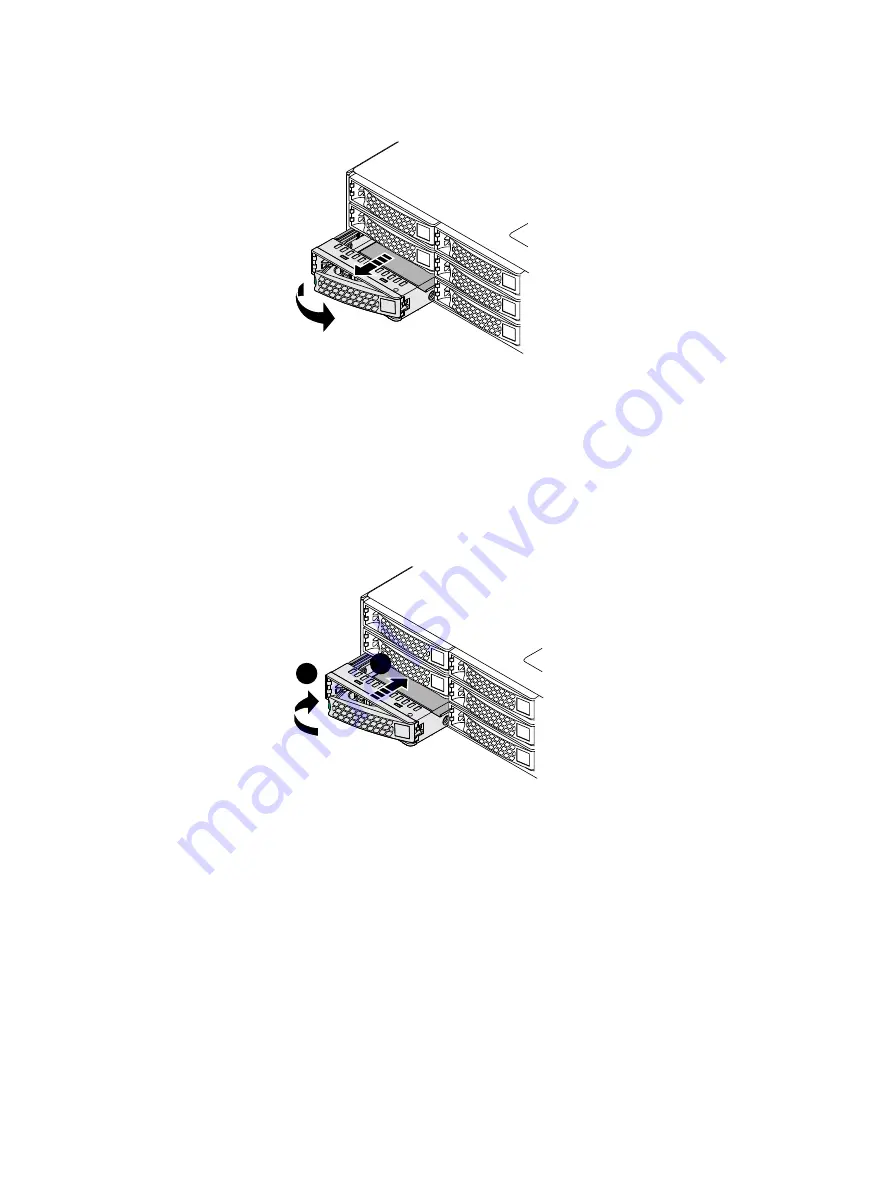
Figure 15 Removing the faulted disk drive assembly
CL4982
3. Unpack the replacement disk drive assembly and save the packing material for
returning the faulted disk drive assembly.
4. Install the replacement disk drive assembly (
a. With the lever on the replacement disk drive assembly in the fully open position
(green button to the right), slide the module into the server.
b. When the lever begins to close by itself, push on the lever to lock it into place.
Figure 16 Installing the replacement disk drive assembly
CL4983
A
B
5. Remove and store the ESD wristband.
Reinstalling the bezel
If a bezel covered the front of the server, reinstall the bezel using the procedure that
follows. Refer to
while performing the procedure.
Procedure
1. Pushing on the ends, not the middle, of the bezel, press the bezel onto the latch
brackets until is snaps into place.
2. If the bezel has a key lock, lock the bezel with the provided key and store the key in a
secure place.
18
EMC SVR-I2U-R2312 Server Installation and Maintenance Guide
0


