40
3.4
Using a USB Camera
You can operate or set a USB camera by connecting it to the USB3.0 port or USB2.0 port of
the display monitor.
◆
Startup
Tap the ELMO Camera icon in the list of apps or the side menu bar.
◆
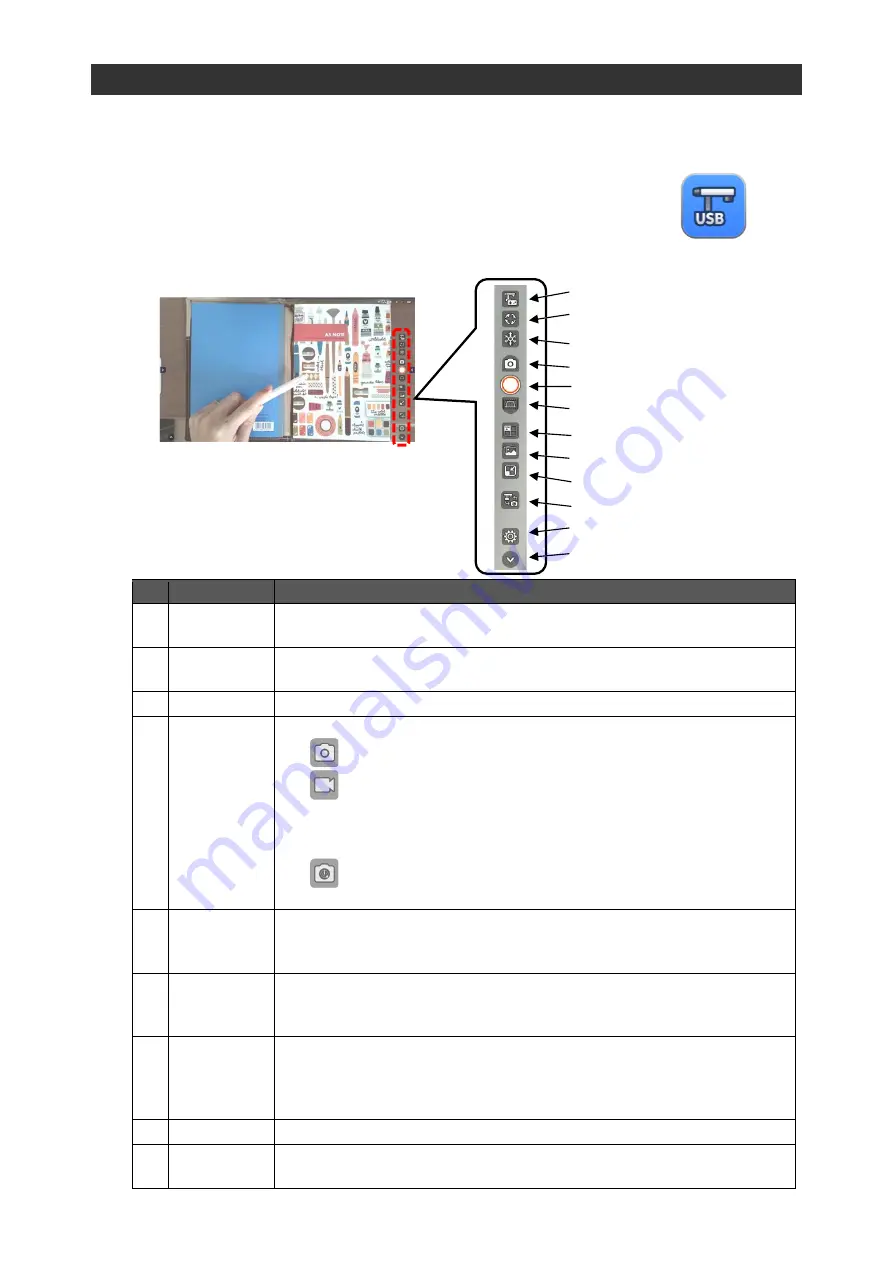
Screen Description
Tap the icon either at the bottom right of bottom left of the screen to display the menu bar.
No.
Name
Function
1
Camera
control
To adjust the level of zoom, brightness, and AF of the USB camera.
You can operate ELMO document cameras.
2
Image
rotation
To rotate the camera image.
3
Freeze
To pause the camera image. Tap this icon again to restart the camera image.
4
Recording
settings
To configure the recording settings of the camera image.
⚫
Image
:
To capture the current screen image.
⚫
Video
:
To record a video.
Maximum recording time is 30 minutes. Audio cannot be
recorded.
⚫
Interval shooting: To record a series of still images automatically at
set intervals.
5
Record
To record the camera image.
For video recording, tap this icon again to stop the recording.
The recorded still images and videos will be saved in the CameraRoll folder.
6
Keystone
correction
To perform keystone correction on the image. A rectangle will appear. Correct
the deformation of the image by moving 4 points.
The corrected image will be saved in the CameraRoll folder.
7
4 split screen
To divide the screen into 4 sections. The upper left section shows the live
camera image.
Each time you tap the Screenshot button, the captured image will appear in the
order of upper right section, lower left section, and lower right section.
8
Camera Roll
To start the Camera Roll app.
(⇒
9
Minimize
To display a minimized screen.
The screen can be enlarged or reduced by pinch-in and pinch-out gesture.
1
2
3
4
5
6
7
8
9
10
11
12


