22
23
Basic operation
Turn off the projector
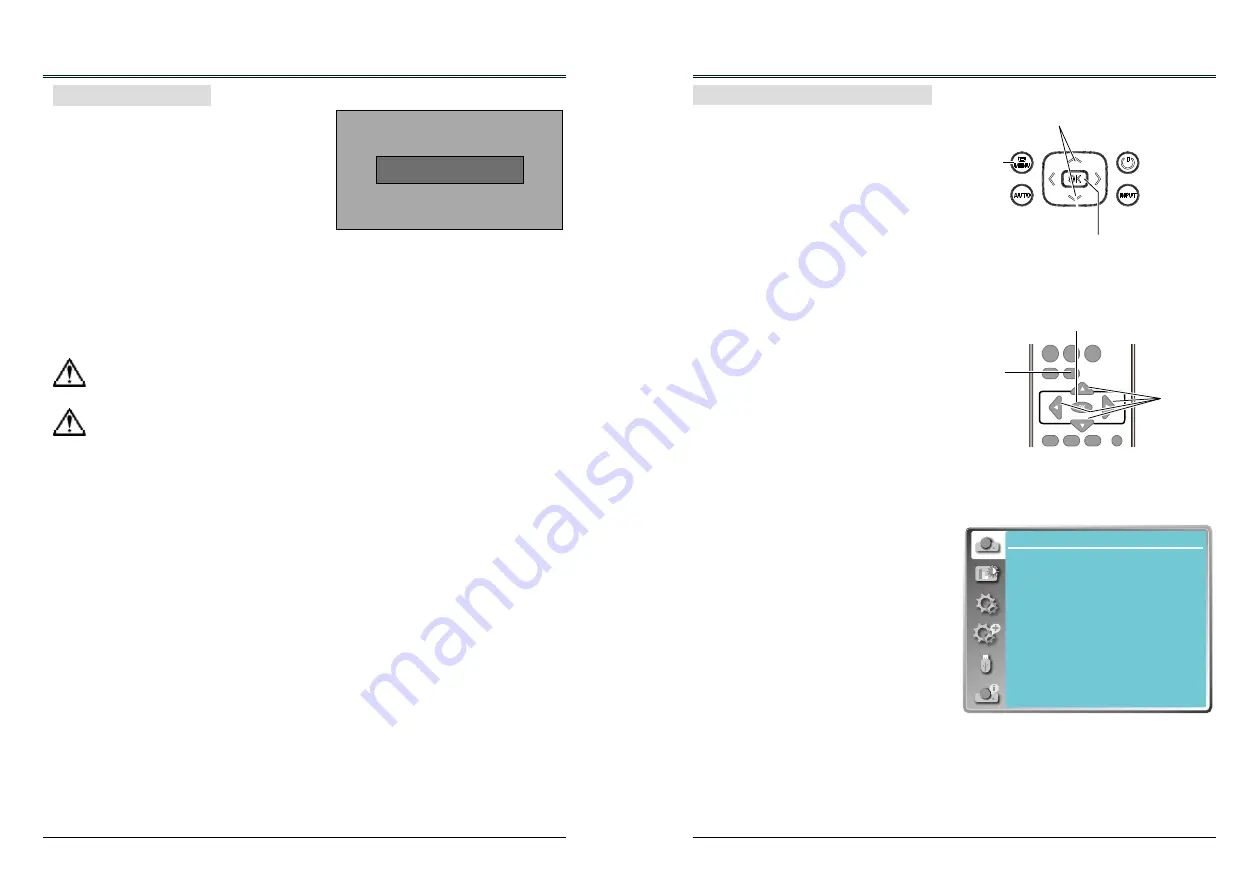
Power off ?
“Power off ? ” disappears after 4 seconds.
1. Press the POWER button on the top control
or on the remote control, and "Power off?"
appears on the screen.
2. Then, press the POWER button again in 4
seconds. The POWER indicator starts to
flash red, and the cooling fans keep running
(You can select the fan noise and running
speed). Now you can unplug the AC power
cord after the fans stop running. Otherwise,
the service life of the projector will be
affected or the projector will can not be
turned on or turn on abnormal.
3 When the projector has cooled down enough
to be turned on again, the POWER indicator
stops flashing.
Note:
● When the On start function is “On” , this
projector is turned on automatically by
connecting the AC power cord to an AC outlet .
● The running speed of cooling fans is changed
according to the temperature inside the
projector.
● Do not put the projector in a case before it is
cooled enough.
● If the POWER indicator flashes or emits a
red light, see page 77.
● While the POWER indicator is flashing, the
lamp is being cooled down and the projector
cannot be turned on. Wait until the POWER
indicator turns red to turn on the projector again.
● The fan rotation will terminate directly if the
AC power cord is unplugged immediately
after the projector is turned off.
● The projector can be turned on after the
POWER indicator turns red. The waiting time
to restart will be shortened when the normal
power-off processing for fan cooling is
completed, comparing with the time the AC
power cord is immediately unplugged after the
power-off.
To maintain the lamp life, once you turn
the projector on, wait at least 5 minutes
before turning it off.
Do not operate the projector continuously
without reset. Continuous use may result
in shortening the lamp life. Turn off the
projector and let it standby for about an
hour in every 24 hours.
Remote control
Screen menu
VGA
VIDEO
HDMI
MENU
INPUT
FREEZE
MUTE
BLANK
LAMP
PATTERN
KEYSTONE
TIMER
INFO.
SCREEN
IMAGE
AUTO
+
+
-
-
D.ZOOM VOLUME
MENU
button
OK button
button
1 Press the MENU button on the remote control
or top control to display the screen menu.
2 Press
buttons to select an entry in the main
menu and then press the OK button to enter
the submenu.
3 Press
buttons to select an item, and then
press the OK button to set or enter the
submenu.
4 Press
buttons to adjust settings or switch
among the items. Press the OK button for
corresponding operation.
5 Press
button on the remote control or
top control to go back to the previous menu.
Press MENU button again to exit the screen
menu.
Display
Auto PC adj.
Fine sync
H Position
V Position
H. Size
Aspect
Project way
Menu position
Background display
System
17
0
0
0
Normal
Front
Center
Blue
1024 x 768, 60Hz
Basic operation
How to operate the screen menu
The projector can be adjusted or set via the
on-screen menu. Each main menu can be
divided into several levels of submenus, and
subme nus are also divided into several levels
of submenus.
For each adjustment and setting procedure,
refer to the respective sections in this manual.
Top control
MENU
button
OK button
button


