


25
3. Plug an IDE cable connector into the CD-ROM/DVD
drive IDE connector. It doesn't matter which connector
on the cable you use. Ensure that the pin-1 side of the
cable is matched with the pin-1 side of the connector.
Refer to the previous note (B).
4. Use the audio cable provided with the CD-ROM/DVD
drive to connect to the mainboard CD-in connector
CD1 or CD2 (D).
5. Plug a power cable from the case power supply into
the power connector on the CD-ROM/DVD drive (C).
When you first start up your system, the BIOS should auto-
matically detect your CD-ROM/DVD drive. If it doesn’t, enter
the Setup Utility and configure the CD-ROM/DVD drive that
you have installed. See IDE Primary/Secondary Master/Slave
(Auto) on page 40 for more information.
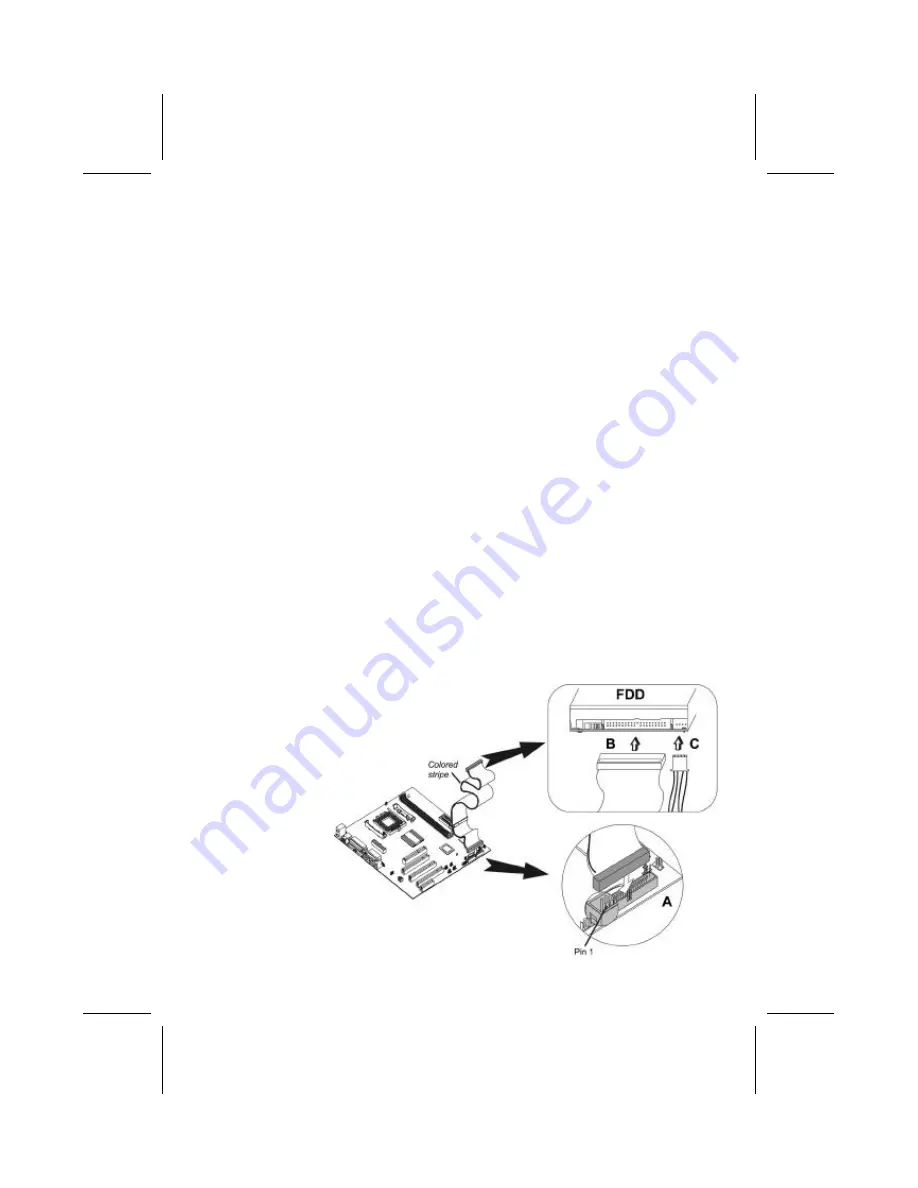
Installing a Floppy Diskette Drive
The mainboard has a floppy diskette drive (FDD) interface
and ships with a diskette drive ribbon cable that supports one
or two floppy diskette drives. You can install a 5.25-inch drive
and a 3.5-inch drive with various capacities. The floppy disk-
ette drive cable has one type of connector for a 5.25-inch
drive and another type of connector for a 3.5-inch drive.
1. Install the FDD into the drive cage in your Micro ATX
system case.
2. Plug the FDD cable into FDD1 (A).