3 Installation
3.4 Dismantling
DX-NET-SWD
06/13 MN04012009Z-EN
www.eaton.com
21
3.4 Dismantling
3.4.1 Dismantling of the SmartWire-DT flat cable
In order to dismantle the SmartWire-DT flat cable from the variable frequency
drive, press from the top and the bottom at the same time and carefully pull
off.
Figure 11:
Remove SmartWire-DT flat band conductor
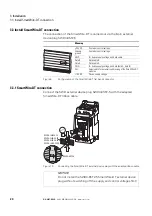
3.4.2 Dismantling of DX-NET-SWD3
In order to dismantle the DX-NET-SWD3 interface card from the frequency
inverter,
▶
press on the left and right side of the fastening clips and pull this up
carefully.
▶
Then re-insert both cover plugs.
(in doing so, note that the cover plugs are not identical.)
Figure 12:
Remove the DX-NET-SWD3 interface card
NOTICE
The dismantling must only be carried out with the supply and
control voltage switched off.
L1/L L2/N L3
U
V
W
8
9 10 11
Ready
I
O
A
SWD4-8SF2-5
+ 15V
1
2
L1/L L2/N L3
U
V
W
8
9 10 11
Ready
I
O
A
1
2
Summary of Contents for PowerXL DX-NET-SWD
Page 4: ...II ...
Page 10: ...0 About this Manual 0 6 Units 6 DX NET SWD 06 13 MN04012009Z EN www eaton com ...
Page 16: ...1 Device series 1 7 Disposal 12 DX NET SWD 06 13 MN04012009Z EN www eaton com ...
Page 26: ...3 Installation 3 4 Dismantling 22 DX NET SWD 06 13 MN04012009Z EN www eaton com ...
Page 64: ...4 Commissioning 4 5 SmartWire DT diagnostics 60 DX NET SWD 06 13 MN04012009Z EN www eaton com ...
Page 68: ...5 Appendix 5 2 SmartWire DT 64 DX NET SWD 06 13 MN04012009Z EN www eaton com ...


