IF 1875 • 03/19 Copyright
®
2019, Eaton’s Crouse-Hinds Division
Page 3
!
NOTE
In Class II, Class III and Simultaneous Presence locations, limit upward aiming of
equipment to a maximum of 30º above horizontal. Greater upward aiming could
lead to excessive dust build-up and dangerous overheating of the dust.
C. Conduit connection and wiring
11. Connect enclosure to properly grounded conduit system, installing conduit
sealing fittings as required by Section 501.15 and, if required, 502.15 of the
National Electrical Code plus any other applicable codes.
12. If cable is utilized, a cable sealing fitting must be installed as required by
Sections 501.15 and 502.15 of the National Electrical Code plus any other
applicable codes.
NOTE:
Refer to Step 15, making sure that the “designated disconnect” housing is
installed in the system.
13. Make all wiring connections following wiring diagram located on power supply
battery bracket.
NOTE:
If installing ELPSM22, connection of lighting equipment supply leads is already
completed. Proceed to Step 15.
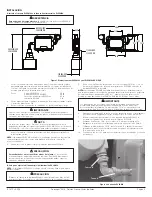
14. Connect the blue lamp lead to the purple (L+) charger board lead via the 3-pole
Wago terminal and connect the yellow lamp lead to the yellow (L-) charger
board lead. See figures 3 and 4.
!
WARNING
•
To avoid explosion,
all unused conduit openings must be plugged. Plug
must engage a minimum of five (5) full threads. Use PLG plugs supplied
with the unit.
•
To maintain explosionproof integrity,
conduit sealing fittings MUST
be installed in each attached conduit run (within eighteen inches of the
ELPSM20 power supply enclosure in Class I locations).
•
To maintain explosionproof integrity in Class I areas,
conduit sealing
fittings are required on all conduit entrances (within eighteen inches of
the ELPSM20 power supply enclosure) for all remotely located emergency
lighting equipment.
Figure 3. Wiring Diagram
!
WARNING
To avoid explosion or personal injury,
all electrical power must be turned OFF
before and during installation and maintenance and installation area must be free
of hazardous atmospheres.
15. Connect a designated disconnect switch for ELPSM2 emergency lighting
system as follows:
NOTE:
Insulation rating on 12V conductors must equal to that of the higher voltage
power supply leads in accordance with Article 300.3(C) of NEC.
Important:
TO PROPERLY INSTALL AND OPERATE THE ELPSM2, YOU MUST
INSTALL A SEPARATE DISCONNECT SWITCH. IF THE DISCONNECT SWITCH
IS LOCATED IN THE HAZARDOUS AREA, YOU MUST INSTALL A CLASS
I, DIVISION 1 RATED SWITCH. USE CROUSE-HINDS SERIES EDS2129 OR
EDSC2129.
(See Warning below)
This designated disconnect switch can be supplied as part of the ELPSM22
emergency light (option S794 or option S854).
Option S794 – key operated designated disconnect as part of the ELPSM22
emergency light. See Step 16 below to continue supply wiring.
Option S854 – keyless designated disconnect as part of the ELPSM22 emergency
light. See Step 16 below to continue supply wiring.
EDS2129 or EDSC2129 – Designated Disconnect Remote Mounted (not supplied).
Install per the instructions supplied with the EDS2129 or EDSC2129 disconnect.
Wire in series according to the wiring diagram in Figure 3 by cutting the red battery
lead wire and attaching a listed wire connector to both ends (rated 300V minimum)
for connection to disconnect switch lead wires. See Step 16 to continue supply
wiring.
16. Connect AC power to terminal block via the ground “G”, line “L” and neutral
“N” Wago terminals.
17. Test wiring for correctness with continuity checks and also for unwanted
grounds with insulation resistance tester.
18. Allow the ELPSM2 to charge under line power for 15 hours before initiating any
testing of the emergency operation of the lights.
D. Complete installation
19. Install CID101 corrosion inhibitor device (supplied loose in ELPSM20).
Recommended location is on the bottom wall between “Main Power On” pilot
light and 1” NPT tapped hole. Refer to CID101 instructions for installation.
!
WARNING
•
To avoid explosion,
a designated disconnect position with lock-in/lockout
is required for safe servicing of the completely wired unit. The lock-in/
lockout capability will help prevent unauthorized opening of the circuit
when the system should be functioning and to help prevent energizing of
the system while it is being serviced, minimizing the possibility of arcing
in the battery circuit while the enclosure is open in a hazardous (classified)
area.
•
To avoid explosion,
the designated disconnect switch, Crouse-Hinds
series EDSC2129, must be suitable for use in the hazardous locations in
which it is installed.
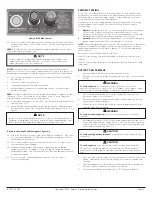
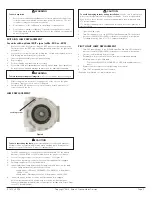
Figure 4
!
WARNING
To avoid electrical shocks,
install luminaire only on systems with an equipment
grounding conductor.
!
NOTE
Unit needs to charge for 15 hours before conducting any tests. Do not
disconnect AC power until unit is fully charged.
!
CAUTION
To avoid explosion,
clean both flat joint surfaces of body and cover before
closing. Dirt or foreign material must not accumulate on flat joint surfaces.
Surfaces must seat fully against each other to provide a proper explosionproof
seal.


