10
EATON
Aerospace Group
TF100-63B October 2018
Section VI
Assembly Procedure — Hand Tool Method
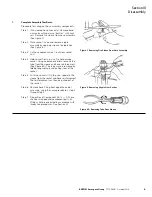
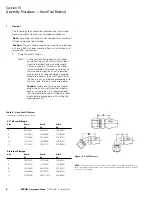
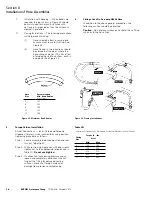
Step 5. Size tube to sleeve. Size tube to sleeve by
pushing hose onto the nipple until the sleeve
bottoms against the nipple chamfer. Remove
and recheck to be certain that the sleeve is still
properly positioned. Again push hose onto the
nipple until the sleeve is bottomed against the
nipple chamfer. (See Figure 16.)
Note
: When assembling new fittings no
lubrication is needed as component parts are
dryfilm lubricated at the time of manufacture.
After reuse of the fitting, if undue wearing
of the dryfilm or bare metal is observed, the
thread area should be lubricated with G N
Paste. *
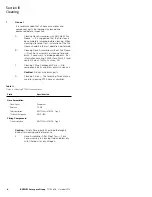
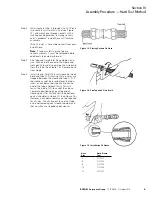
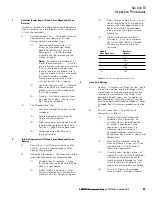
Step 6. (Size -4 through size -10) — Engage socket
and tighten. Slide socket forward and thread
onto nipple by hand. Remove assembly and
place socket hex in vise. Using a wrench on
the nipple hex, tighten to a gap of 1/32 inch
nominal for all sizes. (Gap may vary from
0.023 to 0.046 inch.)
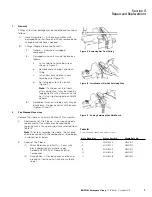
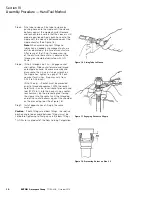
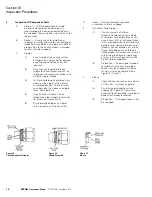
(Size -12 only) — Socket must be preseated
prior to thread engagement. With the socket
held firmly in a vise, insert socket preseat hand
tool (S1272-8-1), into the hose. Using a nonfer-
rous hammer, tap the preseating tool forcing
the sleeve into the socket until the threaded
end of the socket bottoms against the shoulder
on the preseating tool. (See Figure 18.)
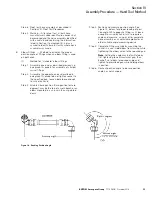
Step 7. Install opposite hose fitting in the same
manner.
Caution
: If both fittings are elbow fittings, the relative
position angle (index angle between fittings) must be
set before tightening to final gap, see B, elbow fittings.
*G N Paste is a product of the Dow Corning Corporation.
Figure 16. Sizing Tube to Sleeve
Figure 17. Engaging Socket to Nipple
Figure 18. Preseating Socket on Size -12


