background image

EATON  

Aerospace Group

    TF100-63B   October 2018                          

1

Section I

 Introduction

1. Purpose

This manual provides specific instructions for 

maintenance and overhaul of Eaton’s Aeroquip hose 

assemblies made of high-pressure tetrafluoroethylene 

(PTFE) hose. Eaton’s Jackson, Michigan facility 

manufactures Aeroquip products (Federal Code 

Number 00624). The manual is divided into three 

areas of maintenance to enable each maintenance 

group to complete its service within a sequence 

of sections. The first area, following “Introduction” 

and “Identification” which are common to all levels, 

contains the maintenance and overhaul procedures for 

hose assemblies removed from service (Sections III 

through VIII). The second area provides maintenance 

and replacement instructions for hose assemblies which 

are in service (Sections IX through X). The last area of 

the manual is devoted specifically to inspection, storage 

and disposition of hose assemblies (Sections XI through 

XIV).

2. Scope

Hose assemblies fabricated in accordance with this 

manual will conform to the requirements listed in 

Specification MIL-H-38360 and are suitable for use in 

high temperature, 3,000 psi hydraulic and pneumatic 

systems. Use in other systems is permissible where 

pressure and fluid are compatible with the requirements 

of the specifications and as further specified in 

paragraph 6.1 of MIL-H-38360 or when specifically 

approved by Eaton.

3. Description

AE246 High Pressure PTFE Hose and reusable “super 

gem” fittings are manufactured by Eaton. Where 

applicable, supplementary information covering these 

hose lines protected with Eaton’s Aeroquip fire sleeve is 

included.

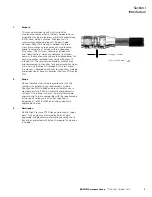
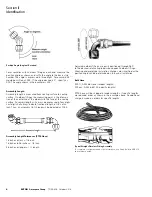
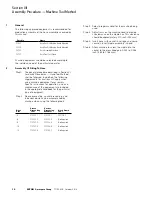
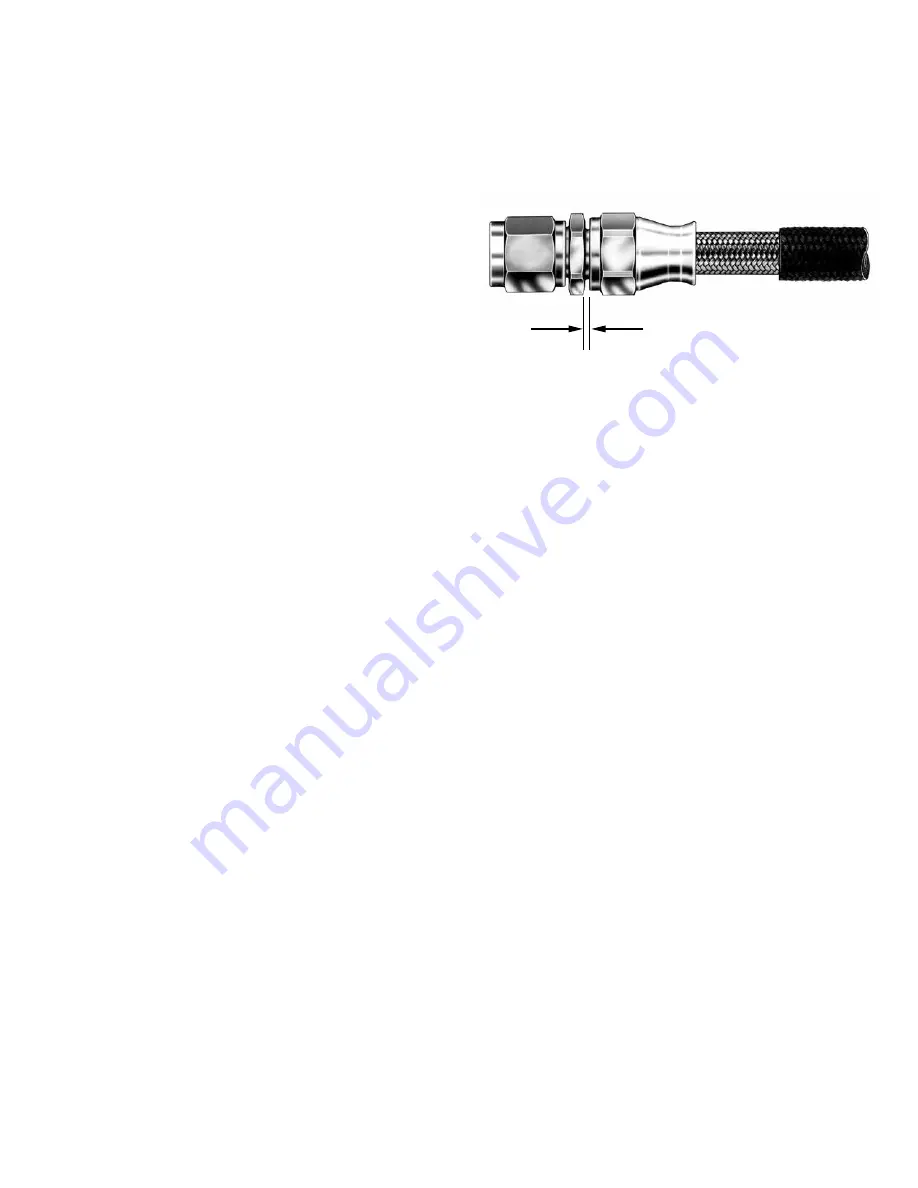
One gap - all sizes

1/32 inch (.793 mm) 

+ .015

- .008

Summary of Contents for Aeroquip AE246

Page 1: ...Aeroquip AE246 High Pressure PTFE Hose and super gem Reusable Fittings Assembly and disassembly instructions for hand and machine assembly ...

Page 2: ...on If Fitting Leakage Is Noted 13 6 After Proof Test Operation 13 Section IX Removal of Hose Assemblies from Installation 14 1 Inspection 14 2 AN MS Flared and Flareless Connections 14 3 Handling General 14 Section X Installation of Hose Assemblies 15 16 1 Installation General 15 2 Routing and Clamping 15 3 Torque Values Installations 16 4 super gem Fittings Used on Aeroquip AE246 Hose 16 Section ...

Page 3: ...cement instructions for hose assemblies which are in service Sections IX through X The last area of the manual is devoted specifically to inspection storage and disposition of hose assemblies Sections XI through XIV 2 Scope Hose assemblies fabricated in accordance with this manual will conform to the requirements listed in Specification MIL H 38360 and are suitable for use in high temperature 3 00...

Page 4: ...cifying Aeroquip hose size operating pressure lot number and hose manu facturer s code Tape is located at each end and in middle of hose 2 Hose Assembly Tag Identification All factory assembled hose assemblies are identified with a metal band Identification may include such information as customer part number Federal Stock Number if required hose assembly specification number operating pressure in...

Page 5: ...0184 Complete assembly number hose assembly with straight fittings or elbow on one end only Complete assembly number AE4108 E 0184 225 hose assembly with elbow or special fitting on each end BASIC STYLE NUMBER Select hose required and choose correct assembly part number basic style number covering desired configuration Use Aeroquip Aerospace Engineering Bulletin AEB 212 as a reference guide HOSE S...

Page 6: ...al length in 1 8 s of an inch Thus an assembly 18 1 2 long will be indicated as 0184 Assembly Length Tolerances PTFE Hose 18 inches or less 1 8 inch 18 inches to 36 inches 1 4 inch 36 inches or longer 1 length Adjustable elbow fittings are easily positioned through 360 to the desired relative angle between opposite elbow fittings Mock up and prototype installation changes are simplified as the pos...

Page 7: ...ise Do not damage socket Using needle nose pliers remove the tube from the sleeve and hose reinforcement See Figure 8A The tube may be removed by folding longitudinally and pulling it out of the socket Step 5 With the socket still in the vise separate the sleeve from the socket and hose reinforcement The reinforcement can then be pulled out of the socket Step 6 Remove hose fitting from opposite en...

Page 8: ...formation covering F 2244 Hose Wash Stand contact Eaton s facility Jackson MI C Cleaning Fitting Component Parts Dip components parts and blow dry with clean air Caution Do not wire brush parts D Cleaning Fluids The following fluids may be used for cleaning PTFE hose assemblies Caution All dry filmed parts should be thoroughly dried after cleaning and before reuse E Hose Assemblies After Proof Tes...

Page 9: ...g lightly with a hammer on the hex flats or tightening onto an AN815 adapter 3 Backed out wires on wired on nuts may be driven back into place and set with a punch Figures 10 and 11 2 Fire Sleeved Hose Lines Remove fire sleeve as shown in Section III Disassembly A Replacement of Fire Sleeve Lines requiring only replacement of fire sleeve may be repaired by replacing with a fire sleeve and clamp se...

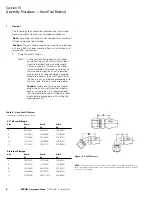
Page 10: ...efore proceeding with the assembly the tape may be removed Caution Hold hose firmly against angle plate or bolts of cut off machine to bend hose at cutting point It is recommended that the operator cut one sample and check length before proceeding with cutting the required quantity Figure 12 Cut Off Factors NOTE Cut off factors are for one end only see Figure 12 Add cut off factors for each end to...

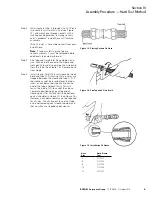
Page 11: ...vise Push end of hose onto the nipple and work gently to aid in separating the wire braid from the tube See Figure 14 Remove hose from nipple Step 4 Install sleeve Carefully insert sleeve between braid and tube O D insuring that no wires are trapped between the sleeve and tube O D If the sleeve cannot be inserted over the tube insert a neck down tool see chart over the end of the tube and push fir...

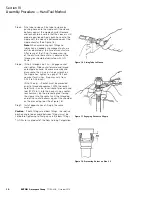
Page 12: ...et forward and thread onto nipple by hand Remove assembly and place socket hex in vise Using a wrench on the nipple hex tighten to a gap of 1 32 inch nominal for all sizes Gap may vary from 0 023 to 0 046 inch Size 12 only Socket must be preseated prior to thread engagement With the socket held firmly in a vise insert socket preseat hand tool S1272 8 1 into the hose Using a nonfer rous hammer tap ...

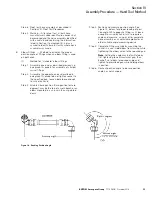
Page 13: ...graph 1A except do not tighten socket to the specified gap Leave nipple loose enough to swivel by hand Step 3 Establish base position Base position or zero degrees may be the top of a work bench or an elbow mounted in a vise with the nut pointed down Figure 19 Reading Position Angle Step 4 Position and measure position angle See Figure 19 below for proper reading of posi tion angle While opposite ...

Page 14: ...p 2 Sleeve preseating socket preseating and tube neck down can be accomplished by machine when using the following tools Hose Size Sleeve Preseating Tool Socket Preseating Mandrel Neck Down Tool 4 S1272 7 1 S1272 3 1 F2717 6 7 6 S1272 7 2 S1272 3 2 Not Required 8 S1272 7 3 S1272 3 3 Not Required 10 S1272 7 4 S1272 3 5 Not Required 12 S1272 7 5 S1272 3 7 Not Required Step 3 Select proper mandrel fo...

Page 15: ...ds and special adapters are avail able from Eaton to facilitate testing large quantities of hose assemblies See Assembly Equipment Special Tools Fixtures and Services Section XV 4 Pneumatic test Pressure test air under water for not less than 30 sec onds nor more than 5 minutes and observe for bubbles indicating leakage Warning Pneumatic leakage testing shall only be performed under a protective c...

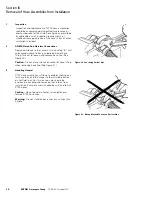
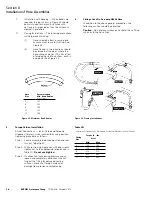
Page 16: ...cond wrench to hex on nipple portion of hose fitting Turn nut to loosen and remove hose line See Figure 20 Caution Do not place wrench on socket of hose fitting when removing hose line See Figure 21 3 Handling General PTFE hose assemblies will tend to preform themselves assume their installed shape to the installed position on hot fluid lines For this reason care should be exercised in handling an...

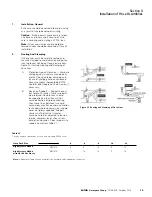
Page 17: ...e moving parts of other lines by proper clamping and by use of chafing guard on unsleeved hose assemblies Aeroquip 656 PTFE Guard or 646 Neoprene Chafe Guard if necessary B Hose Line Support Support hose at least every 24 inches Closer supports are preferred Flexible liens should be supported so that they will not cause deflection of rigid connecting lines Hose lines between two rigid connections ...

Page 18: ...procedure as follows Step 1 Locate assembly in desired position and then turn nut finger tight Step 2 While restraining nipple hex with one wrench tighten nut to the appropriate torque value in Table VII Do not overtighten Step 3 If connection leaks during pressure check loosen and completely disconnect the nut Inspect the fitting for damaged sealing surfaces present of foreign material or damage ...

Page 19: ... internal inspection procedures are recommended 1 Straight Hose Assemblies Hose ID can be checked by looking through hose at a light source 2 Elbow Fitting on One End Insert flexible inspection light into one end and examine from straight fitting end 3 Elbow Fittings on Both Ends Insert flexible inspection light into one end and examine from opposite end with dental type mirror This procedure is o...

Page 20: ... flats on forged type elbow nipple assemblies for excessive wrench marks 5 Scrap damaged nipples or nipples with no clearance See Figure 26 Figure 25 Sealing Surface of Nipples Figure 26 Nipple Assembly Figure 27 Sleeve D Hose All hose removed from hose assemblies shall be scrapped E Nut and or Male Nipples 1 Visually inspect nut internal threads and threads on male nipple assemblies Acceptable th...

Page 21: ...length may be cut as described in 1A above 3 Fittings A Rework of fittings is restricted to the replacement of damaged swivel B nuts B Swivel B nuts will be replaced in accordance with Section V paragraph 1 B C Dry Film Inspect threads and sealing surfaces for wear If undue wearing of the dry film is observed or bare metal is revealed the entire thread and or sealing surface may be evenly lubricat...

Page 22: ...h pressure tetrafluoroethylene hose 2 Bulk Hose Cut ends of hose should be taped closed to prevent wire flare out and keep out dirt Storage in a straight position is preferred If coiling is necessary large loose coils are preferred Caution Under no circumstances shall hose be piled to a height which could result in damage to the under sec tions This caution applies to hose in cartons as well as un...

Page 23: ...n ing etc of PTFE hose These include special tool and power equipment for both small volume and production type shops Service engineering assistance is available for shops or engineering groups relative to either equip ment or hose assembly installation For a copy of Eaton product brochures or to obtain engineering assistance contact Eaton Aerospace Group Conveyance Systems Division 300 South East...

Page 24: ...ctober 2018 Eaton Aerospace Group Fluid Electrical Distribution Division 300 South East Avenue Jackson Michigan 49203 1972 Phone 517 787 8121 Fax 517 789 2947 Eaton Aerospace Group 9650 Jeronimo Road Irvine California 92618 Ph 949 452 9500 Fax 949 452 9555 www eaton com aerospace ...

Reviews: