


26
E-MU Systems
Basic Operations
Main Screen
Main Screen
The Preset Select screen is Proteus 1000’s default screen (also called the
main screen) and is active when you have not selected any of the other
button-activated menus. From this screen you can change or examine the
Preset, Volume, Pan Position and Preset Location for each of the 16 MIDI
channels.
MIDI Channel
Selection
To Change the MIDI Channel
1.
Press either cursor button until the cursor is underneath the channel
number. (The cursor is the little flashing line underneath one of the
parameters in the display.)
The channel number
shown in the main screen is the
“basic MIDI channel” when in
Omni or Poly modes.
2.
Rotate the Data Entry Control to select a MIDI channel (01-16). As the
channel number changes, the display changes to show the preset,
volume, pan and preset location associated with the displayed channel.
Preset Selection
To Change the Preset
1.
Press either cursor key until the cursor is underneath the preset number.
(The cursor is a little flashing line underneath one of the parameters in
the display.) As you rotate the Data Entry Control, the preset number
and name changes.
2.
The displayed preset is assigned to the displayed MIDI channel. Presets
are arranged into banks of 128, as shown in the diagram at left.
Using the screen above as an example, the superscripted number 2 in the
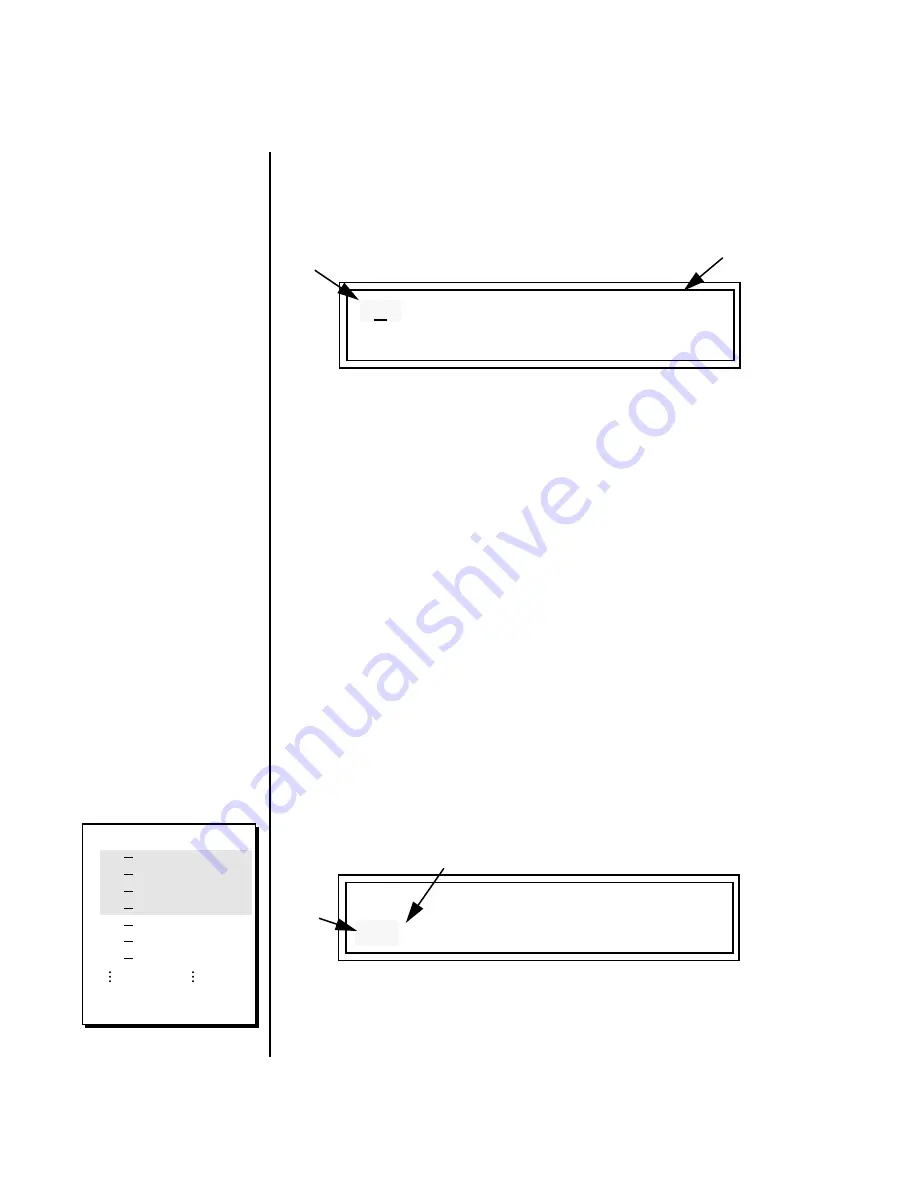
second line of the display identifies the current bank number.
C01 Vol127 Pan01
R
User
032
2
bas: Interference
C01 Vol127 Pan01
R
User
Number
Preset
Bank Number
032
2
bas: Interference
MIDI Channel
ROM or RAM Preset Location
Bank
Contents
128 RAM Presets
128 RAM Presets
128 RAM Presets
128 RAM Presets
128 ROM Presets
128 ROM Presets
128 ROM Presets
Depending on
ROM sets installed
0
1
2
3
0
1
2
??
USER
ROM 1


