17
18
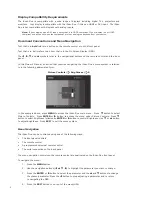
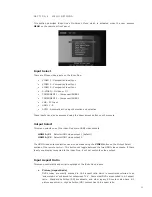
The Picture Controls settings are briefly described below:
• Brightness
Adjust the black level of the overall image from the iScan Duo. When you make an adjust-
ment to brightness, all levels of brightness, from black to peak white, are shifted up or down.
The Brightness control is complimentary to the Contrast control which will be described next.
Contrast adjusts the level of white.
• Contrast
Video contrast works by adjusting the level of white. Contrast is complimentary to the
Brightness control. Contrast controls should be used carefully because if overly adjusted,
some details in lighter areas can become less visible.
• Color Saturation
Color Saturation refers to the mix of “color” vs. “brightness” in the picture. Increasing Color
Saturation makes colors look more vivid. Decreasing Color Saturation makes colors look
“washed out.” Changes to either Brightness or Contrast can change your Color Saturation.
You can use this control to balance the mix of color verses brightness.
• Hue (Tint)
The changes made with a Hue control effect what most people would refer to as “color.” Hue
controls cause a shift in color spectra. Sometimes this control is called “Tint”. Hue changes
color without changing Luminance (picture brightness) or color saturation.
• Detail Enhancement
Increase Detail Enhancement to enhance or sharpen the fine details in an image such as
grass or the texture of a plaster wall.
Decrease Detail Enhancement to reduce noise in a noisy image.
• Edge Enhancement
Increase
Edge Enhancement to sharpen object edges in an image.
Decrease
Edge Enhancement to soften object edges in an image.
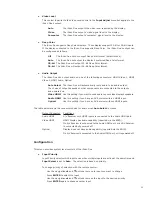
• Mosquito NR
The term “noise” in the context of video images refers to unwanted or unnatural looking
elements that find their way into video signals. “Mosquito Noise” is a particular type of image
noise that is caused by video compression processing. Video compression is common for all
types of transmitted video, including cable, satellite, and over-the-air broadcasts. Compres-
sion is also used with DVD and other prerecorded media. The visibility of Mosquito Noise will
vary. In some cases, it can become objectionable. Mosquito Noise will be more obvious in
standard definition video, although it is sometimes present in high definition video.
The iScan Duo’s Mosquito NR feature removes mosquito noise present in an image. There
are three controls.
Off No noise reduction is applied. This is the normal setting for a good quality image.
On-Low Used when there is a small amount of mosquito noise present in the image.
On-High Used when there is significant amount of mosquito noise present in the image.
Mosquito NR should only be enabled when there is noise in an image since it will remove
details in a good image.
Output Setup
The Output Setup menu lets you set up the iScan Duo’s many output features. The menus are listed
below.
• Test Patterns
There are 35 test patterns available for advanced users and calibration professionals. These
patterns automatically resize and use the correct colorimetry for the current output format.
Test patterns are useful to calibrate your home theater setup.
The iScan Duo remote has a group of buttons labeled TEST PATTERNS to turn test patterns
on/off and to navigate through the list of available test patterns.
• Video Format
All DVI and HDMI displays have an Extended Display Identification Data (EDID), which con-
tains information about the display’s capability. This information which includes the display’s
“preferred format” can be read by iScan Duo over the HDMI or DVI cable. In Auto Select
mode (iScan Duo’s default mode), the iScan Duo will automatically self-configure its output
to the display’s preferred format. It is possible that the display’s preferred format is not on
the list of standard formats shown on the Video Format menu listed below.
Use the INFO button on the remote or the Information screen in the menu to see the cur-
rent output format.
If you prefer not to use Auto Select, you can choose one of the standard formats from the list
on the Video Format menu
List of formats in the Video Format menu
Auto Select – this is the default setting
VGA 60Hz
480p 60Hz
720p 60Hz
1080i 60Hz
1080p 60Hz
576p 50Hz
720p 50Hz
1080i 50Hz
1080p 50Hz
1080p 24Hz
1080p 25Hz
SVGA 60Hz
XGA 60Hz
SXGA 60Hz
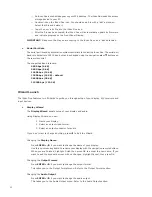
If the output format changes, the iScan Duo tests to insure that your display can accept the
new format. You have about 30 seconds to verify that you see the new format by moving
the highlight bar to “Yes” then “OK.” If you don’t verify the new format, the iScan Duo will
revert to the previous format.
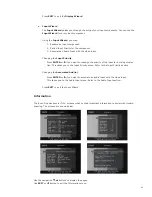
• Underscan
Some displays will overscan the picture, which means that the edges of the picture are
outside the frame of the viewable area. The Underscan slider-bar control lets you shrink the
picture, so that you can see all of it, and adjust for over-scanning.
Underscan is a display control. It is fixed regardless of which input is selected.

