


54
Chapter 6 Reference
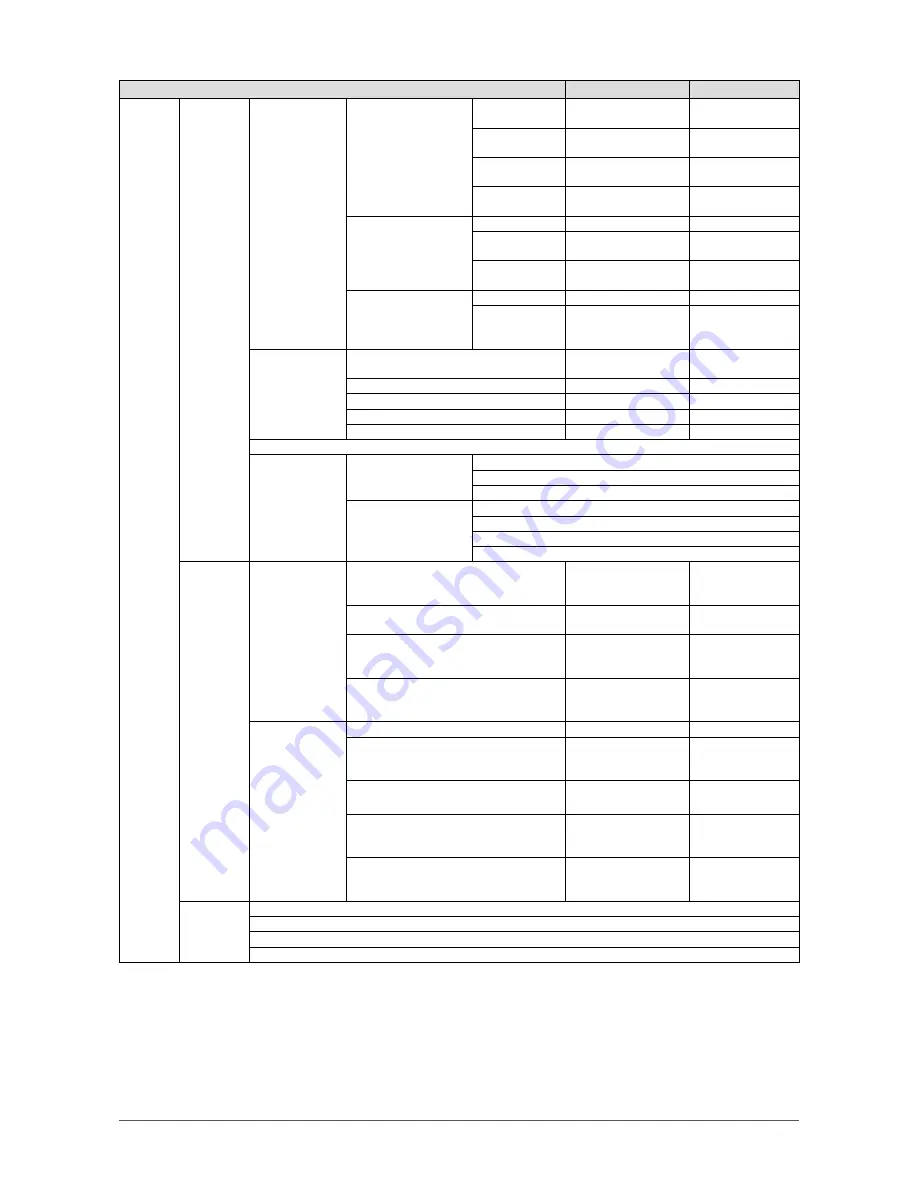
Setting item
Setting
Default setting
System
System
Network
Network Settings
IP Setting
Method
DHCP/Manual Setting
Manual Setting
IP Address
0.0.0.0 to
255.255.255.255
192.168.0.150
Subnet Mask
0.0.0.0 to
255.255.255.255
255.255.255.0
Gateway
0.0.0.0 to
255.255.255.255
192.168.0.1
DNS Settings
DNS
Auto/Manual
Manual
Primary Server
Address
0.0.0.0 to
255.255.255.255
(None)
Secondary
Server Address
0.0.0.0 to
255.255.255.255
(None)
NTP Settings
NTP
On/Off
Off
Server Address Alphanumeric
characters and
symbols
(None)
Other
Language
日本語
/English/
Deutsch
(Depends on sales
region)
Quick Start
On/Off
Off
Key Lock
On/Off
Off
Logo
On/Off
On
Power Indicator
On/Off
On
Initialization
Troubleshooting
Connection
Confirmation
Camera Name
ping
traceroute
System Log
Date (GMT)
Display
Save to USB Storage
Remove USB Storage
User
*1
New User
Registration
Username
Alphanumeric
characters (1 to 16
characters)
(None)
User Level
ADMIN/CAMERA
CONTROL/LIVE
(None)
Password
Alphanumeric
characters (1 to 16
characters)
(None)
Confirm Password
Alphanumeric
characters (1 to 16
characters)
(None)
Change/Delete
User Information
Username
(Registered user)
New Username
Alphanumeric
characters (1 to 16
characters)
(None)
New User Level
ADMIN/CAMERA
CONTROL/LIVE
(None)
New Password
Alphanumeric
characters (0 to 16
characters)
(None)
Confirm New Password
Alphanumeric
characters (0 to 16
characters)
(None)
Log Display Date (GMT)
Display
Save to USB Storage
Remove USB Storage
*1
The following user information is set as the default setting:
Username: “admin”, Password: “admin”, User Level: “ADMIN”
Summary of Contents for FDF2304W-IP
Page 2: ......


