4
2.2.
Menu interfaces
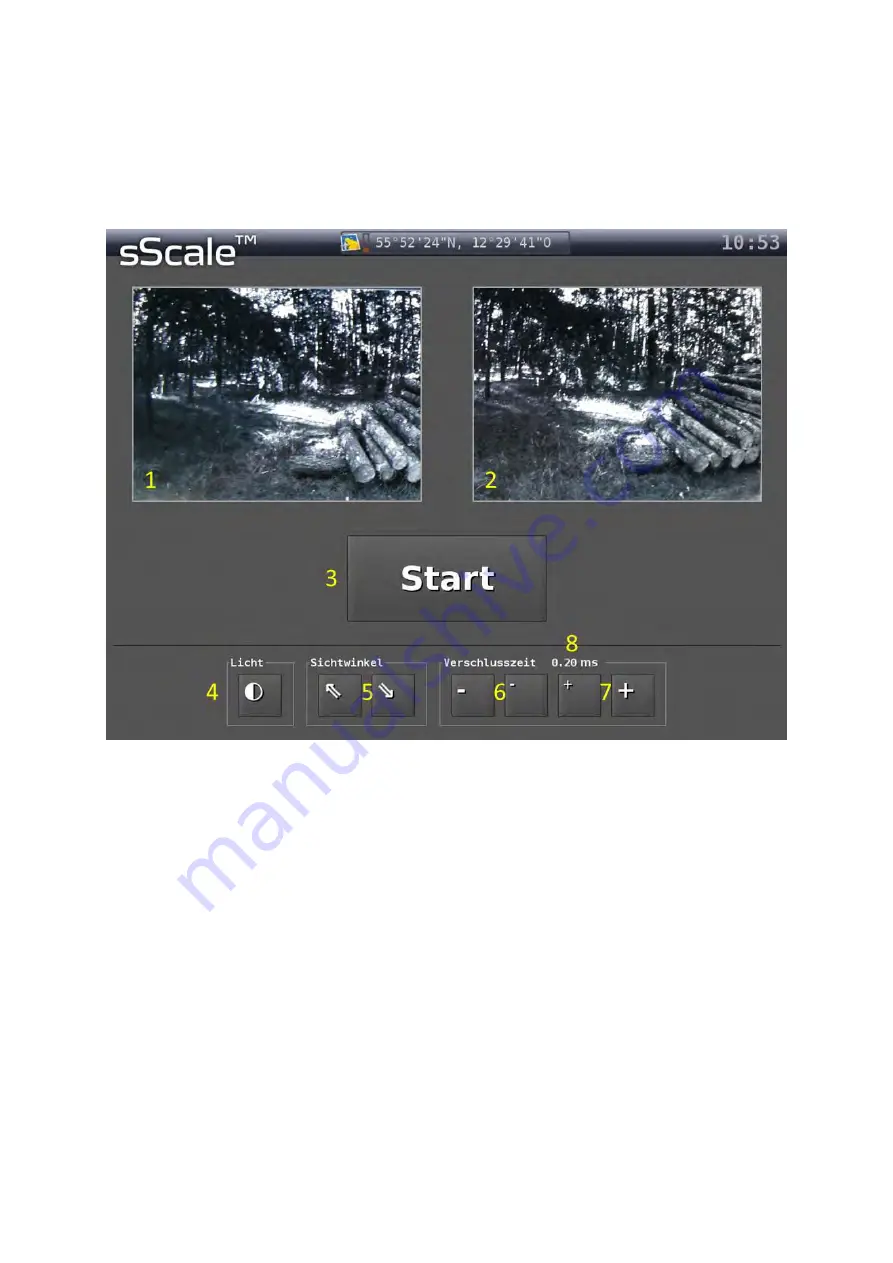
sScale™ is divided into various menu interfaces. The following is
an overview on all available
menu items. You will find a detailed description in the chapters indicated.
2.2.1.
“Start screen” user interface
1
Picture of camera 1.
2
Picture of camera 2.
3
Button to start photographing. While photographing the “Stop” button is displayed.
The frame around the camera images will flash and a progress bar below the cam-
era images shows the capacity of the working-memory.
4
Button, to switch the LED floodlights on and off.
5
Button, to move the viewing angle of the camera up or down.
6
Button, to adjust the exposure time for brighter conditions.
7
Button, to adjust the exposure time for darker conditions.
8
Indication of the selected exposure time (will be displayed after the first touch of
the buttons 6 or 7 - not directly after starting the system).
You can find more information in the Chapters A.3 and A.5.
Summary of Contents for sScale
Page 2: ......
Page 6: ......
Page 9: ...3 Figure 3 Schematic structure of the sScale ...
Page 26: ...20 Figure 9 Automatic generated polygonal course insufficient optimisation ...
Page 27: ...21 Figure 10 Edited polygonal course excessive optimisation ...
Page 28: ...22 Figure 11 Edited polygonal course adequate optimisation ...


