X
=
□
=
□
THE DNP100 DRAKE NETWORK PLAYER
NETWORK SETTINGS Screen (continued
)
may come in handy later on in the day to day use of the DNP100. All of this information can be
found within the Drake DNP Series Digital Signage Manager software so you won’t be required
to repeat accessing the MENU on the DNP100 this way again unless you intend on connecting
to the DNP100 via
NETWORK
one day and PC-to-DNP100
DIRECTLY
the next, or vice versa.
What you do need to do on this screen this initial time is make sure that the USE DHCP setting
is correct. Make sure the DHCP box has an “X” in it if you are connecting to the DNP100
through a local network. If you are connecting directly to the DNP100 with your PC with a
Crossover Cable, ensure that the USE DHCP box does not have an “X” in it.
LOCAL NETWORK CONNECTION
DIRECT CONNECTION / CROSSOVER CABLE
10. To place an “X” in the empty box, use the Arrow Keys (
▲
,
▼
) on the Accessory Remote Control
or on the USB Keyboard to navigate to and highlight the box next to the words USE DHCP and
press ENTER. Pressing ENTER in this
fi
eld alternates between an “X” and no “X”.
11. Once you have the correct setting entered, use the Arrow Keys (
▲
,
▼
) to navigate to and high-
light the SAVE CHANGES bar at the bottom of the screen and press ENTER. Congratulations,
your DHCP setting is now saved.
12. Press the MENU Button on the DNP100’s Accessory Remote Control (or the F1 key on the USB
Keyboard) to exit the NETWORK SETTINGS Screen. Continue pressing the MENU Button on
the Remote Control (or the F1 key on the Keyboard) until all MENU screens have been exited
(including the original MAIN MENU Screen).
DRAKE DNP SERIES DIGITAL SIGNAGE MANAGER
Launch Drake’s DNP Series Digital Signage Manager software by clicking the icon on your desk-
top. Each time you launch Drake’s DNP Series Digital Signage Manager software (herein referred
to as “DSM”), the software will scan for any active DNP100’s that your PC is connected to directly or
through your local network.
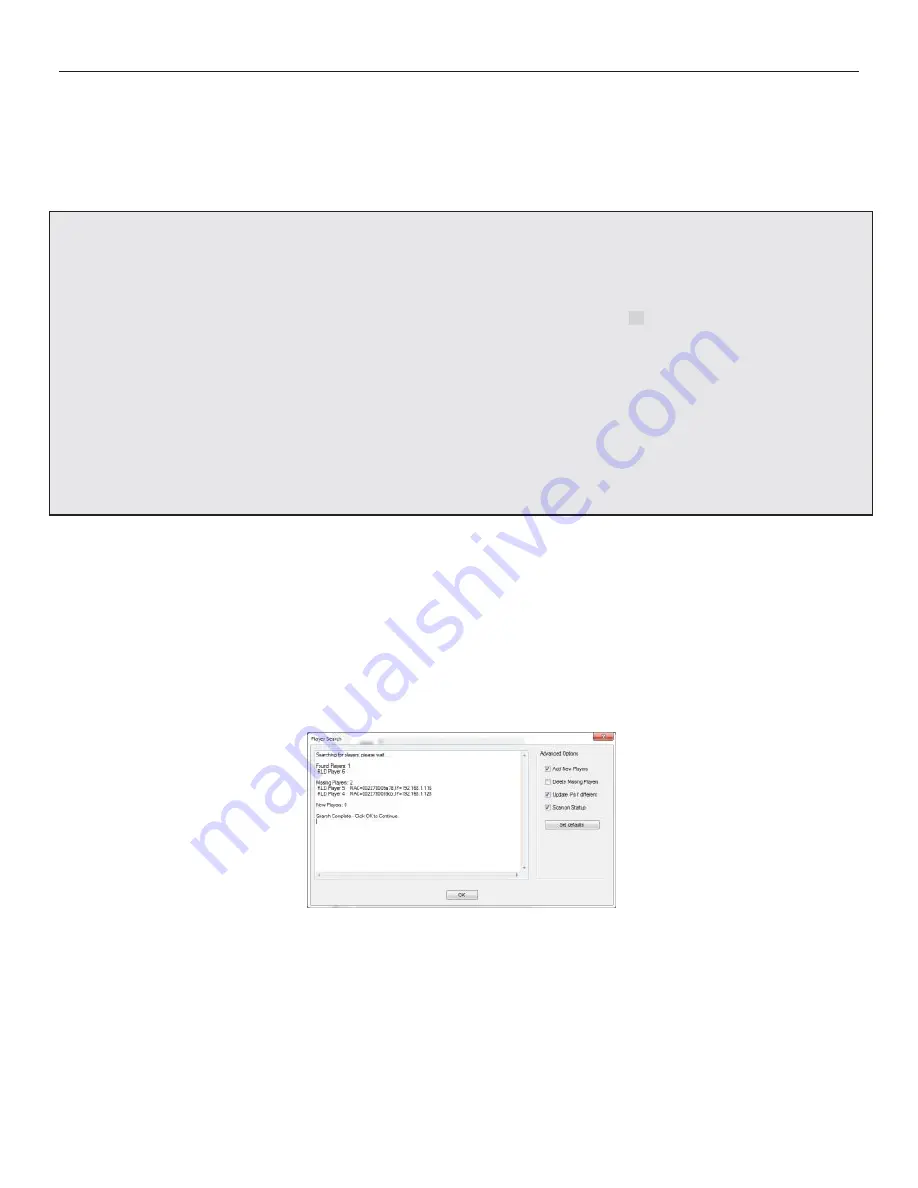
Image: DSM PLAYER SEARCH Window
From this PLAYER SEARCH pop-up window, you may select preferences that will take effect the next
time a PLAYER SEARCH is run, including: manually add a previously unknown DNP100 to your PC’s
known DNP100 inventory, have DSM automatically remove any missing/non-active DNP100’s from
the PC’s known DNP100 inventory (typically, this is unnecessary), have DSM update any changed IP
addresses of active DNP100’s in the PC’s DNP100 inventory
fi
les, and if you wish to change PLAY-
ER SEARCH from running automatically when DSM is launched. Click the SET DEFAULTS Button to
save any changes.
(continued on Page 9)
8


