22
Dräger Polytron 8000
Settings menu
Displaying the Unique Identifier
This function enables reading of the Unique Identifier (unique
HART address), which has to be known for almost all the
HART addressing commands. However this information is only
required for those systems that are not able to read back the
Unique Identifier using HART command #0 in Short-Frame
Format or HART command #11. The display corresponds to
the address for HART command #0 (Read Unique Identi
fi
er) or
#11 (Read Unique Identi
fi
er associated with Tag).
z
Select
Settings > Communication > HART interface >
Unique Identifier
and confirm.
The Unique Identifier is displayed.
Changing the tag name
The tag can be used to identify special devices. It can contain
up to 8 alphanumeric characters. The tag can also function as
an address for reading the unique identifier from the device
using HART command #11 (Read Unique Identifier Associated
With Tag), even when the polling address is unknown.
This requires that a unique tag has previously been configured.
1. Select
Settings > Communication > HART interface >
Tag
and confirm.
2. Select the tag line for the entry and confirm.
3. Set the tag and confirm.
4. Select
Confirm
and confirm.
Selecting Dräger REGARD
This function enables switching between different HART
protocols.
1. Select
Settings > Communication > HART interface >
Dräger REGARD
and confirm.
2. Select
REGARD SW 2.0
or
REGARD SW 1.4
and confirm.
8.3.2
Settings for the analog interface
The test and setting functions for the analog interface are
summarized in this menu.
Setting the fault current
This function is used to set the current for the fault signal on
the analog interface.
1. Select
Settings > Communication > Analog interface >
Fault current
and confirm.
2. Select the fault current line and confirm.
3. Set the current and confirm.
4. Select
Confirm
and confirm.
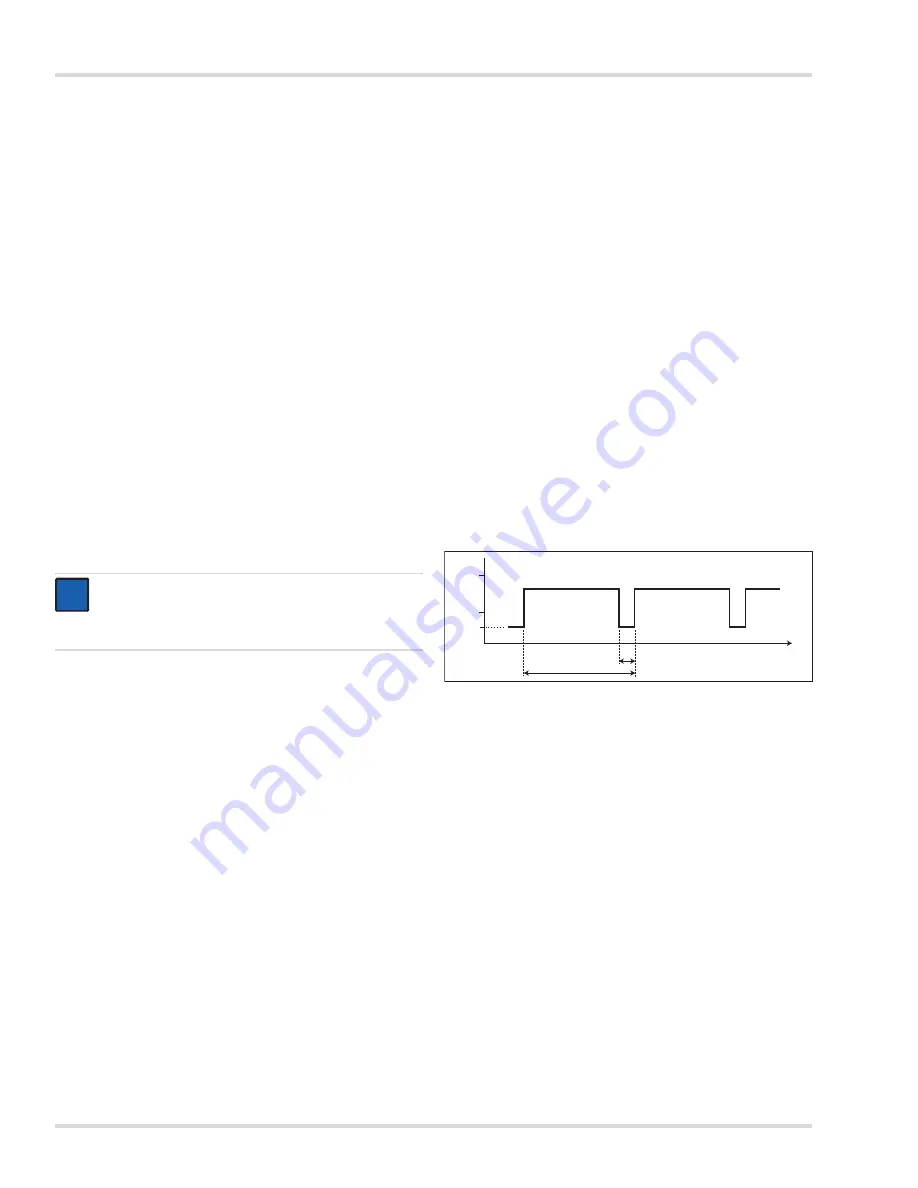
Switching the warning signal on or off
This function is used to switch the warning signal on the analog
interface on and off. If an existing warning is to be output over
the analog interface, the warning signal must be turned on.
During a warning, the current on the analog interface is switched
to the "Warning" status for one second. The measurement is
transmitted for the rest of the time. The interval between warning
signals and the analog signal phase can be customized.
To switch the warning signal on or off:
1. Select
Settings > Communication > Analog interface >
Warning
and confirm.
2. Select
On
or
Off
and confirm.
Setting the warning interval
This function is used to set the interval between the warning
signals and the measured value output.
1. Select
Settings > Communication > Analog interface >
Warning interval
and confirm.
2. Select line
T1
for the entry and confirm.
3. Set the time and confirm.
The setting for Time T1 is displayed.
4. Select
Next
and confirm.
5. Select line
T2
for the entry and confirm.
6. Set the time and confirm each setting.
The setting for Time T2 is displayed.
7. Select
Confirm
and confirm.
Setting the warning current
This function is used to set the current for the warning signal
on the analog interface.
1. Select
Settings > Communication > Analog interface >
Warning current
and confirm.
2. Select the current line for the entry and confirm.
3. Set the current and confirm.
The setting for the warning current is displayed.
4. Select
Confirm
and confirm.
Changing the maintenance signal type
This function sets the type of signal used on the analog
interface for the maintenance signal.
1. Select
Settings > Communication > Analog interface >
Maint. signal
and confirm.
2. Select
static
or
dynamic
signal type and confirm.
NOTICE
REGARD SW 2.0 is the standard setting. REGARD
SW 1.4 must be set on REGARD controllers with
SW 1.4.
i
i
0533300.eps
t
[s]
T
1
Messwert
4
20
[mA]
T
2
3
Value