10
4.2 Creating a New Layout
From the Home screen, press
►
Or from the layout editor screen, press
or File
►
New…
Any layout currently being edited should be saved or any edits will be lost.
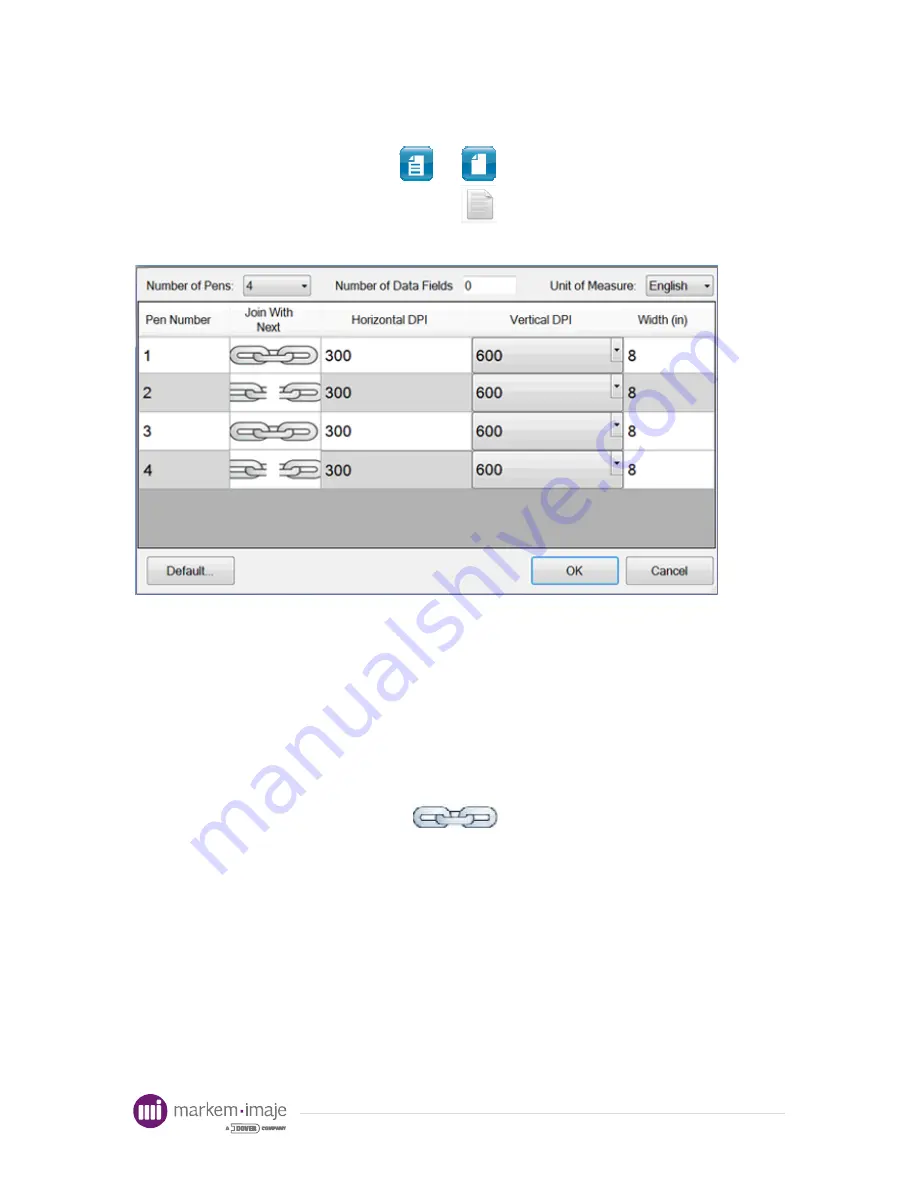
The Layout Settings window shown above will appear to allow the specification of
the print layout. In the center of the window is the pen properties box. This allows
specification of individual pen properties, including linking pens, their horizontal and
vertical DPI and the width of the image for each set of linked pens. The number of pens
displayed here is selected at top left with the box labeled “Number of Pens”. When the
number of pens is changed, the settings for each pen go back to default.
The number of data fields is also specified here. This allows automatic entry of
data fields in text and barcodes. The unit of measure can also be switched from English
to metric on this screen.
The layout shown above has 4 pens defined, with the first two pens and the last
two pens “linked” (as indicated by the
icon). When two pens are linked, they
are rendered together and layout objects like text are allowed to cross over the pen
boundaries. It is assumed that the printer used to print these images has the linked pens
physically stitched so this will print correctly. In this example, each set of linked pens has
the same horizontal and vertical resolution and image width. The allowable vertical
resolutions are 300 DPI and 600 DPI. The horizontal resolution can be any whole value
from 1 to 600. Any width can be specified, limited only by the memory of the controller.
For more information on the effects of print resolution on printing, see the section entitled
Resolution and Barcodes.
To change to default values for the Layout Settings window, select the Default
button at the lower left of this screen. There you can set the default values for number of
pens, resolution, width and data objects that will be saved for future editing sessions.
For
information
Summary of Contents for Markem-Imaje 1050
Page 1: ...F o r i n f o r m a t i o n ...
Page 2: ...F o r i n f o r m a t i o n ...
Page 63: ...F o r i n f o r m a t i o n ...
Page 64: ...F o r i n f o r m a t i o n ...


