218
Camera
2
Press
O
o
(
) or
0
.
Continuous shooting starts.
When “Continuous mode” is set to “Manual”, press
O
o
(
) or
0
the
number of times of shooting frames. The Post View display for confirmation
appears.
If “Focus” is set to “Auto”, shooting starts after the focus operation.
To cancel shooting midway, press
r
. If you shoot in the “Auto” or “Auto
bracket” mode of “Continuous mode”, you can cancel also by pressing
l
(
). You can cancel shooting also by closing the FOMA terminal.
When “Auto save set” is set to “ON”, the still images are automatically saved.
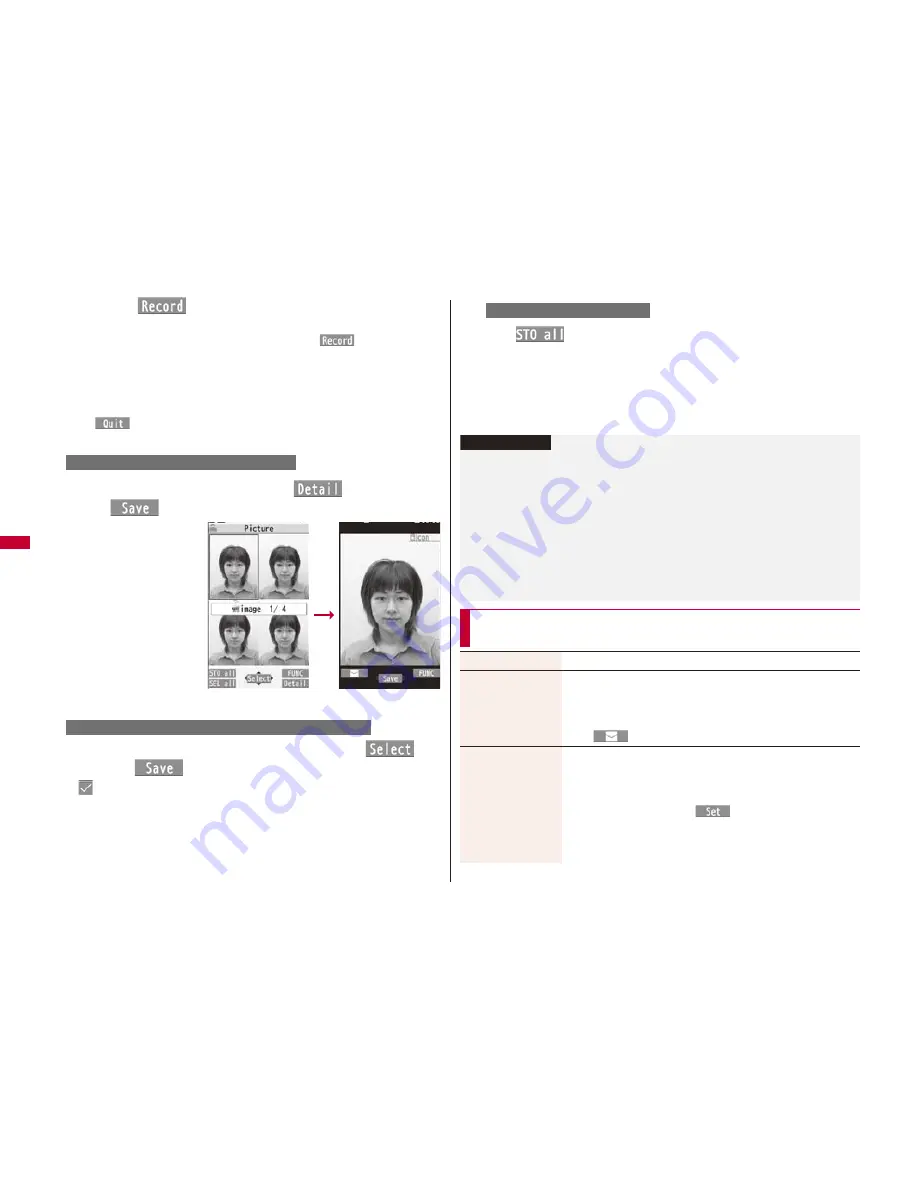
3
Select a still image and press
c
(
)
O
o
(
) or
0
Press
N
o
from the detailed
display to show the
previous or next still image.
Select still images to be saved and press
O
o
(
) or
0
l
(
)
Save
“
” is added to the selected still images.
To select a still image and save it
To select multiple still images and save them
Post View display
Detailed display
c
l
(
)
Save
The still images you shot are saved to the “Camera” folder of “My picture” in the
FOMA terminal or to the microSD card.
See “Store in” and “Select storage” for selecting a storage location.
Press
r
from the Post View display to cancel the shot still images and return to
the Finder display.
To save all still images
Information
The image quality may be coarse depending on “Image size” or “Display size”.
When you shoot, the tone selected for “Shutter sound” sounds regardless of the
settings such as Manner Mode. The sound volume for shutter tone cannot be
changed.
Even when a mail message comes in while shooting, the shooting operation
continues. Though unread message icon is displayed, the Mail Receiving display is
not displayed.
If you end the camera function by using Multitask while shooting, unsaved still images
are deleted.
When shooting, hold the FOMA terminal securely to avoid blurring images.
Function Menu of the Post View Display in Photo Mode/
Detailed Display in Continuous Mode
Save
See page 217 and page 218.
Attach to mail
You can save the still image you shot and attach it to an i-mode
mail message.
Go to step 2 on page 130.
You can compose an i-mode mail message also by pressing
l
(
).
Attach loc. info
Select an item.
By position loc.
. . . . Measures the current location (see page 306) and stores
the location information. After checking the location
information, press
O
o
(
).
From loc. history
. . . . Select a piece of location information from Location History
(see page 310) and store it.


