【
6-36
】
ENGINE
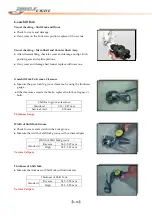
Piston
Ring
Free
End
Gap
and
Piston
Ring
End
Gap
●
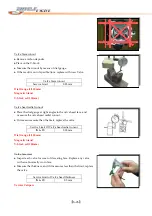
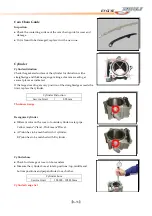
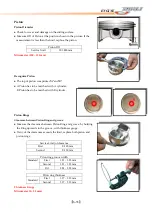
Measure
the
Piston
Ring
free
end
gap
with
a
thickness
gauge.
Service
Limit
of
Piston
Ring
free
end
gap
First
ring
10.1
mm
Second
ring
8.7
mm
Vernier
Calipers
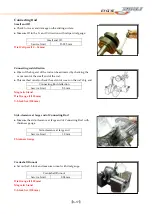
●
Insert
Piston
Ring
into
the
lower
portion
of
Cylinder
horizontally
by
using
Piston.
●
Measure
the
Piston
Ring
free
end
gap
by
using
a
thickness
gauge.
Service
Limit
of
Piston
Ring
end
gap
Top
ring
0.50
mm
Second
ring
0.50
mm
Thickness
Gauge
Piston
pin
and
pin
bore
ID
of
Piston
hole
for
Pin
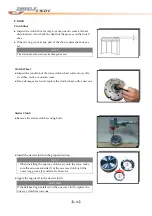
●
Clean
Piston
hole
for
Pin.
●
Measure
ID
in
the
up
and
down
direction
and
the
right
angle
direction
with
dial
caliper
gauge.
ID
of
Piston
hole
for
Pin
Service
limit
23.030
mm
Dial
Gauge
(1/1000
mm,
1mm)
Small
Bore
Gauge
(18
–
35
mm)
Piston
Pin
OD
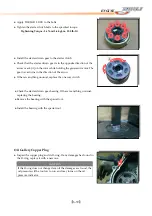
●
Check
for
wear
and
damage
on
the
sliding
surface.
●
Measure
OD
at
total
3
positions;
both
ends
and
middle
position
in
the
X
‐
and
Y
‐
direction.
Piston
Pin
OD
Service
limit
22.980
mm
Micrometer
(0
–
25
mm)
Summary of Contents for DL-702 2008
Page 1: ...FOREWORD INDEX 0 0...
Page 41: ...3 11 BRAKE...
Page 180: ...6 70 ENGINE Install the starter motor...
Page 201: ...7 21 COOLING AND LUBRICATION SYSTEM Engine Lubrication System Chart...
Page 202: ...7 22 COOLING AND LUBRICATION SYSTEM Engine Lubrication System 1 2 3 1 2 3 1 2 3...
Page 203: ...7 23 COOLING AND LUBRICATION SYSTEM 1 2 3...
Page 235: ...7 32 ELECTRICAL SYSTEM Wiring Diagram...
Page 236: ...7 33 ELECTRICAL SYSTEM Wiring Diagram...
Page 237: ...7 34 7 34 ELECTRICAL SYSTEM ELECTRICAL SYSTEM...
Page 238: ...7 35 ELECTRICAL SYSTEM NOTE...
Page 240: ...9 2 PERIODIC MAINTENANCE...
Page 246: ...9 8 PERIODIC MAINTENANCE Intake Side...
Page 247: ...9 9 PERIODIC MAINTENANCE Exhaust Side Side...
Page 270: ...9 32 PERIODIC MAINTENANCE 1 2 3 4 18 19 12 16 17 21 13 14 15 22 23 5 6 7 8 9 12 10 11 20...


