【
6-28
】
ENGINE
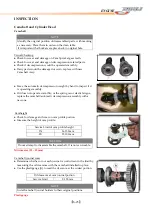
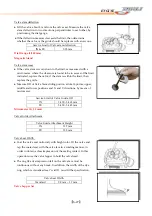
Initial
Seat
Cut
●
Using
the
45
○
cutter,
descale
and
clean
up
the
seat
with
one
or
two
turns
●
Inspection
the
seat
(see
Valve
Seat
Width).
If
the
seat
is
pitted
or
burned,
additional
seat
conditioning
with
the
45
○
cutter
is
required.
NOTE
45
○
Cut
only
the
minimum
amount
necessary
from
the
seat
to
prevent
the
possibility
of
the
tappet
shim
replacement.
●
If
the
contact
area
is
too
high
on
the
valve,
or
if
it
is
too
wide,
use
the
30
○
/60
○
cutters
to
lower
and
narrow
the
contact
area.
●
If
the
contact
area
is
too
wide
or
too
low,
use
the
75
○
cutter
to
narrow
and
raise
the
contact
area.
●
If
the
contact
area
is
too
low
or
too
narrow,
use
the
45
○
cutter
to
raise
and
widen
the
contact
area.
W
30
○
W
75
○
NOTE
W
After
cutting
the
30
○
and
75
○
angles,
it
is
possible
that
the
valve
seat
(45
○
)
is
less
than
the
correct
width.
Summary of Contents for DL-702 2008
Page 1: ...FOREWORD INDEX 0 0...
Page 41: ...3 11 BRAKE...
Page 180: ...6 70 ENGINE Install the starter motor...
Page 201: ...7 21 COOLING AND LUBRICATION SYSTEM Engine Lubrication System Chart...
Page 202: ...7 22 COOLING AND LUBRICATION SYSTEM Engine Lubrication System 1 2 3 1 2 3 1 2 3...
Page 203: ...7 23 COOLING AND LUBRICATION SYSTEM 1 2 3...
Page 235: ...7 32 ELECTRICAL SYSTEM Wiring Diagram...
Page 236: ...7 33 ELECTRICAL SYSTEM Wiring Diagram...
Page 237: ...7 34 7 34 ELECTRICAL SYSTEM ELECTRICAL SYSTEM...
Page 238: ...7 35 ELECTRICAL SYSTEM NOTE...
Page 240: ...9 2 PERIODIC MAINTENANCE...
Page 246: ...9 8 PERIODIC MAINTENANCE Intake Side...
Page 247: ...9 9 PERIODIC MAINTENANCE Exhaust Side Side...
Page 270: ...9 32 PERIODIC MAINTENANCE 1 2 3 4 18 19 12 16 17 21 13 14 15 22 23 5 6 7 8 9 12 10 11 20...

