


System settings
46
|
ISOFLOW application – User manual for XeedSystem v1.6
11.3
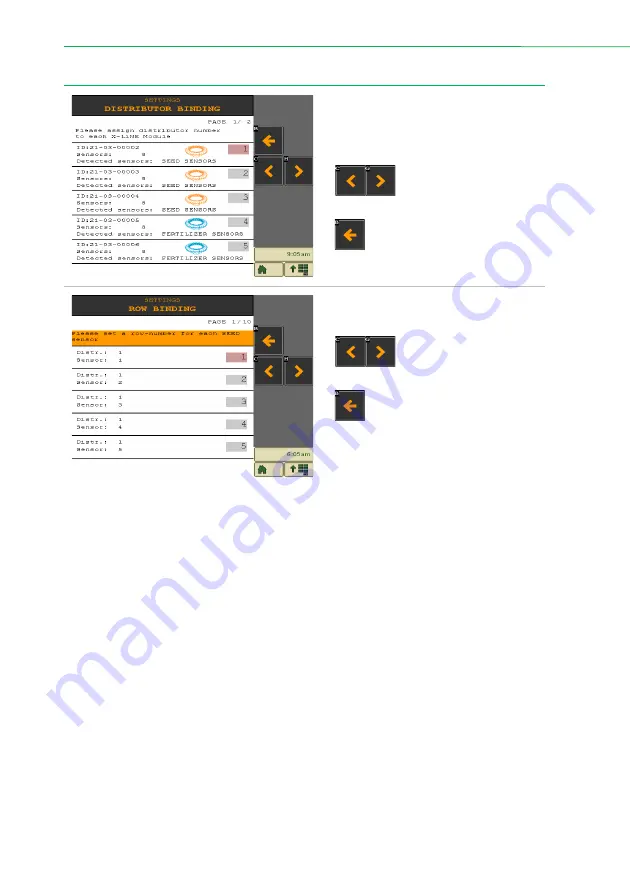
Distributor binding
The binding of the X-LiNE modules and
distributor heads can be modified here,
that were specified during the setup
flow.
Use the paging buttons
to page through the
device’s list.
Press the Back button to
return to the system settings
screen.
The binding of the sensors can be
modified here
Use the paging buttons
to page through the
device’s list.
Press the Back button to
return to the system settings
screen.


