CC7574DKV OPERATOR’S MANUAL
Concrete Cutting
WARNING
•
DO NOT expose yourself or anyone else
to the direct line of the blade while
operating the saw.
•
The direct work area should not contain
buried or embedded electrical, gas, or
water lines that could be damaged
and/or cause personal injury or death.
Note: Always raise the blade to provide proper
clearance between the blade and the ground
when maneuvering the saw.
Helpful Hints Prior to Cutting
Keep the following in mind for better efficiency
while cutting:
•
Use just enough handle pressure to guide
the saw down the cutting line. DO NOT
forcibly direct (twist) the saw from side to
side when cutting. DO NOT jam, cock, or
wedge the blade in a cut.
•
Moving too quickly when cutting may stall
the saw, or may cause the blade to climb
out from the cut. If the saw stalls while
cutting, put the saw in neutral and raise the
blade from the cut to restart the engine.
•
Avoid sawing excessively deep to preserve
the blade and reduce sawing costs.
•
DO NOT lower the blade too quickly or
move the saw forward too quickly when
finishing a partial-cut to avoid forcing the
blade into the concrete.
•
Always have a proper water flow when
cutting for maximum blade efficiency. Using
too much water when cutting will make the
slurry look clear. Not using enough water
will make the slurry look thick and pasty.
•
Refer to the Diamond Products’ Guide for
Professional Concrete Cutters for
additional cutting tips and information.
Tasks Prior to Cutting
Complete the following tasks prior to cutting:
•
Align the cutting guide(s) with the blade.
•
Clearly mark the cutting line.
•
Turn off all electricity, gas, and water
around the direct work area.
Making a Cut
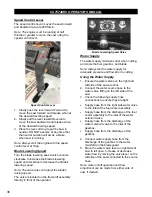
1. Align the blade and cutting guide(s) with
the cut line.
2. Start the engine and allow to idle briefly
before going to full power.
3. If the saw is equipped with a clutch
(optional), turn on the
Blade Clutch
switch
with engine at idle to start the blade
rotation.
4. Turn on the water.
5. Move the lever on the right side water valve
to the fully open position.
6. Adjust the water flow using the left side
water valve.
7.
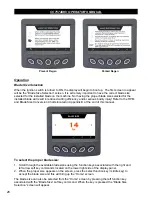
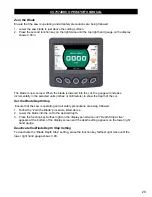
Lower the blade to just above the cutting
surface and zero the blade by pressing the
“Zero Blade” button on the display panel.
8.
Slowly lower the blade into the surface to
no more than 2” deep. Make the initial pass
across the entire cutting line using the most
effective travel speed. If the blade is
coming up out of the cut, decrease travel
speed and/or feed depth.
DO NOT CUT
FULL DEPTH IN ONE PASS
.
9.
If you are cutting more than 2” deep, you
can finish the job in less time and effort by
step cutting. Cut a 2” depth on the initial
pass, followed by deeper passes. On
repeated passes, the blade will tend to
follow the previous cut.
10. Raise the blade out of the cut and
reposition the saw at the start of the cut
line. DO NOT move backwards with the
blade in a previous cut.
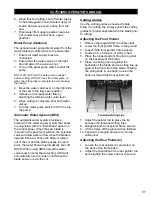
11. At the start of the cut line, lower the blade
back into the cut and make a second,
deeper pass across the entire cutting line.
12. Continue the step-cut process to reach the
maximum depth. DO NOT cut any deeper
than required.
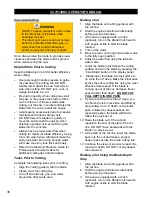
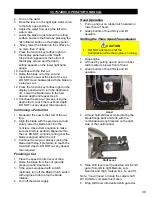
Making a Cut Using the Blade Depth
Stop
1. Align the blade and cutting guide(s) with
the cut line.
2. Start the engine and allow to idle briefly
before going to full power.
3. If the saw is equipped with a clutch
(optional), turn on the
Blade Clutch
switch
with engine at idle to start the blade
rotation.
38
Summary of Contents for CC7574DKV
Page 1: ...CORE CUT OPERATOR S MANUAL CC7574DKV CC7574DKV 3 MAY 2022 Part 1802742 01...
Page 2: ......
Page 11: ...CC7574DKV OPERATOR S MANUAL CC7574DKV Specifications 11...
Page 12: ...CC7574DKV OPERATOR S MANUAL CC7574DKV 3 Specifications 12...
Page 65: ...CC7574DKV OPERATOR S MANUAL Appendix B CC7574DKV RPM Chart CC7574DKV 3 RPM Charts 65...
Page 66: ...CC7574DKV OPERATOR S MANUAL 66...
Page 67: ...CC7574DKV OPERATOR S MANUAL CC7574DKV Blade Size Conversion Chart 67...
Page 68: ...CC7574DKV OPERATOR S MANUAL CC7574DKV 3 Blade Size Conversion Chart 68...
Page 71: ......

